
Transform ordinary bath time into a bubbly science adventure!
Melt-and-pour soap-making lets kids wield beakers and color drops like real chemists—no lye, no tears, just squeaky-clean fun.
Follow this step-by-step guide to craft custom bars, explore chemistry, and weave art, math, and eco-smarts into every sudsy swirl.
Why Melt-and-Pour Is Perfect for Kids
Zero-Lye, Zero Fear
Traditional cold-process soap demands caustic sodium hydroxide.
Melt-and-pour bases arrive pre-saponified, so there’s no harsh chemicals for little hands—only microwave-safe cubes that melt like chocolate.
Instant Results
Children see, smell, and hold their finished bars within an hour. Immediate feedback builds confidence and curiosity faster than projects that “cure” for weeks.
STEAM Every Step
- Science – states of matter, emulsion, pH
- Technology – digital scales, infrared thermometers
- Engineering – mold design, layer stability
- Art – color theory, fragrance blending
- Math – ratio of embeds, pour temperatures, cost per gram

Safety First: The Four Golden Rules
- Heat with Care
- Use a microwave or a dedicated mini slow-cooker.
- Adult supervision is mandatory whenever temperatures exceed 55 °C / 130 °F.
- Protect Little Eyes and Skin
- Require snug-fitting goggles and cotton aprons.
- Provide silicone gloves for kids who want to stir.
- Ventilate
- Fragrance oils can be potent. Crack a window or switch on a kitchen hood.
- Non-Slip Zone
- Lay silicone mats or damp paper towels under every mixing bowl to prevent skids.
Gathering Supplies: From Base to Bling
Main Ingredients
- Melt-and-pour base
- Glycerin (clear) for vibrant transparency
- Shea or goat-milk (opaque) for pastel shades
- Aloe, honey, or oatmeal bases for gentle skin feel
- Colorants
- Liquid soap dyes: high potency, won’t bleed
- Mineral mica powders: pearlescent shimmer
- Natural infusions: beetroot, spirulina, turmeric
- Fragrance and Essential Oils
- Kid-friendly picks: lavender, orange, vanilla, cotton candy
- Max load: 3 % of total soap weight to avoid irritation
- Add-ins (Texture & Fun)
- Biodegradable glitter, jojoba beads
- Dried botanicals (rose petals, calendula)
- Mini rubber animals or glow-beads for “treasure bars” (ages 6+)
Tools & Equipment
- Microwave-safe measuring cup with spout
- Silicone spatulas
- Digital kitchen scale accurate to 1 g
- Infrared thermometer (optional but cool)
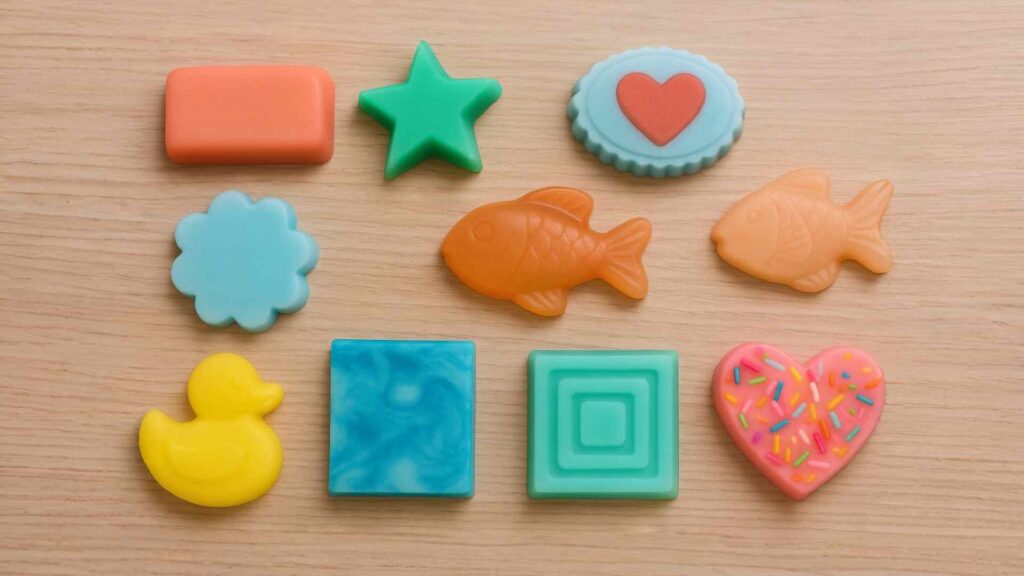
- Silicone soap molds—bars, donuts, dinosaurs
- Rubbing alcohol in a small spray bottle (banishes bubbles)
- Wax paper or silicone mat for cooling rack
- Permanent marker and masking tape for labeling experiments
The Science of Soap—Explained Kid-Style
Molecule Magic — Why Soap Can Grab Grime
Picture every soap molecule as a tiny tadpole: a hydrophilic head that loves water and a hydrophobic tail that would rather hang out with oils.
When those tadpoles dive into dirty bathwater, their tails poke into grease while the heads stick out toward the water.
Millions of them huddle together, forming ball-shaped bubbles called micelles that trap the yucky stuff in the middle. One quick rinse and the whole micelle—oil, dirt, and all—zooms down the drain.
Kitchen-Sink Demo:
- Fill a shallow bowl with water and dust the surface with ground pepper.
- Coat a cotton swab in dish soap.
- Touch the water: the pepper shoots to the edges as the soap instantly lowers surface tension and builds micelles.
- Level-up version—add a drop of food coloring and watch color explosions for extra “oohs” and “aahs.”
Melting Point Matters — The Goldilocks Temperature Zone
Most glycerin bases become silky liquid between 55 °C and 65 °C (130–150 °F).
Below that, stubborn chunks float like icebergs; above that, the base scorches, and delicate fragrances evaporate.
- Thermometer Trick: Aim for 60 °C (140 °F) before adding scent—hot enough to flow but cool enough to protect aromas.
- Microwave Safety: Use 30-second bursts and gentle stirring; if steam rises, you’ve gone too far.
- Slow-Cooker Hack: A mini crock pot on the “warm” setting hovers in the perfect range all afternoon for large batches.
Density & Layers — How to Build a Soap Rainbow
Density is simply “how heavy something feels for its size.”
Extra oils lighten soap, while dissolved salts weigh it down.To keep layers crisp:
- Start Heavy: Pour the saltiest or opaque layer first; wait until it skins over.
- Go Lighter Each Time: Reduce salt or add a tad more fragrance oil in each successive color.
- Temperature Matters: Pour the next layer just below 55 °C; too hot and it melts the skin, too cold and layers won’t fuse.
- Test Tube Teaser: Fill a clear straw with two colored soap samples—tilt it. The denser chunk stays low, proving the concept in miniature.
pH & Skin — Keeping the Acid Mantle Happy
Human skin likes a slightly acidic pH of 4.5–5.5. Melt-and-pour bases clock in at pH 7–8—gentle enough for most kids but still outside your skin’s comfort zone.
- Litmus Lab: Dip red and blue litmus strips in lemon juice (pH 2), baking soda water (pH 9), and melted soap. Kids instantly “see” where soap lands on the scale.
- Buffer Boost: If sensitivity pops up, stir a pinch of citric acid into the cooled melt to nudge pH downward without weakening lather.
- Acid Mantle Talk: Explain that skin’s natural acidity keeps out germs; harsh soaps strip it, but melt-and-pour is mild enough to rinse away without damage.
Suspension — Making Glitter and Mica Float
When molten soap is runny like water, heavy sparkle powders sink to the bottom. Viscosity—how thick a liquid is—changes as soap cools.
- Watch for “Trace”: Stir until consistency resembles yogurt; that’s the window when particles stay suspended.
- Use a Suspension Base: Specialty melt-and-pour formulas include thickeners that hold glitter mid-bar even at higher temperatures.
- Swirl Stick: Drag a chopstick in figure-eights to tether mica streaks through the soap instead of letting them drop.

Setting Up a Kid-Friendly Soap Lab
- Deck Out the Workspace
- Spread a silicone baking mat over the table—heat-proof, wipe-clean, and non-slip.
- Tape down the edges of a disposable tablecloth so over-excited elbows don’t send tools flying.
- Mise en Place Like Real Pastry Chefs
- Pre-measure colorants into silicone cupcake liners labeled “Blue,” “Neon Pink,” etc.
- Set out fragrance oils in dropper bottles arranged from lightest (citrus) to strongest (peppermint) to prevent scent-mixing accidents.
- Stash embeds—rubber ducks, star confetti, jojoba beads—in ice-cube trays so kids can grab, not spill.
- Assign—and Rotate—Specialist Roles
- Heat Master: Runs microwave, wears oven mitts, checks that soap never boils.
- Color Captain: Adds dyes and mica, keeps blotting paper handy to test shade strength.
- Scent Scientist: Counts drops aloud, records totals, and announces “Flash-point check!” before pouring.
- Quality Inspector: Stands with the alcohol spritzer to zap every bubble, scans molds for dust or stray hairs.
- Cleanup Commander (bonus role): Hands out baby wipes, scrapes cooled drips, and resets the station between batches.
- Rotate jobs each new recipe so everyone masters every skill.
- Create a Kid-Proof Batch Log
- Columns for date, base type, temperature at pour, dye count, fragrance weight, special add-ins, results (“Smells like jelly beans!”), and next-time tweaks.
- Clipboards and fat markers make writing easy even with gloved hands.
- Atmosphere Matters
- Play upbeat, lyric-free tracks (video-game soundtracks are crowd-pleasers).
- Keep a sand timer visible; the gentle “whoosh” warns kids to prep next steps before soap cools too far.
- Safety Checkpoint
- Goggles on faces before the microwave door opens.
- A labeled “Hot Zone” traced in painter’s tape on the floor reminds younger siblings to keep clear.
- A spray bottle of cool water stands by—not for burns (always use cold running water)—but to rinse sticky hands without leaving the workstation.
With a souped-up science explainer and a detail-rich lab setup, kids don’t just make soap—they understand it, record it, and run their craft space like mini engineers. Suds and smiles guaranteed!
Core Recipe: One-Pound Starter Batch
Ingredients & Why They Matter
- Clear glycerin melt-and-pour base — 453 g (one exact pound)
• The “blank canvas” that already contains soap molecules, humectant glycerin, and a touch of sugar alcohol for extra shine.
• Because it’s transparent, every swirl of color, sparkle of mica, or hidden toy shows through like stained glass. - Skin-safe fragrance or essential oil — up to 14 g (≈ 3 teaspoons)
• Adds character—anything from dreamy lavender to bubble-gum carnival.
• Never exceed three percent of total soap weight; higher loads can irritate young skin or make bars weep excess oil. - Liquid soap dye — four to six concentrated drops
• Designed to disperse evenly without staining tubs or towels.
• Start with fewer drops than you think; glycerin’s clarity amplifies pigment. - Cosmetic-grade mica powder — one level teaspoon
• Microscopic mineral flakes that catch light for a pearlescent shimmer.
• Choose ultrafine particle size so bars stay smooth, not gritty. - 99 % isopropyl (rubbing) alcohol — a fine mist “as needed”
• Breaks surface tension so bubbles burst instantly.
• Acts like invisible glue between layers when creating multi-color bars. Keep a travel spray bottle within arm’s reach.

Step-by-Step Process
1. Cube & Weigh
- Place a sheet of parchment on the scale to keep it clean.
- Slice the soap base into roughly one-inch squares; aim for uniformity so they melt evenly.
- Drop cubes into the bowl as you weigh; call out numbers so kids practice place value aloud.
- Stop at 453 g exactly—extra soap changes fragrance ratios and melting time.
2. Melt Gently, Never Boil
- Use a microwave-safe pitcher with a pouring spout (glass shows progress, but thick plastic stays cooler to the touch).
- Heat on HIGH for 30 seconds, stir with a silicone spatula, then repeat in 15-second bursts.
- When only pea-sized bits remain, switch to 5-second pulses; latent heat will finish the melt.
- If suds or steam appear, you’re overheating—pause, stir, and let it cool 30 seconds before continuing.
3. Cool to the “Goldilocks” 55 °C (130 °F)
- Check with an infrared thermometer aimed at the liquid center, not the glass walls.
- No thermometer? Dip a spotless pinky for half a second—hot bath level is perfect.
- Cooling prevents fragrance flash-off and keeps dyes from morphing weird hues.
4. Color Like a Chemist
- Drip liquid dye one drop at a time, stirring fully before judging shade.
- In a ramekin, blend one teaspoon mica with a tablespoon alcohol; this “slurry” eliminates clumps.
- Swirl mica mixture into the melted base; watch a galaxy form, then disappear as it disperses.
- Check color against white paper—soap darkens slightly as it sets.
5. Scent With Precision
- Place the pitcher back on the scale, tare to zero, and pour fragrance until the display reads between 10 g and 14 g.
- Stir for a full 30-count, scraping bottom corners so heavier oils don’t settle.
- Have kids waft—not sniff—the steam above the pitcher to preview the aroma.
6. Pour & Spritz Like a Pro
- Set silicone molds on a cutting board so you can move them without wobbling.
- Pour in a slow, steady ribbon starting at one corner; this slides under air pockets and pushes them out the opposite edge.
- Hold the alcohol spray eight inches above and mist twice—watch tiny bubbles vanish like magic.
- Pause and scan: any surface film means the alcohol has already flashed off; give one extra spritz if needed.
7. Embed Magic (Optional but Awesome)
- Wait 20–30 seconds until the soap’s top feels tacky—not wet—when tapped with a chopstick.
- Gently place a rubber duck, seashell, or contrasting mini soap star.
- If the embed floats, anchor it by drizzling a teaspoon of slightly cooler soap over the back, then fill to the rim.
- Finish with another light alcohol mist so the new pour bonds invisibly.
8. Set, Chill, and Demold
- Leave molds on a level surface away from drafts; rapid cooling can warp layers.
- At the 45-minute mark, press the corner of a bar: if it resists and pulls slightly from the mold wall, it’s ready.
- Flex silicone outward while pushing on the bar’s underside; it should pop free with a gentle “thwup.”
- Adults may trim any flashing (overflow) with a paring knife warmed briefly in hot water for cleaner cuts.
9. Wrap & Lightly Cure
- Glycerin is a humectant—it drinks moisture from air. Once bars feel room-temperature, wrap each in kitchen-grade plastic film or biodegradable cellulose wrap.
- Label with batch name, date, and scent—markers stick better to tape than slick plastic.
- Though safe instantly, let bars rest 24 hours on a wire rack; this hardens edges, extends lifespan, and intensifies fragrance meld.
- Store finished soaps in a cool, dry bin with a sachet of uncooked rice or silica gel to absorb stray humidity.
Follow these directions and kids won’t just make soap—they’ll craft glossy, bubble-free masterpieces worthy of gifting or starring in their own mini market stall.

Creative Variations
Rainbow Layer Bars
- Set Up Six Heat-Proof Cups
- Pour about 75 g of melted clear base into each. Label the cups Red, Orange, Yellow, Green, Blue, Violet so no one mixes them up mid-pour.
- Tint with Tiny Drops
- Add dye one drop at a time, stirring until each cup glows like liquid candy. Keep alcohol spray nearby—densely pigmented soap traps bubbles faster.
- Pour the First Layer
- Tilt the mold slightly and drizzle the red soap against one wall so it spreads without splashing. Spritz twice with alcohol.
- Wait for the “Thumbprint Test”
- After 90 seconds, touch the surface lightly: if a gentle press leaves no residue, it’s ready for orange.
- Stack the Spectrum
- Repeat the pour-pause-spritz ritual for each shade. To prevent color bleed, never pour a hotter layer over a cooler one—hold every cup at roughly 55 °C by parking them in a warm-water bath.
- Reveal the Prism
- Once fully set, unmold in bright light. Kids will see razor-sharp color lines if every spritz and pause was perfectly timed.
Hidden Picture Soap
- Create a Waterproof Decal
- Print a favorite cartoon onto inkjet-compatible waterproof vinyl. Cut the image to fit inside the mold with 5 mm clearance on all sides.
- First Clear Pour
- Fill the mold one-third full and pop bubbles. Let the layer cool until it supports the decal without warping—about two minutes.
- Sandwich the Image
- Slide the decal face-down onto the tacky surface, then spritz lightly with alcohol to anchor it.
- Seal the Secret
- Pour a second layer of clear soap at 50–55 °C. The cooler temp prevents the ink from ghosting while still fusing both layers. Kids will watch the picture emerge only after multiple hand-washes—a built-in incentive for good hygiene!
Confetti Swirls
- Harvest the Scraps
- Shave leftover colored soap into rice-grain bits with a cheese grater. Aim for mixed colors; contrast makes the final slice pop.
- Stabilize the Base
- Heat white or goat-milk soap to 65 °C so it’s fluid enough to suspend solids yet thick enough to hold them mid-pour.
- Tumble and Pour
- Stir in a fistful of confetti, counting to ten so pieces distribute evenly. Quickly fill the mold; over-mixing blends colors into muddy gray.
- Marble Effect Upgrade
- Drag a chopstick through the freshly poured soap in a slow figure-eight to create bakery-style swirl ribbons.
Fizzy Surprise
- Craft Mini Bath-Bomb Cores
- Mix 2 parts baking soda, 1 part citric acid, a drizzle of water, and a drop of essential oil—just enough moisture to pinch together. Press into half-inch spheres and let dry 15 minutes.
- Anchor the Core
- Pour a shallow layer of clear soap and let it gel until it can cradle the bomb without dissolving it.
- Cover Completely
- Set the fizzy ball in place, spritz, then flood with warmer (60 °C) soap. The finished bar lathers first; when kids hit the center—whoosh—tiny bubbles erupt like a science-fair volcano.
Scratch-n-Sniff Bars
- Double-Layer Fragrance Strategy
- Prepare a thin top layer containing the maximum safe scent load (3 %). Color it lightly so noses, not eyes, do the work.
- Lock in the Aroma
- Once the fragrant cap hardens, pour the unscented or lightly scented body beneath it. This preserves the whiff while avoiding skin overload.
- Game Time
- Label each bar with a question mark. Players sniff the dry surface, guess the scent, then lather up to see if they were right.
Curriculum Tie-Ins — Learning Beyond the Lather
Chemistry Lab
- Assign students to heat three soap bases—clear glycerin, goat-milk, and aloe—recording the precise melt temperature when each turns completely liquid. Plot the data on a line graph and discuss why added fats raise or lower the curve.
- Demonstrate flash-points by warming two beakers of scented soap: one at 45 °C, one at 70 °C. Have students smell the vapor distance—hotter soap loses aroma faster, a real-world lesson in volatility.
Art Class
- Introduce the color wheel, then challenge kids to design soap using complementary pairs such as teal and coral. Swirls show the contrast instantly.
- Shift to digital: have teams photograph their bars, import images into Canva, and design front-and-back labels including name, scent notes, and “artist statement.”
Environmental Science
- Hold a mini-debate on mica versus biodegradable glitter: research mining practices, biodegradability, and waterway impact. Kids vote on which sparkle stays in future batches.
- Task groups with calculating transport emissions: compare a locally sourced soap base to an imported one using distance × weight estimates; brainstorm ways to offset the footprint, such as planting herbs used for natural colorants.
Entrepreneurship
- Supply mock invoices for base, fragrance, colorant, packaging, and labor. Let students tally cost per bar, then set a retail price that covers expenses plus charitable donation.
- Each team writes a “brand story” in 100 words, pitches it Shark-Tank-style to classmates, and sets up a cardboard pop-up store complete with sample bars and digital QR codes linking to their instructional video.
Troubleshooting & Pro Tips
Cloudy Clear Soap
If yesterday’s crystal loaf turned milky, chances are you scorched the base past 75 °C. Re-melt gently below 70 °C, add a teaspoon of extra glycerin, and watch it regain clarity.
Layers Peel Apart
A missing alcohol spritz is the usual suspect. Roughen the contact surface with a clean toothbrush, warm each layer to 50 °C, spritz generously, and re-seal. The revamped bond is often stronger than the original.
Fragrance Fades
Essential oils bind best above 55 °C but below their flash-point (usually 65 °C–85 °C). Warm a test spoonful and time how long the scent lingers; adjust your pour temperature accordingly.
Mica Clumps
Always pre-blend mica in either rub-alcohol or a few drops of liquid glycerin. Dumping dry powder straight into hot soap forms “fish eyes” that never disperse. If disaster strikes, strain the batch through nylon pantyhose and re-mix.
Sweating Bars
Glycerin pulls water from humid air, creating sticky beads. Combat this by adding one percent sodium lactate during the melt, wrapping bars in airtight film, and storing them with silica packets. If sweat appears, wipe gently with a lint-free cloth and rewrap.
Master these creative spins, academic links, and rescue tricks, and every student will graduate from mere soap-maker to full-fledged suds scientist.
Kid-Sized FAQ
Is melt-and-pour real soap or just fancy play-dough?
It’s 100 % real soap. Chemists already did the tricky “lye + oil” reaction for you in a factory kettle. That means you start with a finished cleanser, melt it like chocolate, and customize every bar—from color to confetti—without handling harsh chemicals.
How long will my glittery dolphin bar last before it turns into mush?
If you wrap it tight in plastic film or compostable cellulose and store it somewhere cool, expect a full year of bubbly life. Scents mellow after six months, but lather and cleaning power keep going until the bar disappears down the drain.
Can I raid the kitchen for food coloring?
Better not. Red #40 and friends are designed for cupcakes, not bathtubs. They often fade in sunlight or bleed into washcloths. Soap-safe liquid dyes bond to glycerin and stay bright no matter how many cannon-ball baths you take.
Why does everyone shout “Spritz it!” the moment bubbles appear?
A quick mist of 99 % isopropyl alcohol pops surface bubbles and glues layers together. The alcohol vanishes in seconds—no smell, no stickiness, just glassy-smooth bars worthy of a gift shop.
Help! I just sloshed hot soap on the counter—now what?
Step away from the water tap. Wipe the spill with a paper towel, let the smear harden for two minutes, then peel it off like a wax strip. Easy, safe, and zero sudsy puddles on the floor.
Hosting a Soap-Making Party
- Bubble-Gram Invitations
- Trace a bar outline onto cardstock, cut, and scent lightly with a drop of essential oil. Guests get a whiff of the fun before they RSVP.
- Four Interactive Stations
- Melt Zone: adult-supervised microwave or slow-cooker.
- Color Lab: dropper bottles, mica pots, test spoons.
- Scent Bar: scent strips, coffee-bean “nose reset” dish, digital scale.
- Wrap & Label Studio: biodegradable shrink sleeves, heat gun, sticker maker.
- Sing-Along Safety Brief
Belt out safety rules to the tune of “Happy Birthday”:
“Goggles first, stir in bursts, don’t touch steam—keep it clean!”
Kids remember because they’re giggling. - Friendly Competitions
- Best Swirl: judged on hypnotic patterns.
- Funkiest Fragrance: weird yet wonderful combo—think marshmallow-mint.
- Sparkle Champion: shine without shedding glitter everywhere.
- Take-Home Treasure Bags
Include each guest’s bars, a mini instruction sheet (“Store cool, keep wrapped”), and a sticker that says “I’m a Certified Soap Scientist!”
Sustainability & Eco-Ethics
- Palm-Free or RSPO-Certified Bases
Unsustainable palm oil destroys rainforests. Look for bases labeled “palm-free” or certified by the Roundtable on Sustainable Palm Oil, which supports habitat-friendly farms. - Ditch Disposable Plastic Molds
Swap single-use trays for stainless-steel brownie pans lined with compostable parchment. They last decades and reduce plastic clutter. - Closed-Loop Fragrance Bottles
Collect empty glass or PET scent containers. Ship them to a Terracycle fragrance program or a local recycling co-op that reuses specialty plastics. - Second-Chance Soaps
Not every bar is runway-ready. Donate dented or color-bleed soaps to animal shelters—they’re perfect for washing kennels and keep mistakes out of landfills.
Extending the Fun
Digital Design Wizardry
Snap high-resolution photos of each pour layer. Stitch them into an animated GIF that shows the bar “growing” rainbow rings in 10 seconds. Add captions of temperature, fragrance load, and color code—instant STEAM micro-lesson for social media.
Soap-Powered Community Car-Wash
Stage a Saturday fundraiser. Sell student-made lemon-verbena bars as both hand soap and bonus car-wash sudser. Print waterproof QR codes linking to students’ YouTube tutorials so donors can try the craft at home.
Collaborative Rainbow Mosaic
Every child pours one two-inch square soap tile in their assigned spectrum color. Arrange the tiles into a giant rainbow mural for a class photo, then separate and gift the pieces—memories preserved in glycerin.
Teacher’s Quick-Reference Timeline
- 0–10 min | Safety & Science Spark
Slip on goggles, demonstrate pepper-on-water micelle trick, outline heat rules. - 10–25 min | Chop, Weigh, Melt
Students cube bases, shout out mass readings, and cycle through the microwave in teams. - 25–35 min | Color & Scent Alchemy
Dye droplet math, fragrance scaling, mica slurry swirling—all logged on batch sheets. - 35–45 min | Pour, Embed, Spritz
Steady hands fill molds; dinosaurs, flower petals, or bath-bomb cores take their places; alcohol spray makes surfaces glassy. - 45–60 min | Soapy Clean-Up Quiz + Label Art
While stations reset, rapid-fire Q&A reinforces melting points, pH, and safety. Kids design labels with scent names and ingredient icons. - 60–75 min | Demold & Discovery
Bars pop free—oohs and aahs. Compare clarity, swirl success, and embed placement. Record observations in science journals. - 75–90 min | Wrap, Log, Reflect
Shrink-wrap or bio-film seal every bar, stick on labels, tally costs, and write one sentence: “Next time, I will….” Group high-five ends the class.
With detailed answers, planet-friendly pointers, and a minute-by-minute playbook, you’ve got everything needed to turn soap into the most compelling STEAM adventure of the school year.
Grab the goggles, queue the music, and let the sudsy discoveries begin!
The Clean Conclusion
Melt-and-pour soap-making weaves chemistry, creativity, and conscientious crafting into one sudsy package.
Kids graduate from passive consumers to empowered creators who understand molecular structures, color harmony, budgeting, and eco-choices—all while their hands smell like mango or moon-mint.
Whether you’re a parent hunting for rainy-day magic or a teacher aiming for standards-aligned science, this squeaky-clean workshop delivers sparkling results, one satisfying bar at a time.

