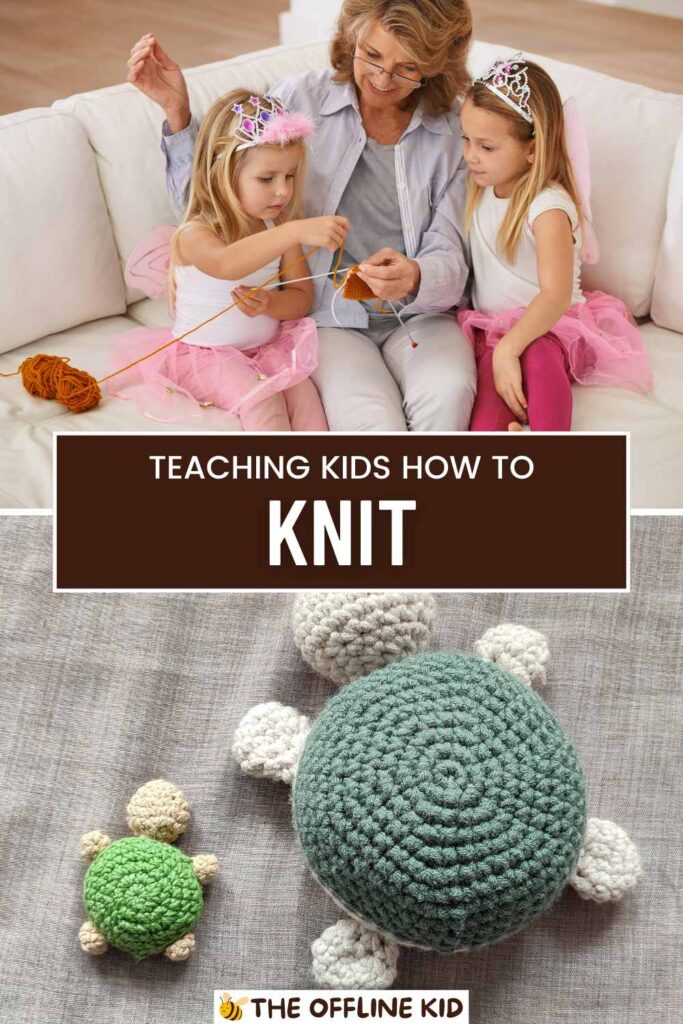
Knitting is a fantastic activity for kids, promoting creativity, patience, and fine motor skills.
This comprehensive guide will help you teach children the basics of knitting, from gathering supplies to completing simple projects, ensuring a fun and rewarding experience.
Why Teach Kids to Knit?
Benefits of Knitting for Kids
Knitting is not just a craft; it’s a skill that offers numerous benefits for children. Here are some reasons why teaching kids to knit can be incredibly rewarding:
- Creativity and Imagination: Knitting allows kids to create something unique, sparking their imagination and encouraging creative thinking.
- Patience and Focus: The repetitive nature of knitting helps children develop patience and the ability to focus on a task for an extended period.
- Fine Motor Skills: Handling knitting needles and yarn enhances fine motor skills, improving hand-eye coordination.
- Math and Problem-Solving: Counting stitches and following patterns help develop mathematical skills and problem-solving abilities.
- Sense of Accomplishment: Completing a knitting project, no matter how small, gives kids a sense of achievement and boosts their self-esteem.
Building Lifelong Skills and Hobbies
Knitting is a hobby that can stay with kids throughout their lives. Here’s why it’s worth introducing at a young age:
- Relaxation and Stress Relief: The rhythmic motions of knitting can be very soothing, helping to reduce stress and anxiety.
- Social Connection: Knitting can be a social activity, allowing kids to join knitting groups or teach their friends.
- Practical Skills: Knowing how to knit means kids can make their own clothes and accessories, fostering a sense of independence and resourcefulness.
By teaching kids to knit, you’re not just giving them a new hobby; you’re equipping them with valuable life skills that can benefit them in numerous ways.
Preparing to Teach Knitting
Choosing the Right Age
Deciding when to start teaching kids to knit can depend on several factors, including their interest and dexterity. Here’s how to determine the best age to begin:
- Ideal Age Range: Most children can start learning to knit around the ages of 6 to 8. At this age, they typically have the fine motor skills and attention span needed to grasp the basics.
- Adjusting Techniques for Different Ages: For younger kids, focus on finger knitting or using larger needles and bulkier yarn. Older kids can handle standard needles and more intricate patterns.
Gathering Supplies
Having the right supplies makes the learning process smoother and more enjoyable. Here’s what you’ll need:
- Yarn: Choose a medium-weight yarn (like worsted weight) that is easy to handle. Avoid slippery or very thin yarns. Acrylic yarns are a good choice for beginners because they are durable and come in a wide range of colors.
- Knitting Needles: Opt for kid-friendly needles made of bamboo or plastic, as they are lighter and easier to grip. Size 8 or 9 needles are a good starting point.
- Optional Tools: Scissors, stitch markers, and a row counter can be helpful. A darning needle for weaving in ends is also useful.
Creating a Kid-Friendly Knitting Space
A comfortable and organized space can make a big difference in the knitting experience:
- Safety and Comfort: Ensure the space is well-lit and free from distractions. Use a comfortable chair and a table at the right height.
- Organizing Materials: Keep supplies organized in a basket or container. Having everything in one place makes it easier to start and continue projects without frustration.
Creating a positive and inviting environment will help kids feel excited about learning to knit and make the process more enjoyable for everyone involved.
Getting Started
Introducing Knitting to Kids
When introducing knitting to kids, it’s important to make it engaging and exciting:
- Explain the Basics: Start with a simple explanation of what knitting is and how it works. Show them how yarn and needles are used to create fabric.
- Inspire with Finished Projects: Show examples of easy, kid-friendly knitting projects like scarves, headbands, or small toys. This helps kids visualize what they can achieve.
Simple Knitting Vocabulary
Teaching basic knitting terminology helps kids understand the process better. Here are some key terms:
- Yarn: The thread used to knit.
- Needles: Tools used to create stitches.
- Cast On: The process of starting a row of stitches.
- Knit Stitch: A basic stitch that forms the fabric.
- Purl Stitch: Another basic stitch that complements the knit stitch.
- Bind Off: The process of finishing a project and securing the stitches.
Visual Aids and Charts
Using visual aids can significantly enhance the learning experience:
- Picture Guides: Step-by-step photo guides or videos can help kids see exactly what to do.
- Charts and Diagrams: Simple charts showing different stitches and techniques can be useful reference tools.
Introducing these concepts in a clear, fun, and interactive way will lay a solid foundation for kids as they begin their knitting journey.
Basic Knitting Techniques
Casting On
Learning how to cast on is the first step in any knitting project:
- Long-Tail Cast On: This method is simple and effective for beginners.
- Step-by-Step Guide:
- Measure out a length of yarn approximately four times the width of the project.
- Create a slipknot and place it on one needle.
- Hold the needle with the slipknot in your right hand.
- Use your left hand to hold the yarn, with the tail end around your thumb and the working yarn around your index finger.
- Insert the needle under the yarn on your thumb, then over the yarn on your index finger, and pull through to create a new loop.
- Slip the loop onto the needle and tighten gently.
- Visual Aids and Practice Tips: Use diagrams or videos to illustrate each step. Encourage kids to practice casting on multiple times to get comfortable with the motion.
- Step-by-Step Guide:
The Knit Stitch
The knit stitch is the foundation of knitting:
- How to Create a Knit Stitch:
- Hold the needle with the cast-on stitches in your left hand.
- Insert the right-hand needle into the first stitch from front to back.
- Wrap the yarn around the right-hand needle counterclockwise.
- Pull the wrapped yarn through the stitch with the right-hand needle.
- Slide the original stitch off the left-hand needle.
- Common Mistakes and How to Fix Them: Help kids identify and correct common errors, such as dropping stitches or knitting too tightly. Encourage them to practice until they can comfortably create even stitches.
The Purl Stitch
The purl stitch complements the knit stitch and is essential for many patterns:
- How to Create a Purl Stitch:
- Hold the needle with the stitches in your left hand.
- Bring the yarn to the front of the work.
- Insert the right-hand needle into the first stitch from back to front.
- Wrap the yarn around the right-hand needle counterclockwise.
- Pull the wrapped yarn through the stitch with the right-hand needle.
- Slide the original stitch off the left-hand needle.
- Difference Between Knit and Purl Stitches: Explain how the knit stitch creates a smooth, V-shaped pattern while the purl stitch creates a bumpy texture. Demonstrate how combining these stitches can create different textures and patterns in the fabric.
Binding Off
Binding off finishes the project and secures the stitches:
- Simple Bind-Off Technique:
- Knit the first two stitches.
- Use the left-hand needle to lift the first stitch over the second stitch and off the needle.
- Knit another stitch and repeat the process until all stitches are bound off.
- Cut the yarn, leaving a tail, and pull it through the last stitch to secure.
- Ensuring a Neat Finish: Show kids how to keep the bind-off edge even and not too tight. Practice binding off on small swatches before finishing a full project.
By mastering these basic techniques, kids will be well on their way to creating their first knitting projects with confidence.
Practice Projects for Kids
Knitted Bookmark
A knitted bookmark is a simple and rewarding first project for beginners:
- Materials Needed:
- Medium-weight yarn in a favorite color
- Size 8 knitting needles
- Scissors
- Step-by-Step Instructions:
- Cast On: Cast on 12 stitches using the long-tail cast on method.
- Knit: Knit every row until the bookmark reaches the desired length (about 6-8 inches).
- Bind Off: Bind off all stitches and cut the yarn, leaving a small tail.
- Finishing: Weave in the ends using a darning needle.
- Tips for Customization: Kids can add fringe to the ends, use different colors to create stripes, or sew on small buttons or beads for decoration.
Simple Scarf
A simple scarf is an excellent project to practice basic knitting techniques:
- Materials Needed:
- Bulky-weight yarn for a quicker project
- Size 10 knitting needles
- Scissors
- Step-by-Step Instructions:
- Cast On: Cast on 20 stitches.
- Knit: Knit every row until the scarf is about 4-5 feet long.
- Bind Off: Bind off all stitches and cut the yarn, leaving a small tail.
- Finishing: Weave in the ends using a darning needle.
- Adding Fringe or Other Decorations: Show kids how to add fringe by cutting yarn into equal lengths and knotting them onto the ends of the scarf. They can also try creating simple patterns with different colored yarns.
Cozy Headband
A cozy headband is a quick and useful project that kids will love to wear:
- Materials Needed:
- Medium-weight yarn
- Size 8 knitting needles
- Scissors
- Darning needle
- Step-by-Step Instructions:
- Cast On: Cast on 15 stitches.
- Knit: Knit every row until the headband reaches the circumference of the child’s head (about 18-20 inches).
- Bind Off: Bind off all stitches and cut the yarn, leaving a tail.
- Seam: Use the darning needle to sew the two ends of the headband together, forming a loop.
- Finishing: Weave in the ends.
- Adjusting Size for Different Ages: Measure the head circumference of the child and adjust the length of the knitting accordingly. Add embellishments like buttons or bows for a personalized touch.
These practice projects provide a great opportunity for kids to apply their knitting skills and see tangible results. Each project builds on the basic techniques and offers room for creativity and customization, ensuring that the learning process is both fun and rewarding.
Encouraging Creativity
Incorporating Colors and Patterns
Adding colors and patterns to knitting projects can make the process more engaging for kids:
- Choosing Colors: Let kids pick their favorite colors or explore new ones. Using variegated yarns can create interesting effects without the need for changing yarns.
- Changing Colors:
- Step-by-Step Guide:
- Knit to the point where you want to change colors.
- Cut the old yarn, leaving a tail of about 6 inches.
- Tie the new yarn to the old yarn with a simple knot.
- Continue knitting with the new color.
- Tips: Encourage kids to experiment with stripes or blocks of color. Show them how to carry the yarn up the side if changing colors frequently.
- Step-by-Step Guide:
- Simple Patterns:
- Stripes: Alternate colors every few rows to create stripes.
- Blocks: Change colors at regular intervals to create blocks of color.
- Checkerboard: Use two colors and alternate stitches to create a checkerboard pattern.
Embellishments and Decorations
Adding embellishments can make projects more personalized and fun:
- Adding Beads: Show kids how to thread beads onto the yarn before knitting or how to sew them on after the project is finished.
- Buttons and Appliqués: Teach kids to sew on buttons or small fabric appliqués to add character to their projects.
- Pom-Poms and Tassels:
- Pom-Poms: Use a pom-pom maker or wrap yarn around your fingers, tie in the middle, and cut the loops.
- Tassels: Wrap yarn around a piece of cardboard, tie one end, and cut the other to create tassels.
- Personalized Tags: Help kids create personalized tags with their names to sew onto their finished projects.
Encouraging kids to incorporate colors, patterns, and embellishments not only makes knitting more enjoyable but also fosters a sense of pride and ownership in their creations. It allows them to express their individuality and creativity, making each project uniquely their own.
Troubleshooting Common Problems
Fixing Mistakes
Mistakes are a natural part of learning to knit. Teaching kids how to recognize and fix them will build their confidence:
- Dropped Stitches:
- How to Identify: A dropped stitch looks like a loose loop hanging down from the knitting.
- How to Fix:
- Insert a crochet hook or knitting needle into the dropped stitch.
- Pull the yarn through the loop, recreating the stitch.
- Place the fixed stitch back on the knitting needle.
- Uneven Tension:
- How to Identify: Uneven tension results in some stitches being too tight and others too loose.
- How to Fix:
- Gently tug on the stitches to even out the tension.
- Practice knitting at a consistent pace, neither too tight nor too loose.
- Tips for Improvement: Encourage kids to practice regularly to develop a consistent tension. Remind them to relax their hands and not to pull the yarn too tightly.
Preventing Frustration
Keeping knitting enjoyable and frustration-free is key to maintaining kids’ interest:
- Keeping Sessions Short and Fun: Limit knitting sessions to 20-30 minutes to avoid fatigue and frustration. Gradually increase the duration as kids become more comfortable.
- Encouraging Patience and Practice:
- Positive Reinforcement: Praise their efforts and celebrate small achievements.
- Break Down Tasks: Divide projects into manageable sections so kids can see progress more quickly.
- Using Lifelines:
- What is a Lifeline?: A lifeline is a piece of yarn threaded through stitches on a knitting project to save a point you can return to if you make a mistake.
- How to Insert a Lifeline:
- Use a contrasting color of yarn.
- Thread it through the stitches on your needle.
- Continue knitting as usual, knowing you can safely unravel to this point if needed.
Helping with Advanced Techniques
As kids advance, they may encounter more complex issues:
- Reading Patterns:
- Understanding Symbols: Teach kids how to read knitting patterns, including common symbols and abbreviations.
- Following Instructions: Practice following simple patterns together, gradually introducing more complex instructions.
- Fixing More Complex Mistakes:
- Tinking (Un-Knitting): Show kids how to carefully un-knit stitches to correct errors.
- Frogging (Ripping Back): Teach them how to safely unravel rows to correct mistakes without losing their place in the pattern.
By addressing common problems and teaching kids how to troubleshoot, you can help them build resilience and confidence in their knitting abilities. This will make their knitting journey more enjoyable and less frustrating, encouraging them to keep learning and improving.
Making Knitting Fun
Knitting Games and Challenges
Incorporating games and challenges can make learning to knit more enjoyable for kids:
- Knitting Bingo:
- How to Play: Create bingo cards with different knitting tasks (e.g., knit 10 rows, change colors, fix a dropped stitch). Mark off tasks as they are completed.
- Prizes: Offer small rewards for completing rows or achieving bingo.
- Speed Knitting Contests:
- How to Play: Set a timer and see who can knit the most rows in a set time period. Focus on speed but also on maintaining quality.
- Fair Play: Adjust the challenge based on skill level to ensure it’s fun for everyone.
- Group Knitting Projects:
- How to Organize: Work together on a single project, like a blanket made of squares knitted by different kids.
- Team Effort: Assign different tasks based on skill level, ensuring everyone contributes.
Involving Friends and Family
Knitting can be a great social activity, bringing people together:
- Group Knitting Sessions:
- How to Set Up: Arrange regular meet-ups where kids can knit together, share tips, and show off their projects.
- Shared Projects: Work on collaborative projects like a community scarf or a blanket for charity.
- Teaching Friends:
- How to Encourage: Once kids are confident in their skills, encourage them to teach their friends. Teaching reinforces their own knowledge.
- Buddy System: Pair up kids so they can help each other and learn together.
- Family Knitting Nights:
- How to Organize: Set aside a family night dedicated to knitting. Everyone can work on their own projects or collaborate on a family piece.
- Sharing Stories: Use the time to share stories, talk about the day, and enjoy each other’s company while knitting.
By making knitting a fun and social activity, you can keep kids engaged and motivated. Games and group activities provide variety and excitement, while involving friends and family helps build a supportive knitting community. This social aspect of knitting can be just as rewarding as the craft itself, fostering connections and shared experiences.
Expanding Knitting Skills
Learning New Stitches
Once kids are comfortable with the basics, introducing new stitches can keep their interest piqued and expand their skill set:
- Introduction to Advanced Stitches:
- Ribbing: Alternating knit and purl stitches create a stretchy fabric ideal for cuffs and hems.
- How to Knit Ribbing: Knit 2 stitches, purl 2 stitches, repeat across the row.
- Seed Stitch: Creates a textured pattern by alternating knit and purl stitches.
- How to Knit Seed Stitch: Knit 1, purl 1 across the row; on the next row, purl the knit stitches and knit the purl stitches.
- Cable Stitch: Involves crossing groups of stitches to create a braided effect.
- How to Knit Cables: Use a cable needle to hold stitches while you knit others.
- Ribbing: Alternating knit and purl stitches create a stretchy fabric ideal for cuffs and hems.
- Resources for Further Learning:
- Books: Look for beginner-friendly knitting books with step-by-step instructions and illustrations.
- Online Tutorials: Websites like YouTube offer countless video tutorials for visual learners.
- Knitting Classes: Many local craft stores and community centers offer knitting classes for kids.
Starting Bigger Projects
Encouraging kids to take on larger projects can help them apply their skills and gain confidence:
- Simple Hat Patterns:
- Materials Needed: Yarn, knitting needles, and a pattern.
- Step-by-Step Instructions: Start with a basic hat pattern that uses the knit and purl stitches. Hats can be knit flat and seamed or knit in the round.
- Mittens or Fingerless Gloves:
- Materials Needed: Yarn, knitting needles, and a pattern.
- Step-by-Step Instructions: Use a simple mitten pattern that introduces shaping techniques.
- Encouraging Persistence:
- Breaking Down Projects: Help kids divide larger projects into smaller, manageable tasks.
- Celebrating Milestones: Acknowledge and celebrate each step they complete, from casting on to finishing the final piece.
Joining Knitting Communities
Connecting with other knitters can provide inspiration and support:
- Online Communities:
- Forums and Social Media: Platforms like Ravelry, Facebook, and Instagram have active knitting communities where kids can share their projects and get feedback.
- Knitting Blogs: Many bloggers share free patterns, tips, and tutorials.
- Local Knitting Groups:
- Finding Groups: Check local libraries, craft stores, and community centers for knitting clubs or groups.
- Participating in Events: Look for knitting meet-ups, charity knitting events, and local fairs to get involved.
By learning new stitches, taking on bigger projects, and connecting with knitting communities, kids can continue to grow and enjoy their knitting journey. These opportunities help them build advanced skills, gain confidence, and find joy in creating increasingly complex and beautiful projects.