Discover the joy of science with our ultimate guide to at-home experiments.
From chemistry to astronomy, explore 38 fun and educational activities designed to spark curiosity and learning in kids and adults alike. Get ready to experiment, learn, and have fun!
Chemistry Experiments
Baking Soda and Vinegar Volcano
Materials: Baking soda, vinegar, dish soap, food coloring, container.
Instructions:
- Place the container in an area where a mess is okay.
- Add a few drops of food coloring and a squirt of dish soap to the container.
- Fill the container halfway with baking soda.
- Pour vinegar into the container and watch the eruption.
Explanation: This experiment demonstrates an acid-base reaction. When vinegar (an acid) reacts with baking soda (a base), it produces carbon dioxide gas, creating the bubbling and fizzing effect that simulates a volcanic eruption.
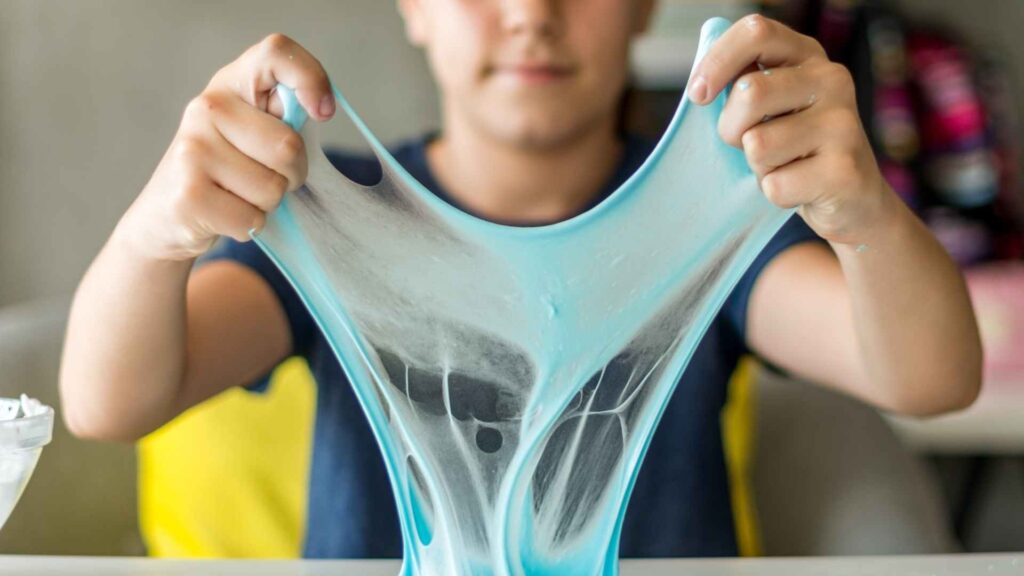
Homemade Slime
Materials: Glue, baking soda, saline solution, food coloring.
Instructions:
- Pour 1 cup of glue into a bowl.
- Add a few drops of food coloring and mix.
- Stir in 1 tablespoon of baking soda.
- Gradually add 2 tablespoons of saline solution, mixing until the slime forms and becomes difficult to stir.
- Knead the slime until it reaches the desired consistency.
Explanation: Making slime is an example of a chemical reaction where the borate ions in the saline solution react with the polyvinyl acetate in the glue to form a stretchy, gooey polymer.
Crystal Growing
Materials: Salt or sugar, water, string, jar.
Instructions:
- Dissolve as much salt or sugar as possible in hot water to create a supersaturated solution.
- Tie one end of the string to a pencil and place the pencil across the top of the jar, letting the string hang down into the solution.
- Leave the jar undisturbed for several days to allow crystals to form on the string.
Explanation: As the water evaporates, the solution becomes more concentrated, and the excess salt or sugar begins to crystallize on the string. This process illustrates the principles of solubility and crystallization.
These simple yet fascinating chemistry experiments are perfect for sparking curiosity and teaching basic scientific principles in a fun and interactive way.

Physics Experiments
Balloon Rocket
Materials: Balloon, string, straw, tape.
Instructions:
- Thread the string through the straw.
- Secure one end of the string to a fixed point (like a chair or doorknob) and hold the other end.
- Inflate the balloon but do not tie it. Instead, tape it to the straw.
- Let go of the balloon and watch it zoom along the string.
Explanation: This experiment demonstrates Newton’s Third Law of Motion: for every action, there is an equal and opposite reaction. The air rushing out of the balloon propels it forward along the string.
Simple Circuit
Materials: Battery, wires, light bulb or LED.
Instructions:
- Connect one end of a wire to the positive terminal of the battery.
- Attach the other end of the wire to one terminal of the light bulb or LED.
- Connect another wire from the other terminal of the light bulb or LED to the negative terminal of the battery.
- Observe the light bulb or LED lighting up.
Explanation: This experiment introduces the concept of electrical circuits. The battery provides a voltage that drives an electric current through the wires and the light bulb or LED, producing light.
Magnetic Slime
Materials: Glue, borax, iron filings, magnets.
Instructions:
- Mix glue and water in a bowl.
- Add a small amount of borax solution and stir until the mixture thickens into slime.
- Add iron filings to the slime and mix thoroughly.
- Use magnets to move and shape the slime.
Explanation: The iron filings in the slime are attracted to the magnets, demonstrating the properties of magnetism and how magnetic fields interact with magnetic materials.
These engaging physics experiments are perfect for illustrating fundamental principles and encouraging hands-on exploration of physical concepts.

Biology Experiments
Seed Germination
Materials: Seeds, cotton balls, water, container.
Instructions:
- Dampen the cotton balls with water and place them in the container.
- Lay the seeds on top of the cotton balls.
- Place the container in a warm, sunny spot.
- Keep the cotton balls moist and observe the seeds over the next few days as they germinate and begin to sprout.
Explanation: This experiment demonstrates the process of seed germination, where a seed develops into a new plant. It illustrates the basic requirements for plant growth: water, light, and warmth.
Bread Mold
Materials: Bread, water, plastic bag.
Instructions:
- Lightly dampen a slice of bread with water.
- Place the bread in a plastic bag and seal it.
- Leave the bag in a warm, dark place.
- Check the bread daily to observe the growth of mold.
Explanation: This experiment shows how mold, a type of fungus, grows on bread. It highlights the conditions that promote fungal growth, such as moisture and warmth, and demonstrates the concept of decomposition.
DIY Microscope
Materials: Water droplet, transparent plastic, smartphone.
Instructions:
- Place a small droplet of water on a piece of transparent plastic.
- Position the plastic over the camera lens of the smartphone.
- Adjust the camera focus and use the water droplet as a magnifying lens to observe small objects.
Explanation: This experiment illustrates the principles of magnification and how simple lenses can be used to observe details that are not visible to the naked eye. It provides an introduction to the basic concepts of microscopy.
These biology experiments are excellent for exploring living organisms and biological processes, offering hands-on learning opportunities that make the study of life sciences exciting and accessible.
Earth Science Experiments
Rock Candy
Materials: Sugar, water, food coloring, string, jar.
Instructions:
- Boil water and gradually add sugar until no more dissolves, creating a supersaturated solution.
- Add food coloring if desired.
- Tie one end of the string to a pencil and place the pencil across the top of the jar, letting the string hang down into the solution.
- Leave the jar undisturbed for several days to allow crystals to form on the string.
Explanation: This experiment demonstrates the process of crystallization. As the water evaporates, the solution becomes more concentrated, and the excess sugar forms crystals on the string, similar to how minerals form crystals in nature.
DIY Barometer
Materials: Jar, balloon, straw, tape, index card.
Instructions:
- Cut the neck off a balloon and stretch the remaining part tightly over the mouth of the jar.
- Tape a straw horizontally across the center of the balloon.
- Tape an index card vertically next to the jar as a scale.
- Observe and record changes in the straw’s position over time.
Explanation: This experiment shows how a barometer works by measuring atmospheric pressure. Changes in air pressure cause the balloon to expand or contract, moving the straw up or down. This demonstrates how barometers can predict weather changes.
Water Cycle in a Bag
Materials: Plastic bag, water, food coloring, tape.
Instructions:
- Add a small amount of water and a few drops of food coloring to a plastic bag.
- Seal the bag and tape it to a sunny window.
- Observe the water as it evaporates, condenses, and forms droplets inside the bag.
Explanation: This experiment simulates the water cycle, demonstrating evaporation, condensation, and precipitation. It provides a visual representation of how water moves through the environment in a continuous cycle.
These earth science experiments offer hands-on activities that help explain natural processes, making complex concepts easier to understand and engage with.
Environmental Science Experiments
Water Filtration
Materials: Sand, gravel, charcoal, plastic bottle.
Instructions:
- Cut the bottom off a plastic bottle and turn it upside down to use as a filter.
- Layer the bottle with charcoal, gravel, and sand.
- Pour dirty water through the filter and collect the filtered water in a clean container.
- Observe the clarity of the filtered water compared to the original dirty water.
Explanation: This experiment demonstrates how natural materials can filter and purify water, mimicking the processes used in water treatment plants. It highlights the importance of clean water and basic principles of environmental science.
Compost in a Bottle
Materials: Organic waste, soil, plastic bottle.
Instructions:
- Cut the top off a plastic bottle to create a compost bin.
- Layer soil and organic waste (such as vegetable scraps and leaves) inside the bottle.
- Keep the compost moist and turn it occasionally.
- Observe the decomposition process over several weeks.
Explanation: This experiment shows how organic matter breaks down into compost, illustrating the natural process of decomposition and the recycling of nutrients in ecosystems. It also emphasizes the benefits of composting for reducing waste and enriching soil.
Solar Oven
Materials: Cardboard box, aluminum foil, plastic wrap, black paper.
Instructions:
- Line the inside of a cardboard box with aluminum foil, shiny side out.
- Place a piece of black paper at the bottom of the box.
- Cover the top opening with plastic wrap, sealing the edges tightly.
- Place food inside the box and set it in direct sunlight to cook.
Explanation: This experiment demonstrates the use of solar energy to cook food. The aluminum foil reflects sunlight into the box, and the black paper absorbs heat, while the plastic wrap creates a greenhouse effect. It highlights the potential of renewable energy sources.
These environmental science experiments offer practical activities to explore important ecological concepts and demonstrate the impact of human activities on the environment.

Astronomy Experiments
DIY Star Projector
Materials: Cardboard, push pins, flashlight.
Instructions:
- Cut out a small circle of cardboard.
- Use push pins to poke holes in the cardboard in the pattern of a constellation.
- Shine a flashlight through the cardboard in a dark room to project the constellation onto a wall or ceiling.
Explanation: This experiment helps visualize constellations and understand how stars are positioned in the night sky. It also introduces the concept of light projection and the use of simple tools to simulate celestial phenomena.
Phases of the Moon
Materials: Oreo cookies, plastic knife.
Instructions:
- Twist open Oreo cookies and use the plastic knife to shape the cream filling to represent different phases of the moon (new moon, crescent, half, gibbous, full moon).
- Arrange the cookies in the correct order to show the sequence of lunar phases.
Explanation: This experiment visually demonstrates the phases of the moon and helps explain why the moon appears to change shape throughout the month. It provides a hands-on way to learn about lunar cycles and the relationship between the Earth, moon, and sun.
Constellation Viewer
Materials: Toilet paper roll, paper, push pins.
Instructions:
- Cut a piece of paper to fit over one end of a toilet paper roll.
- Use push pins to poke holes in the paper in the pattern of a constellation.
- Tape the paper over one end of the toilet paper roll.
- Look through the other end in a dark room to view the constellation.
Explanation: This experiment allows for the exploration of constellations and helps understand how ancient cultures used the stars for navigation and storytelling. It also demonstrates the use of simple tools to simulate astronomical observations.
These astronomy experiments provide engaging ways to explore the night sky and understand celestial phenomena, making the study of space accessible and fun.
Engineering Experiments
Building a Bridge
Materials: Popsicle sticks, glue, weights.
Instructions:
- Design a bridge structure using popsicle sticks.
- Glue the popsicle sticks together according to your design.
- Allow the glue to dry completely.
- Test the strength of your bridge by gradually adding weights until it breaks.
Explanation: This experiment demonstrates the principles of engineering and structural design. It highlights the importance of balance, stability, and material strength in constructing bridges.
Rubber Band Car
Materials: Rubber bands, cardboard, straws, wheels (e.g., bottle caps), tape.
Instructions:
- Cut a piece of cardboard to use as the car’s body.
- Attach straws to the bottom of the cardboard to act as axles.
- Attach wheels (bottle caps) to the ends of the straws.
- Use rubber bands to create a propulsion mechanism by winding them around the axles.
- Release the rubber bands and watch the car move.
Explanation: This experiment explores the concepts of potential and kinetic energy. The rubber bands store potential energy when wound up, which is converted to kinetic energy when released, propelling the car forward.
Homemade Catapult
Materials: Popsicle sticks, rubber bands, spoon.
Instructions:
- Stack several popsicle sticks together and secure them with rubber bands at each end.
- Attach a spoon to the top popsicle stick using a rubber band.
- Place an object (like a small ball) in the spoon and pull it back.
- Release the spoon to launch the object.
Explanation: This experiment illustrates the principles of levers and energy transfer. The catapult stores potential energy when the spoon is pulled back, which is converted to kinetic energy when released, launching the object.
These engineering experiments provide hands-on activities that encourage problem-solving, creativity, and an understanding of basic engineering principles.
Mathematics Experiments
Graphing Gummy Bears
Materials: Gummy bears, graph paper.
Instructions:
- Sort the gummy bears by color.
- Count the number of gummy bears in each color.
- Use the graph paper to create a bar graph representing the number of gummy bears in each color.
- Analyze the graph to discuss patterns and ratios.
Explanation: This experiment helps visualize data collection and graphing. It introduces basic concepts of statistics and data analysis in a fun and interactive way.
Magic Milk
Materials: Milk, dish soap, food coloring.
Instructions:
- Pour a shallow layer of milk into a dish.
- Add a few drops of different food coloring to the milk.
- Dip a cotton swab in dish soap and touch it to the milk.
- Observe the colors swirling and moving in the milk.
Explanation: This experiment demonstrates the concept of surface tension and how it can be affected by soap. The dish soap reduces the surface tension of the milk, causing the food coloring to move and create colorful patterns.
Fibonacci Sequence in Nature
Materials: Pinecones, flowers, paper, pencil.
Instructions:
- Collect pinecones and flowers that exhibit spiral patterns.
- Count the number of spirals in each direction on the pinecones and flowers.
- Compare the numbers to the Fibonacci sequence (1, 1, 2, 3, 5, 8, 13, …).
- Discuss the appearance of the Fibonacci sequence in natural patterns.
Explanation: This experiment explores the Fibonacci sequence and its occurrence in nature. It helps illustrate mathematical patterns and the concept of sequences and series.
These mathematics experiments provide engaging and practical ways to explore mathematical concepts, making abstract ideas more tangible and enjoyable.
Concluding The Best At-Home Science Experiments
Encouragement to Explore More
Engaging in at-home science experiments not only fosters curiosity but also enhances critical thinking and problem-solving skills.
Encourage your kids or yourself to explore more, ask questions, and seek answers through hands-on activities.
Resources for Further Learning
- Books: “The Everything Kids’ Science Experiments Book” by Tom Robinson, “The Big Book of Science Experiments” by National Geographic Kids.
- Websites: Science Buddies, NASA’s Climate Kids, Exploratorium.
Final Safety Reminders
Always prioritize safety when conducting experiments. Use appropriate protective gear, work in a well-ventilated area, and supervise children closely. Ensure all materials are handled with care and clean up thoroughly after experiments.
Embrace the wonders of science with these fun and educational experiments, and inspire a lifelong love of learning and discovery. Happy experimenting!