Introducing toddlers to science sparks curiosity and nurtures a lifelong love for learning.
This guide offers 48 fun, safe, and simple science experiments that will captivate young toddler minds and make science an exciting adventure.
Simple and Safe Experiments
1. Magic Milk Experiment
Materials Needed:
- Whole milk
- Food coloring
- Dish soap
- Cotton swabs
- A shallow dish
Step-by-Step Instructions:
- Pour enough milk into the shallow dish to cover the bottom.
- Add a few drops of different colors of food coloring to the milk.
- Dip a cotton swab into dish soap.
- Touch the soap-coated swab to the center of the milk and watch the colors burst and swirl!
Explanation of the Science Behind It: The dish soap breaks the surface tension of the milk and reacts with the fat molecules, causing the colors to spread and move in fascinating patterns.
2. Rainbow in a Jar
Materials Needed:
- A clear glass jar
- Honey
- Dish soap
- Water
- Rubbing alcohol
- Food coloring
- A spoon
Step-by-Step Instructions:
- Pour honey into the jar, filling about one-fifth of it.
- Slowly add dish soap, creating a second layer.
- Mix water with a few drops of food coloring and gently pour it over the back of a spoon to form the third layer.
- Mix rubbing alcohol with a different color of food coloring and carefully pour it on top of the water layer.
Explanation of the Science Behind It: Each liquid has a different density, which prevents them from mixing and creates a colorful, layered effect resembling a rainbow.
3. Baking Soda and Vinegar Volcano
Materials Needed:
- Baking soda
- Vinegar
- A plastic bottle
- Red food coloring (optional)
- Dish soap (optional)
- A tray or large dish
Step-by-Step Instructions:
- Place the plastic bottle in the center of the tray.
- Fill the bottle halfway with baking soda.
- Add a few drops of red food coloring and a squirt of dish soap if desired.
- Quickly pour vinegar into the bottle and watch your volcano erupt!
Explanation of the Science Behind It: When vinegar (an acid) reacts with baking soda (a base), it produces carbon dioxide gas, causing the fizzy eruption that mimics a volcanic explosion.
These simple and safe experiments are perfect for engaging toddlers in the wonders of science, encouraging their natural curiosity, and providing a foundation for future learning.
Experiments with Everyday Items
4. Floating and Sinking
Materials Needed:
- A large container of water
- Various small objects (e.g., a cork, a coin, a plastic toy, a stone, a leaf)
Step-by-Step Instructions:
- Fill the large container with water.
- Gather various small objects from around the house.
- Ask your toddler to guess which objects will float and which will sink.
- Drop the objects one by one into the water and observe what happens.
Explanation of the Science Behind It: This experiment introduces the concept of buoyancy. Objects that are less dense than water will float, while those that are denser will sink.
5. Color Mixing with Ice Cubes
Materials Needed:
- Ice cube trays
- Food coloring
- Water
- Clear cups
Step-by-Step Instructions:
- Fill the ice cube trays with water and add different food coloring to each section.
- Freeze the trays to make colored ice cubes.
- Once frozen, place different colored ice cubes in clear cups.
- As the ice melts, watch how the colors mix to form new colors.
Explanation of the Science Behind It: This experiment demonstrates the mixing of primary colors to create secondary colors. It also shows the physical change from solid to liquid as the ice melts.
6. Magic Balloons
Materials Needed:
- Balloons
- Baking soda
- Vinegar
- A funnel
- A plastic bottle
Step-by-Step Instructions:
- Use the funnel to pour baking soda into the balloon.
- Fill the plastic bottle with vinegar.
- Carefully attach the balloon to the top of the bottle without spilling the baking soda.
- Lift the balloon, allowing the baking soda to fall into the vinegar.
Explanation of the Science Behind It: The reaction between vinegar and baking soda produces carbon dioxide gas, which inflates the balloon. This demonstrates a simple chemical reaction and the creation of gas.
These everyday items can transform into tools for discovery, making science accessible and exciting for toddlers. By using objects found around the house, you can show that science is everywhere and encourage your child’s natural inquisitiveness.
Nature-Inspired Experiments
7. Leaf Rubbings
Materials Needed:
- Various leaves
- Paper
- Crayons
Step-by-Step Instructions:
- Collect different types of leaves from your garden or a park.
- Place a leaf under a sheet of paper.
- Use the side of a crayon to rub over the paper where the leaf is placed.
- Watch as the leaf’s shape and vein patterns appear on the paper.
Explanation of the Science Behind It: Leaf rubbings help toddlers observe the intricate details of leaves, such as their shapes and vein structures. This activity also enhances fine motor skills and introduces basic plant biology.
8. Mini Greenhouses
Materials Needed:
- Clear plastic cups
- Soil
- Seeds (e.g., beans or flowers)
- Water
- Plastic wrap
Step-by-Step Instructions:
- Fill the plastic cups with soil.
- Plant a seed in each cup and cover it lightly with soil.
- Water the soil gently.
- Cover the top of the cup with plastic wrap to create a mini greenhouse.
- Place the cups in a sunny spot and watch the seeds sprout over time.
Explanation of the Science Behind It: Creating mini greenhouses teaches toddlers about the plant growth process. The plastic wrap traps moisture and warmth, creating an ideal environment for seeds to germinate and grow.
9. Bug Hotel
Materials Needed:
- A small box or wooden crate
- Sticks, leaves, pine cones, and other natural materials
- String (optional)
Step-by-Step Instructions:
- Gather various natural materials from your garden or a park.
- Fill the small box or wooden crate with the collected materials, arranging them to create little nooks and crannies.
- Place the bug hotel in a quiet, sheltered spot in your garden.
- Observe over time as insects and bugs find their way to the hotel.
Explanation of the Science Behind It: Building a bug hotel helps toddlers learn about different insects and their habitats. This activity encourages observation of nature and understanding of ecosystems.
10. Sink or Float with Natural Objects
Materials Needed:
- A large container of water
- Natural objects (e.g., sticks, rocks, leaves, pine cones)
Step-by-Step Instructions:
- Fill the large container with water.
- Gather various natural objects from outside.
- Ask your toddler to guess which objects will float and which will sink.
- Drop the objects one by one into the water and observe what happens.
Explanation of the Science Behind It: This experiment introduces the concept of buoyancy using natural objects. Toddlers learn about density and material properties in a hands-on way.
Exploring nature through these experiments allows toddlers to connect with the environment, fostering a sense of wonder and appreciation for the natural world. These activities promote outdoor play and discovery, making science an everyday adventure.
Water-Based Experiments
11. Sink or Float
Materials Needed:
- A large container of water
- Various small household objects (e.g., a rubber duck, a stone, a plastic spoon, a coin)
Step-by-Step Instructions:
- Fill the large container with water.
- Gather various small objects from around the house.
- Ask your toddler to guess which objects will float and which will sink.
- Drop the objects one by one into the water and observe what happens.
Explanation of the Science Behind It: This experiment helps toddlers understand buoyancy. Objects that are less dense than water will float, while those that are denser will sink.
12. Walking Water
Materials Needed:
- 6 clear cups
- Water
- Food coloring (red, yellow, blue)
- Paper towels
Step-by-Step Instructions:
- Arrange the 6 clear cups in a row.
- Fill the 1st, 3rd, and 5th cups with water, leaving the 2nd, 4th, and 6th cups empty.
- Add red food coloring to the 1st cup, yellow to the 3rd cup, and blue to the 5th cup.
- Take paper towels and fold them lengthwise into strips.
- Place one end of a paper towel strip into the 1st cup and the other end into the 2nd cup. Repeat with the remaining cups, creating a bridge of paper towels between each cup.
Explanation of the Science Behind It: The colored water will “walk” up the paper towels and mix in the empty cups, demonstrating capillary action. This process shows how plants absorb water through their roots.
13. Water Beads Sensory Bin
Materials Needed:
- Water beads
- A large container
- Water
- Various small toys (optional)
Step-by-Step Instructions:
- Soak the water beads in a large container of water according to the package instructions.
- Once the water beads have expanded, drain any excess water.
- Add various small toys to the container (optional).
- Let your toddler explore the sensory bin by feeling, scooping, and playing with the water beads.
Explanation of the Science Behind It: Water beads absorb water and expand, providing a fun sensory experience. This activity enhances fine motor skills and offers a tactile way for toddlers to explore textures and materials.
14. Ice Fishing
Materials Needed:
- A large container of water
- Ice cubes
- Salt
- String
- A small stick
Step-by-Step Instructions:
- Fill the large container with water and add ice cubes.
- Tie a piece of string to a small stick to make a fishing rod.
- Sprinkle some salt on the ice cubes.
- Place the string over the salted ice cubes and wait for a few seconds.
- Gently lift the string and watch as the ice cubes stick to it!
Explanation of the Science Behind It: The salt lowers the melting point of ice, causing it to melt slightly. When the water refreezes, it traps the string, allowing you to “fish” the ice cubes out of the water.
15. Color Changing Water
Materials Needed:
- Clear plastic cups
- Water
- Food coloring
- Clear plastic straws
Step-by-Step Instructions:
- Fill several clear plastic cups with water.
- Add a few drops of different food coloring to each cup.
- Place a clear plastic straw in each cup.
- Watch as the colored water appears to change colors when viewed through the straw.
Explanation of the Science Behind It: This simple experiment demonstrates light refraction. The curved surface of the straw bends the light, causing the colors to appear to change.
These water-based experiments are not only fun but also educational. They provide toddlers with hands-on opportunities to learn about density, absorption, and other basic scientific principles, making learning a splash!
Experiments with Food
16. Dancing Raisins
Materials Needed:
- Clear carbonated soda (e.g., Sprite or 7-Up)
- Raisins
- A clear glass
Step-by-Step Instructions:
- Fill a clear glass with the carbonated soda.
- Drop a few raisins into the glass.
- Watch as the raisins sink, then rise, and dance up and down in the glass.
Explanation of the Science Behind It: The carbon dioxide bubbles in the soda attach to the rough surface of the raisins, making them buoyant and causing them to rise. When the bubbles pop at the surface, the raisins sink again.
17. Egg in a Bottle
Materials Needed:
- A hard-boiled egg, peeled
- A glass bottle with a neck slightly smaller than the egg
- A piece of paper
- Matches or a lighter
Step-by-Step Instructions:
- Light the piece of paper and drop it into the bottle.
- Quickly place the egg on the bottle’s neck.
- Watch as the egg gets sucked into the bottle.
Explanation of the Science Behind It: The burning paper heats the air inside the bottle, causing it to expand. When the flame goes out, the air cools and contracts, creating a vacuum that pulls the egg into the bottle.
18. Cornstarch Slime (Oobleck)
Materials Needed:
- Cornstarch
- Water
- A mixing bowl
- Food coloring (optional)
Step-by-Step Instructions:
- Pour cornstarch into a mixing bowl.
- Gradually add water while stirring until the mixture reaches a thick, gooey consistency.
- Add a few drops of food coloring if desired.
- Play with the mixture, observing how it behaves like both a solid and a liquid.
Explanation of the Science Behind It: Oobleck is a non-Newtonian fluid, which means its viscosity changes under pressure. When squeezed, it acts like a solid, and when released, it flows like a liquid.
19. Ice Cream in a Bag
Materials Needed:
- 1 cup milk or cream
- 2 tablespoons sugar
- 1/2 teaspoon vanilla extract
- Ice
- 1/3 cup salt
- 2 resealable plastic bags (one small, one large)
- Towel or gloves (for handling cold bags)
Step-by-Step Instructions:
- In the small resealable bag, combine milk, sugar, and vanilla extract. Seal tightly.
- Fill the large bag halfway with ice and add salt.
- Place the small bag inside the large bag and seal tightly.
- Shake the bags vigorously for about 5-10 minutes, until the mixture in the small bag hardens into ice cream.
- Remove the small bag, wipe off the salt, and enjoy your homemade ice cream!
Explanation of the Science Behind It: The salt lowers the freezing point of the ice, causing it to melt and absorb heat from the ice cream mixture, which freezes the cream.
20. Lemon Volcano
Materials Needed:
- A lemon
- Baking soda
- Food coloring
- Dish soap
- A spoon or craft stick
Step-by-Step Instructions:
- Cut the top off the lemon and place it on a plate.
- Use the spoon or craft stick to mash the inside of the lemon, releasing the juice.
- Add a few drops of food coloring and a squirt of dish soap to the lemon.
- Sprinkle baking soda into the lemon and watch the fizzy reaction.
Explanation of the Science Behind It: The acid in the lemon juice reacts with the baking soda, producing carbon dioxide gas and creating a fizzy, bubbling effect that looks like a mini volcano.
21. Marshmallow Structures
Materials Needed:
- Mini marshmallows
- Toothpicks
Step-by-Step Instructions:
- Give your toddler a handful of mini marshmallows and some toothpicks.
- Show them how to connect the marshmallows with the toothpicks to build structures.
- Let them experiment with different shapes and designs.
Explanation of the Science Behind It: Building with marshmallows and toothpicks introduces basic engineering concepts. It also encourages creativity and fine motor skills development.
22. Fizzy Lemonade
Materials Needed:
- Fresh lemon juice
- Baking soda
- Water
- Sugar (optional)
- A clear glass
Step-by-Step Instructions:
- Squeeze fresh lemon juice into a clear glass.
- Add a small amount of baking soda to the lemon juice and watch it fizz.
- Add water and sugar to taste, creating a refreshing fizzy lemonade.
Explanation of the Science Behind It: The citric acid in lemon juice reacts with the baking soda (a base), producing carbon dioxide gas, which creates the fizzy bubbles in the lemonade.
These food-based experiments are not only educational but also tasty and fun. They help toddlers understand chemical reactions, states of matter, and physical changes through hands-on activities that they can taste and touch.
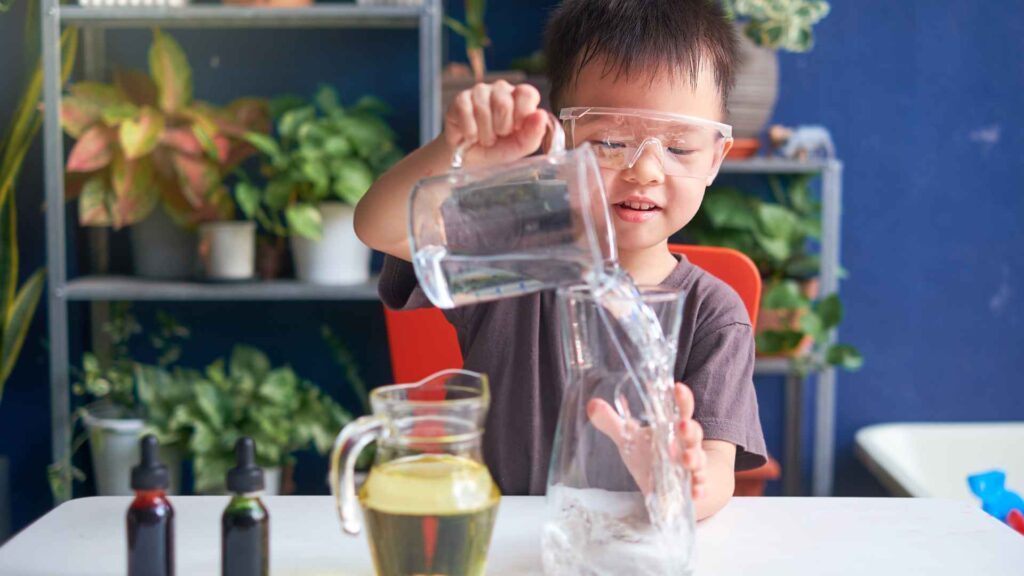
Experiments with Colors
23. Color Changing Flowers
Materials Needed:
- White flowers (e.g., carnations or daisies)
- Food coloring
- Water
- Clear glass jars or vases
Step-by-Step Instructions:
- Fill each jar with water.
- Add different colors of food coloring to each jar.
- Trim the stems of the white flowers and place them in the jars.
- Wait for a few hours to a couple of days and observe how the flowers change color.
Explanation of the Science Behind It: This experiment demonstrates capillary action, where the colored water travels up through the stem and into the petals, changing the flower’s color.
24. Homemade Lava Lamp
Materials Needed:
- A clear plastic bottle
- Water
- Vegetable oil
- Food coloring
- Alka-Seltzer tablets
Step-by-Step Instructions:
- Fill the bottle about a third full with water.
- Add a few drops of food coloring to the water.
- Fill the rest of the bottle with vegetable oil, leaving some space at the top.
- Break an Alka-Seltzer tablet into pieces and drop them into the bottle.
- Watch as the colorful bubbles rise and fall, creating a lava lamp effect.
Explanation of the Science Behind It: The Alka-Seltzer reacts with the water to produce carbon dioxide gas. The gas forms bubbles that rise through the oil, carrying some colored water with them and creating the lava lamp effect.
25. Fizzing Colors
Materials Needed:
- Baking soda
- Vinegar
- Food coloring
- A baking sheet or shallow tray
- Small cups
- Droppers or pipettes
Step-by-Step Instructions:
- Spread a thin layer of baking soda on the baking sheet.
- Fill small cups with vinegar and add a few drops of different food colorings to each cup.
- Use droppers or pipettes to drop the colored vinegar onto the baking soda.
- Watch as the vinegar reacts with the baking soda, creating colorful fizzy eruptions.
Explanation of the Science Behind It: The vinegar (an acid) reacts with the baking soda (a base) to produce carbon dioxide gas, resulting in a fizzy, bubbling reaction. The food coloring adds a visual element to this chemical reaction.
26. Colorful Celery Experiment
Materials Needed:
- Fresh celery stalks with leaves
- Food coloring
- Water
- Clear glasses
Step-by-Step Instructions:
- Fill the glasses with water and add different food coloring to each glass.
- Trim the bottoms of the celery stalks and place one in each glass.
- Leave the celery in the colored water for several hours to a day and observe the changes.
Explanation of the Science Behind It: This experiment shows how plants absorb water through capillary action. The colored water travels up the celery stalks and into the leaves, changing their color.
27. Magic Rainbow Milk
Materials Needed:
- Whole milk
- Food coloring
- Dish soap
- Cotton swabs
- A shallow dish
Step-by-Step Instructions:
- Pour enough milk into the shallow dish to cover the bottom.
- Add drops of different food colorings to the milk.
- Dip a cotton swab into dish soap.
- Touch the soap-coated swab to the milk’s surface and watch the colors burst and swirl.
Explanation of the Science Behind It: The dish soap reduces the surface tension of the milk and interacts with the fat molecules, causing the colors to move in fascinating patterns.
28. Colored Rock Candy
Materials Needed:
- Sugar
- Water
- Food coloring
- Wooden skewers
- Glass jars
Step-by-Step Instructions:
- Dissolve sugar in boiling water to create a supersaturated solution.
- Add food coloring to the solution.
- Pour the solution into glass jars.
- Suspend a wooden skewer in each jar using a clothespin.
- Leave the jars undisturbed for several days to a week and observe as sugar crystals form on the skewers.
Explanation of the Science Behind It: As the water evaporates, the sugar comes out of the solution and forms crystals on the skewer. The food coloring dyes the crystals, making them colorful.
These colorful experiments captivate toddlers’ attention and make learning about chemical reactions and physical changes a fun, visual experience. By playing with colors, toddlers can better understand scientific concepts and enjoy the beauty of the results.
Experiments with Air
29. Balloon Rocket
Materials Needed:
- Balloons
- String
- Tape
- A straw
- Two chairs
Step-by-Step Instructions:
- Tie one end of the string to the back of a chair.
- Thread the other end of the string through a straw and tie it to the other chair.
- Inflate a balloon but do not tie it off.
- Tape the balloon to the straw.
- Move the chairs apart so the string is taut.
- Let go of the balloon and watch it zoom along the string like a rocket.
Explanation of the Science Behind It: The air escaping from the balloon creates thrust, propelling the balloon forward along the string. This demonstrates Newton’s Third Law of Motion: for every action, there is an equal and opposite reaction.
30. Paper Airplane Science
Materials Needed:
- Paper
- Markers or crayons (optional for decorating)
- A measuring tape
Step-by-Step Instructions:
- Fold a piece of paper into a paper airplane.
- Decorate the airplane with markers or crayons if desired.
- Fly the airplane and measure how far it travels.
- Try folding different designs and compare the distances they fly.
Explanation of the Science Behind It: This experiment introduces basic aerodynamics. Different airplane designs can affect the distance and stability of flight, teaching toddlers about lift, drag, and the forces acting on flying objects.
31. Straw Blowing Race
Materials Needed:
- Straws
- Lightweight objects (e.g., cotton balls, pom-poms)
- A flat surface
Step-by-Step Instructions:
- Place a lightweight object at the starting line on a flat surface.
- Use a straw to blow the object across the surface.
- See who can blow their object to the finish line the fastest.
Explanation of the Science Behind It: This activity demonstrates how air can be used to move objects. It introduces concepts of force and motion while being a fun and competitive game.
32. Parachute Play
Materials Needed:
- A small plastic parachute (you can make one using a plastic bag)
- Small lightweight toys (e.g., toy soldiers or action figures)
- String
Step-by-Step Instructions:
- Create a parachute by cutting a square piece from a plastic bag.
- Attach strings to each corner of the plastic square.
- Tie the strings together at the bottom and attach a small lightweight toy.
- Drop the parachute from a height and watch it float down.
Explanation of the Science Behind It: This experiment shows how air resistance works. The parachute slows down the fall of the toy by increasing air resistance, demonstrating how parachutes work to slow descent.
33. Windmill
Materials Needed:
- A small fan
- Lightweight pinwheels or homemade paper windmills
Step-by-Step Instructions:
- Place the pinwheels in front of the small fan.
- Turn on the fan and watch the pinwheels spin.
- Experiment with different speeds of the fan to see how it affects the spinning.
Explanation of the Science Behind It: This activity demonstrates how wind energy can be used to create motion. The air from the fan pushes against the blades of the pinwheel, causing it to spin and teaching about the transfer of energy.
34. Balloon-Powered Car
Materials Needed:
- A balloon
- A small toy car
- Tape
- A straw
Step-by-Step Instructions:
- Tape a straw to the top of the toy car.
- Inflate a balloon and pinch the end to keep the air inside.
- Attach the balloon to the straw without letting the air escape.
- Place the car on a flat surface and release the balloon.
Explanation of the Science Behind It: The air escaping from the balloon propels the car forward, demonstrating principles of air pressure and propulsion. This is a hands-on way to understand the basics of aerodynamics and mechanics.
These air-based experiments provide toddlers with engaging, hands-on opportunities to explore the properties of air and motion. Through play and observation, they can learn about the forces of physics in a fun and accessible way.
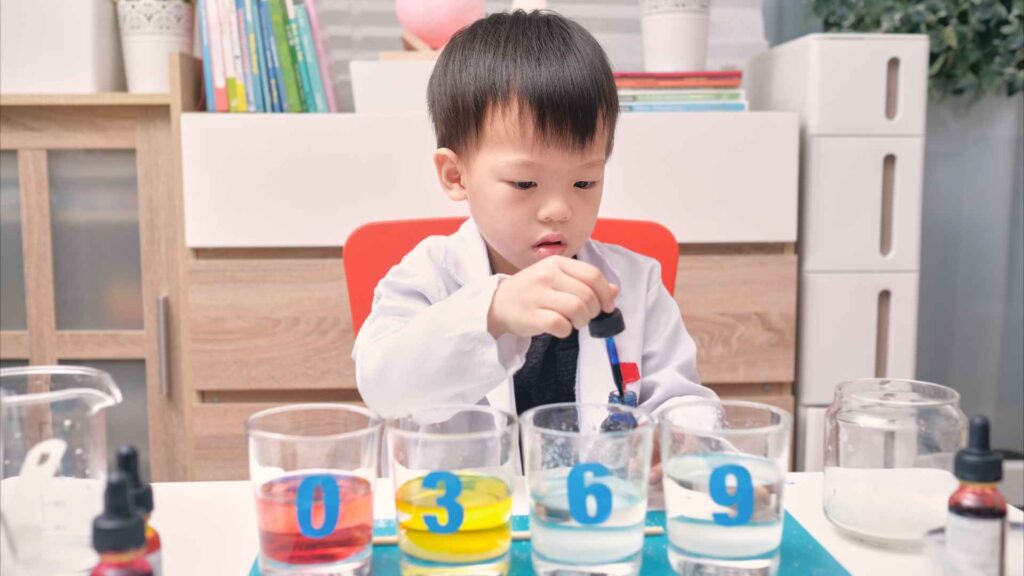
Fun with Light and Shadows
35. Shadow Art
Materials Needed:
- A flashlight or a lamp
- Paper
- Pencils or markers
- Small toys or objects
Step-by-Step Instructions:
- Set up the flashlight or lamp to shine on a flat surface.
- Place a piece of paper on the surface.
- Position a small toy or object between the light source and the paper to create a shadow.
- Trace the outline of the shadow on the paper.
- Let your toddler color in or decorate the shadow tracing.
Explanation of the Science Behind It: This activity introduces toddlers to the concept of shadows and how light interacts with objects. By observing how the shadows change when the objects or the light source moves, they can learn about light and perspective.
36. Sun Prints
Materials Needed:
- Construction paper
- Various objects (e.g., leaves, keys, toys)
- A sunny day
Step-by-Step Instructions:
- Place a piece of construction paper in a sunny spot outside.
- Arrange the objects on top of the paper.
- Leave the paper outside for a few hours.
- Remove the objects to reveal the sun prints left behind.
Explanation of the Science Behind It: The sun’s UV rays fade the exposed parts of the construction paper, while the areas covered by objects remain darker. This experiment demonstrates the effect of sunlight on materials and introduces concepts of light and shadow.
37. Shadow Puppets
Materials Needed:
- A flashlight or a lamp
- A blank wall or a large piece of white paper
- Your hands or cut-out shapes
Step-by-Step Instructions:
- Set up the flashlight or lamp to shine on the wall or the white paper.
- Use your hands or cut-out shapes to create shadow puppets on the wall.
- Experiment with different hand positions or shapes to make various shadow figures.
- Put on a shadow puppet show for your toddler.
Explanation of the Science Behind It: Shadow puppets teach toddlers about how light creates shadows and how the size and shape of shadows change based on the distance and angle of the objects from the light source.
38. Rainbow Refraction
Materials Needed:
- A clear glass of water
- A white piece of paper
- A sunny window or a flashlight
Step-by-Step Instructions:
- Fill a clear glass with water.
- Place the glass on the edge of a table or a windowsill so that it catches the sunlight.
- Hold the white piece of paper on the floor in the path of the sunlight that passes through the glass.
- Observe the rainbow that appears on the paper.
Explanation of the Science Behind It: The water in the glass refracts the sunlight, breaking it into its component colors and creating a rainbow. This experiment demonstrates the concept of light refraction and the spectrum of visible light.
39. Color Mixing with Light
Materials Needed:
- Flashlights
- Colored cellophane or colored plastic sheets (red, blue, yellow)
- Tape
Step-by-Step Instructions:
- Cover the lenses of the flashlights with different colors of cellophane or plastic sheets and tape them in place.
- Shine the flashlights on a white wall or a piece of white paper, overlapping the colors to mix them.
- Observe the new colors created by the overlapping lights.
Explanation of the Science Behind It: This experiment introduces toddlers to the concept of color mixing with light, which differs from mixing pigments. It shows how primary colors of light (red, green, blue) combine to create other colors.
40. Light and Shadow Maze
Materials Needed:
- A large cardboard box or a piece of cardboard
- Straws or sticks
- A flashlight
- Small toys or balls
Step-by-Step Instructions:
- Create a maze on the cardboard using straws or sticks as the walls.
- Place a small toy or ball at the start of the maze.
- Shine the flashlight on the maze to cast shadows.
- Move the flashlight around to see how the shadows change and try to guide the toy or ball through the maze using the light.
Explanation of the Science Behind It: This activity teaches toddlers about how light direction affects shadow formation and movement. It also enhances problem-solving skills as they navigate the maze using shadows.
These light and shadow experiments offer a fascinating way for toddlers to explore the principles of light and shadow. Through playful activities, they learn about reflection, refraction, and the behavior of light, fostering a deeper understanding of the world around them.
Fun with Air and Motion
41. Balloon Rocket
Materials Needed:
- Balloons
- String
- Tape
- A straw
- Two chairs
Step-by-Step Instructions:
- Tie one end of the string to the back of a chair.
- Thread the other end of the string through a straw and tie it to the other chair.
- Inflate a balloon but do not tie it off.
- Tape the balloon to the straw.
- Move the chairs apart so the string is taut.
- Let go of the balloon and watch it zoom along the string like a rocket.
Explanation of the Science Behind It: The air escaping from the balloon creates thrust, propelling the balloon forward along the string. This demonstrates Newton’s Third Law of Motion: for every action, there is an equal and opposite reaction.
42. Parachute Play
Materials Needed:
- A small plastic parachute (you can make one using a plastic bag)
- Small lightweight toys (e.g., toy soldiers or action figures)
- String
Step-by-Step Instructions:
- Create a parachute by cutting a square piece from a plastic bag.
- Attach strings to each corner of the plastic square.
- Tie the strings together at the bottom and attach a small lightweight toy.
- Drop the parachute from a height and watch it float down.
Explanation of the Science Behind It: This experiment shows how air resistance works. The parachute slows down the fall of the toy by increasing air resistance, demonstrating how parachutes work to slow descent.
43. Balloon-Powered Car
Materials Needed:
- A balloon
- A small toy car
- Tape
- A straw
Step-by-Step Instructions:
- Tape a straw to the top of the toy car.
- Inflate a balloon and pinch the end to keep the air inside.
- Attach the balloon to the straw without letting the air escape.
- Place the car on a flat surface and release the balloon.
Explanation of the Science Behind It: The air escaping from the balloon propels the car forward, demonstrating principles of air pressure and propulsion. This is a hands-on way to understand the basics of aerodynamics and mechanics.
44. Blowing Bubbles
Materials Needed:
- Bubble solution (you can make your own with water and dish soap)
- Bubble wands or straws
Step-by-Step Instructions:
- Pour the bubble solution into a shallow dish.
- Dip the bubble wand or the end of a straw into the solution.
- Blow gently to create bubbles.
- Observe the bubbles as they float and pop.
Explanation of the Science Behind It: Blowing bubbles helps toddlers understand surface tension and the properties of air. Bubbles form when air is trapped inside a thin film of soapy water, creating a sphere due to surface tension.
45. Pinwheel Spin
Materials Needed:
- A pinwheel
- A small fan or your breath
Step-by-Step Instructions:
- Hold the pinwheel in front of the small fan or blow on it.
- Watch the pinwheel spin as the air hits it.
- Experiment with different strengths of air to see how fast the pinwheel spins.
Explanation of the Science Behind It: The pinwheel spins because the moving air applies force to the blades, causing them to rotate. This demonstrates how air can be used to create motion and energy.
46. Paper Airplane Science
Materials Needed:
- Paper
- Markers or crayons (optional for decorating)
- A measuring tape
Step-by-Step Instructions:
- Fold a piece of paper into a paper airplane.
- Decorate the airplane with markers or crayons if desired.
- Fly the airplane and measure how far it travels.
- Try folding different designs and compare the distances they fly.
Explanation of the Science Behind It: This experiment introduces basic aerodynamics. Different airplane designs can affect the distance and stability of flight, teaching toddlers about lift, drag, and the forces acting on flying objects.
47. Windmill
Materials Needed:
- A small fan
- Lightweight pinwheels or homemade paper windmills
Step-by-Step Instructions:
- Place the pinwheels in front of the small fan.
- Turn on the fan and watch the pinwheels spin.
- Experiment with different speeds of the fan to see how it affects the spinning.
Explanation of the Science Behind It: This activity demonstrates how wind energy can be used to create motion. The air from the fan pushes against the blades of the pinwheel, causing it to spin and teaching about the transfer of energy.
48. Straw Blowing Race
Materials Needed:
- Straws
- Lightweight objects (e.g., cotton balls, pom-poms)
- A flat surface
Step-by-Step Instructions:
- Place a lightweight object at the starting line on a flat surface.
- Use a straw to blow the object across the surface.
- See who can blow their object to the finish line the fastest.
Explanation of the Science Behind It: This activity demonstrates how air can be used to move objects. It introduces concepts of force and motion while being a fun and competitive game.
These air and motion experiments are not only fun but also educational. They provide toddlers with hands-on opportunities to explore the properties of air and motion, fostering a deeper understanding of physics and mechanics through playful activities.
Conclusion
Science experiments for toddlers are a wonderful way to ignite their curiosity and foster a love for learning.
By engaging in these simple, safe, and fun activities, you’re not only providing hands-on learning experiences but also spending quality time with your child. These experiments help toddlers develop important skills such as observation, problem-solving, and critical thinking.
Remember, the goal is to make science an exciting adventure. Encourage your toddler to ask questions, make predictions, and explore the world around them. These early experiences can lay the foundation for a lifelong interest in science and discovery.
As you try these experiments, always prioritize safety and supervise your child closely. Adapt the activities to suit your child’s interests and developmental level. The key is to create a positive and enjoyable learning environment.
Keep experimenting, exploring, and having fun with science. The world is full of wonders waiting to be discovered, and you and your toddler can enjoy this journey of exploration together. Happy experimenting!
