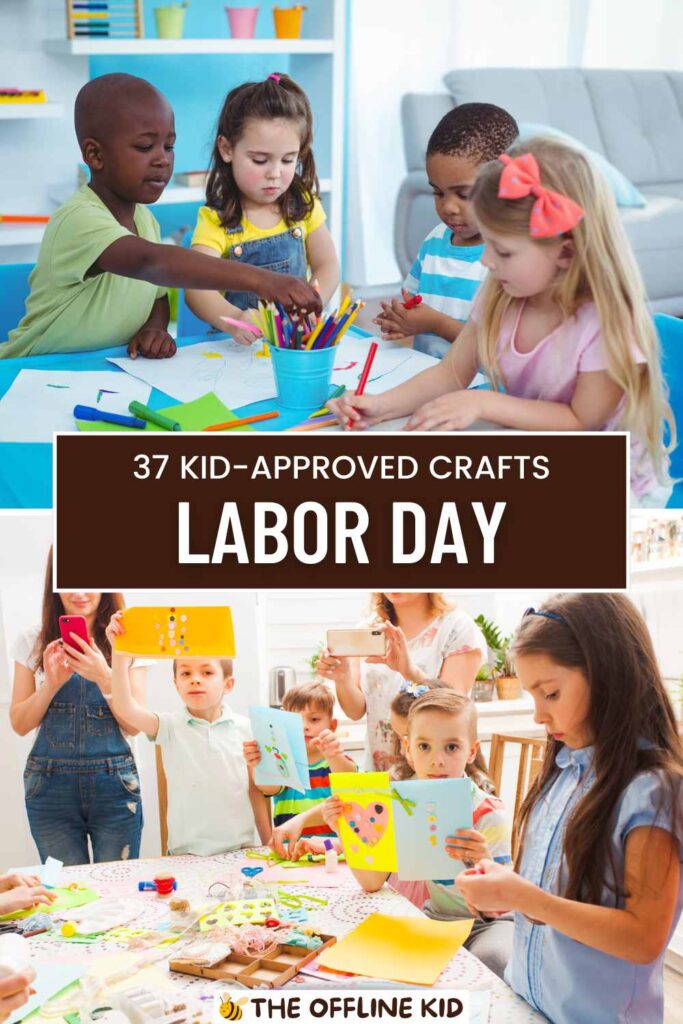
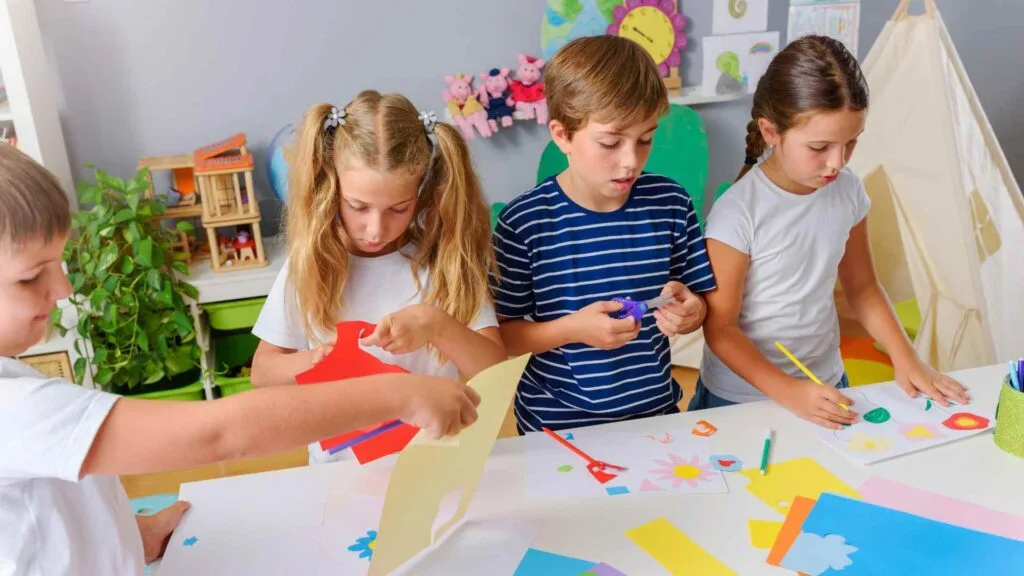
Celebrate Labor Day with your kids through fun and creative crafts!
This guide offers a variety of activities that are both educational and entertaining, perfect for a memorable holiday.
Red, White, and Blue Crafts
Patriotic Wind Socks
Materials Needed:
- Empty toilet paper rolls
- Red, white, and blue paint
- Paintbrushes
- Red, white, and blue streamers
- Glue
- String
- Hole punch
Step-by-Step Instructions:
- Paint the Roll: Let your kids paint the empty toilet paper rolls in patriotic colors. They can use red, white, and blue stripes or any pattern they like.
- Attach Streamers: Once the paint is dry, cut streamers into long strips. Glue these streamers inside one end of the painted roll so they hang down like a wind sock.
- Add the String: Punch two holes on the opposite end of the roll, thread a piece of string through the holes, and tie a knot to create a handle.
- Decorate: Let the kids add stars or other decorations to make their wind socks unique.
Tips for Variations:
- Use different sizes of rolls or even paper towel rolls for variety.
- Add glitter or stickers for extra sparkle.
American Flag Handprint Art
Materials Needed:
- White construction paper
- Red and blue paint
- Paintbrushes
- Markers or crayons
Step-by-Step Instructions:
- Prepare the Handprint: Paint your child’s hand with blue paint on the palm and red paint on the fingers.
- Make the Print: Press their hand onto the white construction paper, making sure to leave space for additional decorations.
- Create the Flag: Once the handprint is dry, use markers or crayons to add stars to the blue palm area and outline the red stripes on the fingers.
- Finish Up: Let your kids write “Happy Labor Day” or any other message on their artwork.
Display Ideas:
- Frame the handprint art and display it on the wall.
- Use it as a holiday card for family and friends.
Star-Spangled Banner Banners
Materials Needed:
- Red, white, and blue construction paper
- Star-shaped cookie cutters or templates
- Scissors
- Glue
- String or ribbon
- Hole punch
Step-by-Step Instructions:
- Cut Out Stars: Using the cookie cutters or templates, trace and cut out stars from the construction paper.
- Decorate: Let your kids decorate the stars with markers, glitter, or stickers.
- Assemble the Banner: Punch holes in the top of each star and thread them onto the string or ribbon.
- Hang It Up: Find a special place to hang the banner, such as a fireplace mantle or across a window.
Tips for Personalization:
- Write each family member’s name on a star.
- Add small flags or other patriotic symbols between the stars.

Crafts to Celebrate Workers
Thank You Cards for Community Helpers
Materials Needed:
- Blank cards or cardstock
- Markers, crayons, or colored pencils
- Stickers or stamps
- Envelopes
- Glitter glue (optional)
Step-by-Step Instructions:
- Choose a Helper: Talk with your kids about different community helpers such as firefighters, police officers, teachers, and nurses.
- Design the Card: Let your kids draw and color a picture of the chosen community helper on the front of the card.
- Write a Message: Help your kids write a thank-you message inside the card. Encourage them to express their gratitude and mention why they appreciate the helper.
- Decorate: Add stickers, stamps, or a touch of glitter glue to make the card extra special.
- Deliver: If possible, deliver the cards to local community helpers or mail them to show appreciation.
Ideas for Recipients:
- Local fire station
- Police department
- School staff
- Hospital or clinic
Career Hats
Materials Needed:
- Construction paper
- Scissors
- Glue
- Markers or crayons
- Stickers or other decorations
Step-by-Step Instructions:
- Choose a Career: Discuss different careers with your kids and let them choose one they find interesting.
- Create the Hat Base: Cut a strip of construction paper to fit around your child’s head and glue the ends together to form a band.
- Decorate the Hat: Cut additional pieces of construction paper to create the top of the hat (e.g., a firefighter’s helmet, a chef’s hat). Glue these pieces to the band.
- Add Details: Use markers, crayons, and stickers to add details to the hat. For example, draw a badge for a police officer’s hat or utensils for a chef’s hat.
- Wear and Role-Play: Let your kids wear their career hats and pretend to be community helpers.
Various Occupations to Represent:
- Firefighter
- Police officer
- Nurse
- Teacher
- Construction worker
Miniature Tool Kits
Materials Needed:
- Small boxes or containers
- Construction paper
- Scissors
- Glue
- Markers or crayons
Step-by-Step Instructions:
- Prepare the Box: Find small boxes or containers to use as the base for the tool kit.
- Create Tools: Cut out shapes of different tools from construction paper, such as hammers, wrenches, and screwdrivers.
- Decorate the Tools: Let your kids decorate the paper tools with markers or crayons.
- Assemble the Kit: Place the paper tools inside the box or container.
- Personalize: Encourage your kids to add their names or other decorations to their tool kits.
Tips for Safety:
- Make sure the paper tools are safe for younger children to handle.
- Supervise children while cutting and using glue.
These Labor Day crafts are a wonderful way to teach kids about the important roles that various workers play in our community.
By creating thank you cards, career hats, and miniature tool kits, children can express their appreciation and learn more about the world of work.
Outdoor Crafts
Labor Day Picnic Baskets
Materials Needed:
- Small baskets or boxes
- Construction paper
- Markers or crayons
- Glue
- Scissors
- Decorative items (ribbons, stickers, etc.)
Step-by-Step Instructions:
- Decorate the Basket: Let your kids use construction paper, markers, and stickers to decorate their picnic baskets. They can add patriotic colors and symbols like stars and stripes.
- Create a Handle: If the basket doesn’t have a handle, use a strip of construction paper or ribbon and glue it to the sides of the basket.
- Fill the Basket: Encourage your kids to fill their picnic baskets with their favorite snacks or small toys for a fun outdoor picnic.
Decorating Ideas:
- Add fabric or paper napkins with patriotic patterns.
- Use stickers or drawings of fruits and picnic foods to decorate the outside.
Nature Collage
Materials Needed:
- Cardboard or thick paper
- Glue
- Scissors
- Collected natural items (leaves, flowers, twigs, etc.)
Step-by-Step Instructions:
- Go on a Nature Walk: Take your kids on a walk to collect various natural items such as leaves, flowers, and small twigs.
- Create a Base: Cut a piece of cardboard or thick paper to the desired size for the collage.
- Design the Collage: Arrange the collected items on the cardboard to create a design or picture.
- Glue the Items: Once the design is set, glue the items onto the cardboard and let it dry completely.
- Display: Find a special place to display the nature collage, such as on the refrigerator or a bedroom wall.
Suggestions for Collecting Natural Items:
- Encourage kids to look for a variety of colors and textures.
- Make sure to only collect items that have fallen naturally to avoid harming plants.
Homemade Kites
Materials Needed:
- Large pieces of lightweight paper or fabric
- Wooden dowels or sticks
- String
- Glue or tape
- Markers or crayons
- Scissors
- Streamers or ribbons
Step-by-Step Instructions:
- Create the Frame: Cross two wooden dowels or sticks to form a cross shape and secure them with glue or tape.
- Attach the Sail: Cut a piece of lightweight paper or fabric to fit over the frame and attach it with glue or tape.
- Decorate the Kite: Let your kids decorate the kite with markers, crayons, and stickers. They can add patriotic symbols or their favorite designs.
- Add the Tail: Attach streamers or ribbons to the bottom of the kite to create a tail.
- Attach the String: Tie a piece of string to the center of the cross frame for flying the kite.
- Fly the Kite: Head outside to a park or open area and enjoy flying the homemade kites.
Tips for Flying:
- Choose a windy day for the best kite-flying experience.
- Make sure there are no obstacles like trees or power lines in the flying area.
These outdoor crafts provide a great way for kids to enjoy the holiday while being creative and spending time in nature.
From making picnic baskets and nature collages to flying homemade kites, these activities will keep kids entertained and engaged.
Educational Crafts
Labor Day History Scrapbook
Materials Needed:
- Scrapbook or blank notebook
- Construction paper
- Markers or crayons
- Scissors
- Glue
- Printed pictures or magazine cutouts
- Stickers
Step-by-Step Instructions:
- Introduce Labor Day: Explain the significance of Labor Day to your kids, including its history and why we celebrate it.
- Design the Cover: Let your kids design the cover of their scrapbook using markers, crayons, and stickers. They can write “Labor Day History” or any title they prefer.
- Create Pages: Help your kids create pages in the scrapbook that highlight different aspects of Labor Day, such as important events, key figures, and how it’s celebrated.
- Add Pictures: Print out pictures related to Labor Day or find suitable magazine cutouts and glue them onto the pages.
- Write Descriptions: Encourage your kids to write short descriptions or fun facts about each picture and event.
- Decorate: Use stickers and additional drawings to make the scrapbook colorful and engaging.
Ideas for Content:
- Origins of Labor Day
- Important labor movements
- Famous labor leaders
- Modern Labor Day celebrations
Community Helper Puppets
Materials Needed:
- Paper bags or socks
- Construction paper
- Markers or crayons
- Glue
- Scissors
- Fabric scraps (optional)
- Googly eyes (optional)
Step-by-Step Instructions:
- Choose a Helper: Discuss various community helpers with your kids and let them choose one to create a puppet for, such as a firefighter, police officer, or nurse.
- Create the Puppet Base: Use a paper bag or sock as the base for the puppet.
- Decorate the Puppet: Cut out shapes from construction paper to create the helper’s uniform, accessories, and facial features. Glue these onto the paper bag or sock.
- Add Details: Use markers, crayons, and optional googly eyes to add additional details to the puppet.
- Role-Play: Encourage your kids to use their puppets in role-playing scenarios to learn more about the roles of community helpers.
Role-Playing Ideas:
- Act out a day in the life of a community helper.
- Create stories where different helpers work together to solve problems.
Worker Bee Projects
Materials Needed:
- Yellow and black construction paper
- Scissors
- Glue
- Markers or crayons
- Googly eyes (optional)
- Pipe cleaners (optional)
Step-by-Step Instructions:
- Cut Out Bee Shapes: Cut out a large oval shape from yellow construction paper for the bee’s body and smaller ovals from black paper for the stripes.
- Assemble the Bee: Glue the black stripes onto the yellow body. Add a smaller black oval for the head.
- Add Features: Draw or glue on eyes, wings, and antennae. If using googly eyes or pipe cleaners, glue them onto the head for a fun 3D effect.
- Learn About Bees: Discuss with your kids how bees are important workers in nature, including their role in pollination and making honey.
Fun Facts About Bees:
- Bees are essential for pollinating flowers and crops.
- A worker bee can visit hundreds of flowers in a single day.
- Honey bees communicate through a special dance called the “waggle dance.”
These educational crafts not only provide fun and creative activities but also teach children valuable lessons about history, community roles, and nature. By making scrapbooks, puppets, and bee projects, kids can learn in an engaging and hands-on way.
Crafting Recipes
Labor Day Cupcake Decorating
Ingredients Needed:
- Cupcakes (homemade or store-bought)
- White frosting
- Red and blue food coloring
- Various sprinkles and decorations (stars, flags, etc.)
- Piping bags or plastic sandwich bags
Step-by-Step Instructions:
- Prepare the Frosting: Divide the white frosting into three bowls. Add red food coloring to one bowl and blue food coloring to another, leaving the third bowl white. Mix well until you achieve the desired colors.
- Fill the Piping Bags: Spoon the colored frosting into piping bags or plastic sandwich bags. If using sandwich bags, cut a small hole in one corner to create a makeshift piping bag.
- Decorate the Cupcakes: Let your kids pipe the frosting onto the cupcakes in various designs. Encourage them to be creative with swirls, stripes, and other patterns.
- Add Decorations: Provide a variety of sprinkles and other decorations for the kids to add to their cupcakes.
- Enjoy: Once decorated, let the cupcakes set for a few minutes before enjoying their delicious creations.
Decorating Ideas:
- Create American flag designs with red, white, and blue stripes.
- Use star-shaped sprinkles to add a patriotic touch.
- Add small paper flags as toppers.
Patriotic Fruit Kabobs
Ingredients Needed:
- Strawberries
- Blueberries
- Bananas
- Wooden skewers
Step-by-Step Instructions:
- Prepare the Fruit: Wash the strawberries and blueberries. Peel the bananas and cut them into bite-sized slices.
- Assemble the Kabobs: Let your kids thread the fruit onto the wooden skewers, alternating between strawberries, bananas, and blueberries to create a red, white, and blue pattern.
- Serve: Arrange the completed kabobs on a platter and serve them as a healthy and festive snack.
Presentation Ideas:
- Serve the kabobs on a platter lined with a red, white, and blue napkin.
- Arrange the kabobs in a vase or jar for a fun centerpiece.
DIY Lemonade Stand
Materials and Ingredients Needed:
- Lemonade (homemade or store-bought)
- Cups
- Ice
- Small table or stand
- Poster board
- Markers or crayons
- Decorations (balloons, streamers, etc.)
Step-by-Step Instructions:
- Set Up the Stand: Find a small table or stand to use as the base for your lemonade stand. Decorate it with streamers, balloons, and other festive items.
- Make Signs: Use the poster board and markers to create signs for the lemonade stand. Write messages like “Fresh Lemonade” and “Happy Labor Day” to attract customers.
- Prepare the Lemonade: If making homemade lemonade, follow your favorite recipe. Otherwise, pour store-bought lemonade into a pitcher and add ice.
- Serve the Lemonade: Let your kids serve cups of lemonade to family and friends. Encourage them to practice good customer service skills.
- Enjoy the Experience: Use the lemonade stand as an opportunity to teach kids about money handling, customer service, and the value of hard work.
Tips for Success:
- Set up the stand in a safe, high-traffic area like your front yard.
- Provide change if you decide to charge for the lemonade.
- Encourage kids to greet customers with a smile.
These crafting recipes combine creativity with delicious treats, making them a perfect addition to your Labor Day celebrations. From decorating cupcakes to making fruit kabobs and running a lemonade stand, these activities are sure to be a hit with kids of all ages.

Recycled Crafts
Bottle Cap Magnets
Materials Needed:
- Bottle caps
- Small magnets
- Glue (super glue or hot glue recommended)
- Paint and paintbrushes
- Stickers or small decorative items (optional)
Step-by-Step Instructions:
- Clean the Bottle Caps: Ensure the bottle caps are clean and dry.
- Paint the Caps: Let your kids paint the bottle caps in their favorite colors or create designs. Allow the paint to dry completely.
- Add Decorations: If desired, add stickers or small decorative items to the painted bottle caps.
- Attach the Magnets: Using glue, attach a small magnet to the inside of each bottle cap. Allow the glue to dry thoroughly.
- Display the Magnets: Once the glue is dry, use the bottle cap magnets to decorate your refrigerator or any magnetic surface.
Creative Ideas:
- Create themed sets of magnets, such as animals, flowers, or abstract designs.
- Use glitter paint for extra sparkle.
Tin Can Planters
Materials Needed:
- Empty tin cans
- Paint and paintbrushes
- Nail and hammer (for adult use)
- Soil
- Small plants or seeds
- Decorative items (ribbons, stickers, etc.)
Step-by-Step Instructions:
- Prepare the Cans: Clean the tin cans and remove any labels. Using a nail and hammer, create a few small drainage holes in the bottom of each can. (Adult supervision required.)
- Paint the Cans: Let your kids paint the tin cans in bright colors or patterns. Allow the paint to dry completely.
- Decorate: Add ribbons, stickers, or other decorative items to personalize the planters.
- Add Soil: Fill the cans with soil, leaving enough room at the top for planting.
- Plant: Let your kids plant small plants or seeds in the soil. Water the plants lightly.
- Display: Place the planters in a sunny spot and watch the plants grow.
Planting Suggestions:
- Choose easy-to-grow plants like herbs, flowers, or succulents.
- Label each planter with the plant’s name.
Cardboard Box Fire Trucks
Materials Needed:
- Empty cardboard boxes
- Red and black paint
- Paintbrushes
- Scissors
- Glue
- Construction paper
- Markers or crayons
Step-by-Step Instructions:
- Prepare the Box: Choose a cardboard box that is large enough for your child to sit in. Cut off the top flaps.
- Paint the Box: Let your kids paint the box red to resemble a fire truck. Paint four circles black to create the wheels and attach them to the sides of the box with glue.
- Create Details: Use construction paper to create windows, lights, and other details. Glue them onto the box.
- Add Features: Draw additional details with markers or crayons, such as ladders, hoses, and the fire truck’s number.
- Play: Once the fire truck is complete, let your kids use their imagination to play and pretend they are firefighters.
Decoration Ideas:
- Add reflective tape to mimic emergency lights.
- Create a fire station backdrop using additional boxes or construction paper.
These recycled crafts are not only fun and creative but also teach kids the importance of reusing and repurposing materials. By making bottle cap magnets, tin can planters, and cardboard box fire trucks, children can learn valuable lessons about sustainability while enjoying hands-on activities.
Crafts for Younger Kids
Handprint Bald Eagles
Materials Needed:
- White, brown, and yellow construction paper
- Scissors
- Glue
- Googly eyes (optional)
- Markers or crayons
Step-by-Step Instructions:
- Trace Handprints: Trace your child’s hand on white construction paper for the wings and on brown construction paper for the body. Cut out the handprints.
- Create the Eagle’s Body: Glue the brown handprint (body) onto a piece of construction paper.
- Add the Wings: Glue the white handprints (wings) on either side of the brown handprint, with the fingers pointing outward.
- Make the Head: Cut out a small circle from the white construction paper for the head. Draw or glue on googly eyes and use markers or crayons to add details like the beak and feathers.
- Attach the Head: Glue the head onto the top of the brown handprint body.
- Decorate: Let your child add any additional details they like, such as a background or extra feathers.
Display Ideas:
- Frame the handprint eagle and hang it on the wall.
- Use it as a centerpiece for your Labor Day table.
Labor Day Coloring Pages
Materials Needed:
- Printable Labor Day coloring pages (find online or create your own)
- Crayons, markers, or colored pencils
Step-by-Step Instructions:
- Find Coloring Pages: Search online for free printable Labor Day coloring pages or draw your own simple designs.
- Color the Pages: Let your kids color the pages using crayons, markers, or colored pencils. Encourage them to be creative with their color choices.
- Talk About Labor Day: While coloring, discuss the significance of Labor Day and why we celebrate it.
Coloring Tips:
- Offer a variety of coloring tools for different textures and effects.
- Encourage kids to share their finished pages with family and friends.
Paper Plate Awards
Materials Needed:
- Paper plates
- Markers or crayons
- Stickers
- Ribbon or yarn
- Scissors
- Glue
Step-by-Step Instructions:
- Design the Awards: Let your kids use markers or crayons to decorate the paper plates with award titles, such as “Best Helper,” “Super Star,” or “Hard Worker.”
- Add Decorations: Use stickers to add extra flair to the awards.
- Attach Ribbons: Cut a piece of ribbon or yarn and glue it to the back of the paper plate to create a hanging loop or a neck ribbon.
- Present the Awards: Hold a special awards ceremony where each family member or friend receives a paper plate award for their hard work and contributions.
Award Ideas:
- Create categories that recognize different skills and qualities.
- Make sure every participant gets an award to encourage positivity.
These crafts are perfect for younger kids and help them engage in the Labor Day celebration through creative activities. From handprint bald eagles and coloring pages to paper plate awards, these projects are simple, fun, and educational.