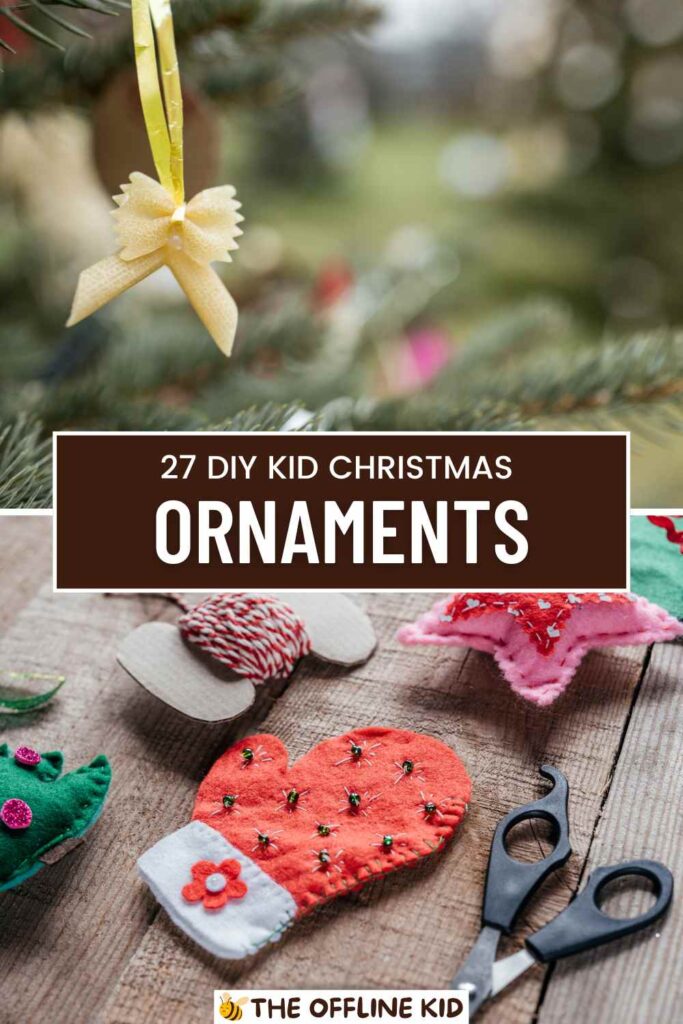
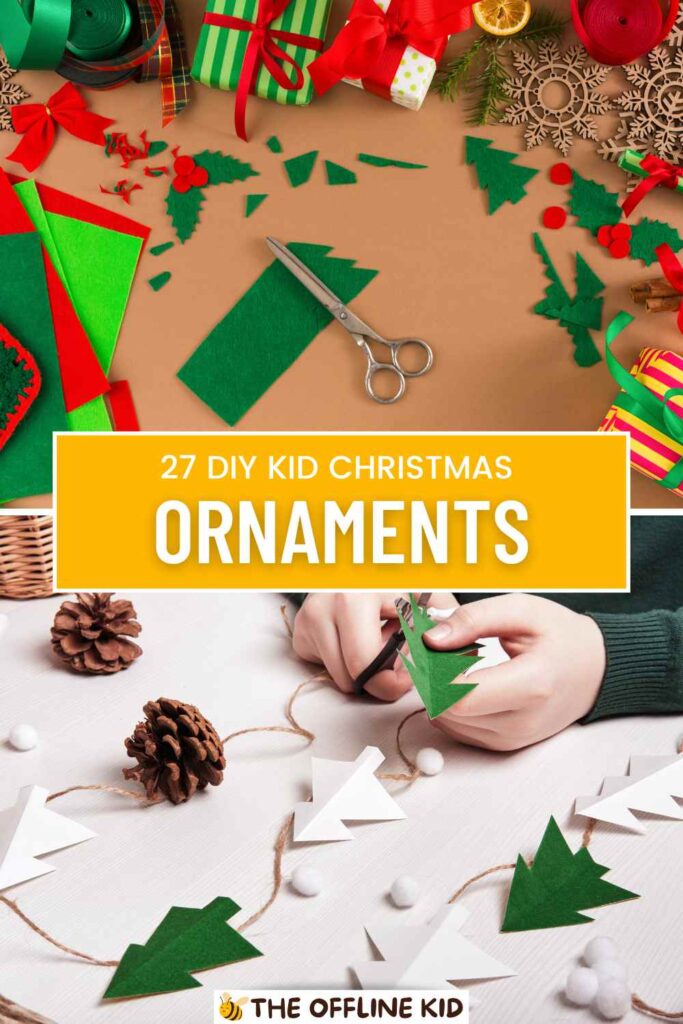
Creating DIY Christmas ornaments with kids is a delightful way to celebrate the holiday season.
This guide provides easy, fun, and creative holiday ornament ideas for kids that will keep your little ones engaged and excited, fostering their creativity and making lasting memories together.
Preparation and Safety
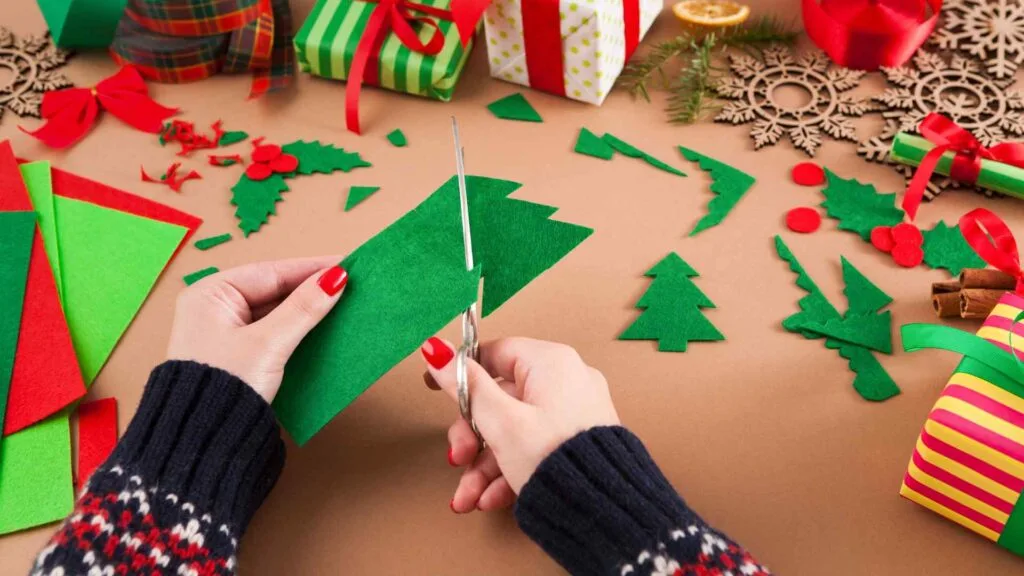
Gathering Materials
Before diving into the fun of making Christmas ornaments, it’s important to gather all the necessary materials.
Here’s a basic list to get you started:
- Craft Supplies:
- Construction paper
- Cardstock
- Popsicle sticks
- Pipe cleaners
- Beads
- Buttons
- Fabric scraps
- Felt sheets
- Glitter
- Glue (both stick and liquid)
- Paint (acrylic or washable)
- Brushes
- Scissors (safety scissors for younger children)
- Markers and crayons
- Ribbons and strings
- Small jars or containers
- Baking supplies (flour, salt, etc. for dough ornaments)
- Optional Supplies:
- Hot glue gun (for adult use only)
- Craft knives (for adult use only)
- Decorative elements like sequins, googly eyes, and stickers
- Natural items like pinecones, twigs, and dried fruit slices
Creating a Safe Crafting Environment
Safety is paramount when crafting with kids. Here are some tips to ensure a safe and enjoyable experience:
- Supervision: Always supervise children, especially when using scissors, glue guns, or any potentially hazardous materials.
- Workspace: Set up a dedicated crafting area, preferably with a table covered in newspaper or a disposable tablecloth to catch any spills or mess.
- Protective Gear: Have kids wear old clothes or aprons to protect their clothing from paint and glue.
- Safety Scissors: Ensure younger children use safety scissors to avoid any accidental cuts.
- Non-Toxic Supplies: Use non-toxic, child-friendly materials whenever possible to ensure their safety.
Tips for Age-Appropriate Crafting
Tailoring the complexity of the ornaments to the age and skill level of your children will make the crafting experience more enjoyable for everyone. Here are some suggestions:
- Toddlers and Preschoolers:
- Focus on simple projects like paper snowflakes, handprint ornaments, and basic painting.
- Provide pre-cut shapes and easy-to-use supplies like glue sticks and washable markers.
- Encourage them to explore textures and colors without worrying about perfection.
- Elementary School Kids:
- Introduce more detailed projects like salt dough ornaments, beaded crafts, and basic sewing with felt.
- Allow them to use child-safe scissors and simple painting techniques.
- Encourage them to follow step-by-step instructions while still adding their creative touches.
- Tweens and Teens:
- Challenge them with intricate projects like upcycled ornaments, photo frame ornaments, and nature-inspired crafts.
- Allow the use of hot glue guns and more advanced tools under supervision.
- Encourage them to take the lead in designing and creating their unique ornaments.
By preparing properly and ensuring a safe and suitable crafting environment, you’ll set the stage for a fun and memorable ornament-making session with your kids.
Classic Ornaments
Paper Snowflakes
Creating paper snowflakes is a timeless and simple craft that kids of all ages can enjoy.
Materials Needed:
- White or colored construction paper
- Scissors
- String or ribbon (for hanging)
Step-by-Step Instructions:
- Fold the Paper: Start with a square piece of paper. Fold it in half diagonally to form a triangle. Fold it in half again to form a smaller triangle.
- Create the Shape: Fold the triangle into thirds. This part can be tricky, so help younger children with this step.
- Cut Out Shapes: Using scissors, cut small shapes (triangles, circles, squares) along the edges of the folded paper. Be creative with the designs!
- Unfold the Snowflake: Carefully unfold the paper to reveal your unique snowflake design.
- Hang Your Snowflake: Attach a string or ribbon to one point of the snowflake and hang it on the tree or in a window.
Salt Dough Ornaments
Salt dough ornaments are not only fun to make but also create lasting keepsakes.
Materials Needed:
- 1 cup of flour
- 1/2 cup of salt
- 1/2 cup of water
- Rolling pin
- Cookie cutters
- Paint and brushes
- String or ribbon (for hanging)
Recipe and Instructions:
- Make the Dough: In a bowl, mix the flour and salt. Gradually add water and mix until a dough forms. Knead the dough until it’s smooth.
- Roll and Cut: Roll out the dough to about 1/4 inch thick. Use cookie cutters to cut out festive shapes like stars, trees, and hearts.
- Create Holes: Use a straw or skewer to make a small hole at the top of each ornament for hanging.
- Bake: Place the cutouts on a baking sheet and bake at 200°F (93°C) for 2-3 hours or until completely dry.
- Decorate: Once the ornaments are cool, paint them with festive colors and designs. Let the paint dry completely.
- Hang Your Ornament: Thread a piece of string or ribbon through the hole and hang the ornament on your tree.
Popsicle Stick Christmas Trees
These cute and easy Christmas trees are perfect for little hands.
Materials Needed:
- Popsicle sticks
- Green paint and brushes
- Glue
- Mini pom-poms, sequins, or buttons for decoration
- Star stickers or cutouts
- String or ribbon (for hanging)
Step-by-Step Instructions:
- Paint the Sticks: Paint the popsicle sticks green and let them dry completely.
- Assemble the Tree: Arrange three sticks into a triangle to form the tree. Glue them together and let the glue dry.
- Decorate the Tree: Glue mini pom-poms, sequins, or buttons onto the tree to represent ornaments. Add a star sticker or cutout at the top.
- Attach the Hanger: Glue a loop of string or ribbon to the back of the tree for hanging.
- Hang Your Tree: Once everything is dry, hang your popsicle stick Christmas tree on your tree or around the house.
These classic ornaments are a great way to start your DIY Christmas ornament crafting adventure. They are simple, fun, and provide a wonderful opportunity for kids to express their creativity while creating holiday memories.
Nature-Inspired Ornaments
Nature provides a wealth of materials perfect for creating beautiful and rustic Christmas ornaments. Here are some easy and delightful nature-inspired projects you can make with your kids.
Pinecone Ornaments
Pinecones are plentiful and make for beautiful, natural decorations.
Materials Needed:
- Pinecones (collected from outside)
- White or green paint
- Paintbrushes
- Glitter (optional)
- Glue and sequins or small beads
- String or ribbon (for hanging)
Step-by-Step Instructions:
- Clean the Pinecones: Shake off any loose debris and give them a quick rinse if needed. Let them dry completely.
- Paint the Pinecones: Use white or green paint to cover the pinecones. You can also leave them natural for a rustic look. Let the paint dry.
- Add Sparkle: If you like, sprinkle glitter on the wet paint for a snowy effect. Let it dry.
- Decorate: Use glue to attach sequins or beads to the tips of the pinecone scales for added decoration.
- Hang Your Ornament: Tie a loop of string or ribbon around the top of the pinecone. Hang them on your tree or use them as festive garlands.
Dried Orange Slices
Dried orange slices add a touch of color and a lovely scent to your tree.
Materials Needed:
- Oranges
- A sharp knife
- Baking sheet
- Parchment paper
- String or ribbon
Step-by-Step Instructions:
- Slice the Oranges: Slice the oranges into thin rounds, about 1/4 inch thick. Remove any seeds.
- Prep for Drying: Place the slices on a baking sheet lined with parchment paper. Make sure the slices do not touch.
- Bake: Bake at 200°F (93°C) for 2-4 hours, turning them halfway through. Keep an eye on them to ensure they don’t burn. They should be dry and slightly crispy.
- Cool and Decorate: Let the slices cool completely. Once cool, thread a piece of string or ribbon through the center of each slice.
- Hang Your Ornaments: Tie the slices onto your tree or use them as garlands around the house. The citrusy aroma will fill your home with a festive scent.
Twig Stars
Twig stars are simple to make and add a rustic charm to your Christmas decor.
Materials Needed:
- Small twigs or sticks
- Hot glue gun or strong glue
- String or ribbon
- Optional: paint, glitter, or beads for decoration
Step-by-Step Instructions:
- Collect Twigs: Gather twigs of varying lengths. You’ll need five twigs of equal length for each star.
- Arrange the Twigs: Lay the twigs in a star shape, overlapping the ends. Adjust them until you’re happy with the shape.
- Glue the Twigs: Use a hot glue gun or strong glue to secure the ends of the twigs together. Let the glue dry completely.
- Decorate: If desired, paint the stars or add glitter and beads for extra sparkle. Let the decorations dry.
- Attach a Hanger: Tie a piece of string or ribbon to one point of the star for hanging.
- Display Your Stars: Hang the twig stars on your tree or use them as part of your holiday decor. Their natural look will blend beautifully with any Christmas theme.
These nature-inspired ornaments are a great way to incorporate the beauty of the outdoors into your Christmas decorations. They are easy to make and perfect for teaching kids about the natural world while crafting together.

Upcycled Ornaments
Turning everyday items into Christmas ornaments is not only eco-friendly but also a fun challenge for kids. Here are some creative upcycled ornament ideas.
Bottle Cap Snowmen
Bottle cap snowmen are a charming way to recycle old bottle caps.
Materials Needed:
- Bottle caps (3 per snowman)
- White paint
- Black and orange markers or paint
- Glue
- Ribbon or string (for hanging)
- Small buttons or beads for decoration
Step-by-Step Instructions:
- Paint the Bottle Caps: Paint the inside of each bottle cap white and let them dry completely.
- Create the Snowman’s Face: Use a black marker or paint to draw eyes and a mouth on one of the bottle caps. Use an orange marker or paint to draw a small carrot nose.
- Assemble the Snowman: Glue three bottle caps in a vertical line, with the face at the top. Allow the glue to dry.
- Decorate: Glue small buttons or beads onto the middle and bottom bottle caps to represent buttons.
- Attach a Hanger: Glue a loop of ribbon or string to the back of the top bottle cap for hanging.
- Hang Your Snowman: Your bottle cap snowman is ready to be hung on the tree or used as a festive decoration around the house.
CD Ornaments
Old CDs can be transformed into dazzling Christmas ornaments.
Materials Needed:
- Old CDs or DVDs
- Glitter glue or glitter
- Stickers, sequins, or beads
- String or ribbon (for hanging)
- Glue
Step-by-Step Instructions:
- Decorate the CDs: Apply glitter glue or regular glue and sprinkle glitter over the CD. Let it dry completely.
- Add Decorations: Stick sequins, beads, or stickers onto the CD to create festive designs. Be as creative as you like!
- Create a Hanger: Thread a piece of string or ribbon through the hole in the center of the CD and tie a knot.
- Hang Your Ornament: Hang the decorated CD on your tree or in a window to catch the light and sparkle.
Toilet Paper Roll Reindeer
These cute reindeer are an excellent way to repurpose toilet paper rolls.
Materials Needed:
- Toilet paper rolls
- Brown paint or construction paper
- Googly eyes
- Red pom-poms (for noses)
- Pipe cleaners (for antlers)
- Glue
- Scissors
- String or ribbon (for hanging)
Step-by-Step Instructions:
- Paint or Cover the Rolls: Paint the toilet paper rolls brown or cover them with brown construction paper. Let them dry.
- Create the Reindeer’s Face: Glue googly eyes near the top of the roll and a red pom-pom below them for the nose.
- Add Antlers: Cut pipe cleaners into equal lengths and twist them into antler shapes. Glue or tape them to the inside of the top of the roll.
- Attach a Hanger: Glue a loop of string or ribbon to the back of the roll for hanging.
- Hang Your Reindeer: Your reindeer ornaments are ready to be displayed on your tree or around your home.
These upcycled ornaments are not only environmentally friendly but also provide a great opportunity to teach kids about recycling and creativity. Enjoy transforming everyday items into festive holiday decorations!
Personalized Ornaments
Creating personalized ornaments adds a special touch to your holiday decorations. These ornaments are unique and hold sentimental value, making them cherished keepsakes.
Photo Frame Ornaments
Photo frame ornaments are a lovely way to display cherished memories on your tree.
Materials Needed:
- Small photo frames or cardboard to make frames
- Photos
- Paint and brushes
- Glue
- String or ribbon (for hanging)
- Decorative items (stickers, sequins, etc.)
Step-by-Step Instructions:
- Prepare the Frames: If using cardboard, cut out small frames and paint them in festive colors. Let them dry.
- Add Photos: Cut photos to fit the frames and glue them in place.
- Decorate: Add stickers, sequins, or other decorations to the frames to make them more festive.
- Attach a Hanger: Glue a loop of string or ribbon to the back of the frame for hanging.
- Hang Your Frames: Place the photo frame ornaments on your tree to showcase your favorite memories.
Handprint Ornaments
Handprint ornaments capture a moment in time and make wonderful keepsakes.
Materials Needed:
- Air-dry clay or salt dough
- Rolling pin
- Paint and brushes
- String or ribbon (for hanging)
- Straw (for making holes)
Step-by-Step Instructions:
- Prepare the Dough: Roll out the air-dry clay or salt dough to about 1/4 inch thick.
- Make Handprints: Press your child’s hand firmly into the dough to create an impression.
- Cut Out Shapes: Use a round or shaped cookie cutter to cut around the handprint.
- Create Holes: Use a straw to make a hole at the top for hanging.
- Let Dry: Allow the ornament to dry completely, according to the clay or dough instructions.
- Paint and Decorate: Once dry, let your child paint the ornament. Add the child’s name and the date if desired.
- Attach a Hanger: Thread a piece of string or ribbon through the hole and tie a knot.
- Hang Your Handprint: Display the handprint ornament on your tree or give it as a gift to family members.
Initial Ornaments
Initial ornaments are simple yet elegant, perfect for personalizing your tree.
Materials Needed:
- Wooden or cardboard letters
- Paint and brushes
- Glitter, stickers, or other decorative items
- Glue
- String or ribbon (for hanging)
Step-by-Step Instructions:
- Paint the Letters: Paint the wooden or cardboard letters in festive colors and let them dry.
- Decorate: Add glitter, stickers, or other decorations to the letters to make them sparkle.
- Attach a Hanger: Glue a loop of string or ribbon to the back of each letter for hanging.
- Hang Your Initials: Hang the initial ornaments on your tree to represent each family member or friend.
These personalized ornaments not only add a special touch to your holiday decor but also create lasting memories and keepsakes that you can cherish for years to come. Enjoy making these unique decorations with your kids!
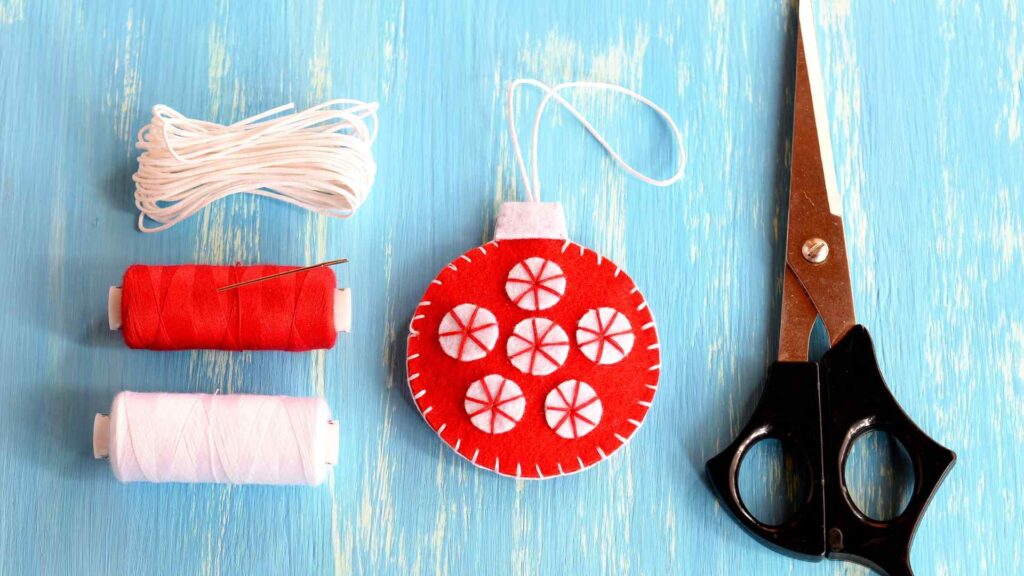
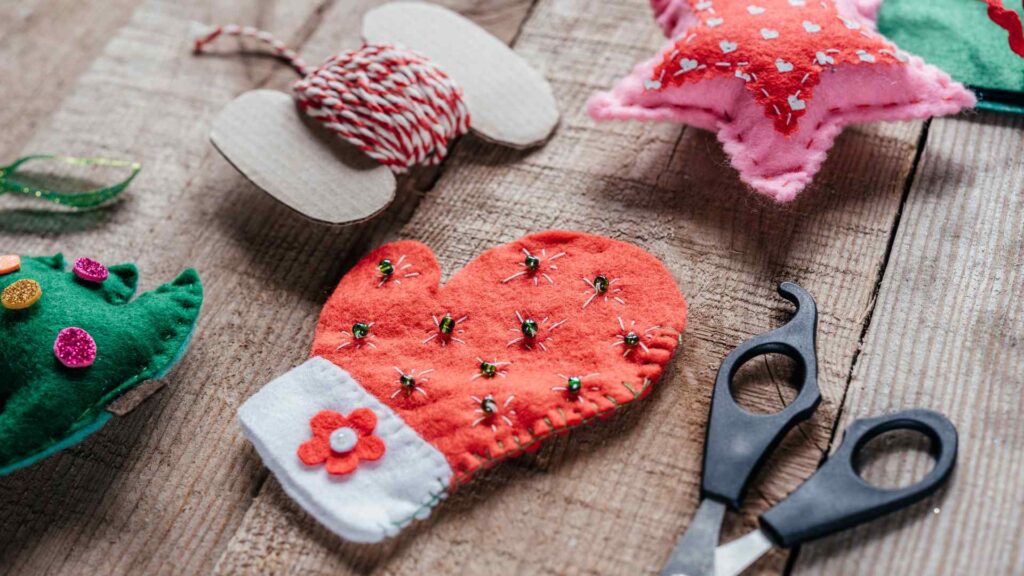
Fabric and Felt Ornaments
Fabric and felt ornaments are soft, colorful, and fun to make. These projects are perfect for kids of all ages and add a cozy touch to your Christmas tree.
Felt Christmas Trees
Felt Christmas trees are simple to make and can be decorated in various ways.
Materials Needed:
- Green felt sheets
- Scissors
- Glue or needle and thread
- Decorative items (buttons, beads, sequins)
- String or ribbon (for hanging)
Step-by-Step Instructions:
- Cut the Trees: Cut out Christmas tree shapes from the green felt. You can use a template to make this easier.
- Decorate: Glue or sew buttons, beads, and sequins onto the felt trees to resemble ornaments and lights.
- Create a Hanger: Attach a loop of string or ribbon to the top of each tree with glue or by sewing it on.
- Hang Your Trees: Display your felt Christmas trees on your tree or around your home.
Fabric Ball Ornaments
These fabric ball ornaments are a great way to use up fabric scraps and add a pop of color to your tree.
Materials Needed:
- Styrofoam balls
- Fabric scraps
- Pins or glue
- Ribbon (for hanging)
Step-by-Step Instructions:
- Cut Fabric Strips: Cut fabric scraps into strips or squares.
- Cover the Ball: Pin or glue the fabric pieces onto the styrofoam ball, overlapping them to cover the entire surface.
- Create a Hanger: Pin or glue a loop of ribbon to the top of the ball for hanging.
- Hang Your Ornaments: Add the fabric ball ornaments to your tree for a colorful and cozy touch.
Sock Snowman
Sock snowmen are adorable and easy to make, using materials you probably already have at home.
Materials Needed:
- White socks
- Rice or stuffing
- Rubber bands
- Buttons, felt, or fabric for decoration
- Glue
- String or ribbon (for hanging)
Step-by-Step Instructions:
- Fill the Sock: Fill a white sock with rice or stuffing, leaving enough room at the top to tie it off.
- Create the Body: Use rubber bands to section off the sock into three parts to form the snowman’s head and body.
- Decorate: Glue buttons onto the body for buttons, and add felt or fabric pieces for the nose, eyes, and scarf. You can also use small pieces of fabric to make a hat.
- Attach a Hanger: Glue or tie a loop of string or ribbon to the top of the sock for hanging.
- Hang Your Snowman: Display your sock snowman on your tree or around your home.
These fabric and felt ornaments are not only fun to make but also add a soft, handmade touch to your holiday decorations. They are perfect for crafting with kids and can be customized in countless ways. Enjoy creating these cozy ornaments together!
Ornaments with Beads and Buttons
Ornaments made with beads and buttons are colorful, shiny, and easy to make. These ornaments can add a touch of sparkle and whimsy to your Christmas tree.
Beaded Candy Canes
Beaded candy canes are simple and fun to make, perfect for kids of all ages.
Materials Needed:
- Red and white pony beads
- Pipe cleaners (preferably white or red)
- Scissors
Step-by-Step Instructions:
- Prepare the Pipe Cleaner: Cut the pipe cleaner to your desired candy cane length.
- String the Beads: Alternate stringing red and white beads onto the pipe cleaner until it is full, leaving a small section at each end.
- Shape the Candy Cane: Bend the beaded pipe cleaner into a candy cane shape.
- Secure the Ends: Twist the ends of the pipe cleaner to secure the beads in place.
- Hang Your Candy Cane: These can be hung directly on the tree by the hook of the candy cane.
Button Wreaths
Button wreaths are charming and customizable, using a variety of buttons in different sizes and colors.
Materials Needed:
- Green pipe cleaners
- Assorted buttons
- Ribbon (for hanging)
- Glue
Step-by-Step Instructions:
- Prepare the Pipe Cleaner: Shape the pipe cleaner into a circle to form the base of the wreath.
- Thread the Buttons: Thread buttons onto the pipe cleaner, pushing them tightly together. Use a variety of sizes and colors for a festive look.
- Complete the Wreath: Once the pipe cleaner is full, twist the ends together to close the circle.
- Add a Bow: Tie a piece of ribbon into a bow and glue it to the top of the wreath.
- Create a Hanger: Glue a loop of ribbon to the back of the wreath for hanging.
- Hang Your Wreath: Display your button wreath on the tree or as part of your holiday decor.
Pipe Cleaner and Bead Ornaments
These versatile ornaments can be shaped into various festive forms, such as stars, hearts, or snowflakes.
Materials Needed:
- Assorted beads
- Pipe cleaners
- Scissors
- String or ribbon (for hanging)
Step-by-Step Instructions:
- Shape the Pipe Cleaner: Shape the pipe cleaner into your desired form, such as a star, heart, or snowflake.
- Add Beads: String beads onto the pipe cleaner, pushing them closely together.
- Secure the Ends: Twist the ends of the pipe cleaner to secure the beads in place and maintain the shape.
- Create a Hanger: Attach a loop of string or ribbon to one end of the ornament for hanging.
- Hang Your Ornament: Display your beaded creations on the tree or around the house.
These bead and button ornaments are perfect for adding a bit of sparkle and color to your Christmas tree. They are easy to make and can be customized in countless ways to match your holiday decor. Enjoy making these shiny and whimsical ornaments with your kids!
Creative Painting Ornaments
Painting ornaments is a delightful way to let kids express their creativity. These projects are simple, fun, and result in beautiful decorations for your tree.
Painted Wood Slices
Wood slices are a rustic and natural canvas perfect for painting festive designs.
Materials Needed:
- Wood slices (available at craft stores)
- Acrylic paints
- Paintbrushes
- String or ribbon (for hanging)
- Varnish (optional, for sealing)
Step-by-Step Instructions:
- Prepare the Wood Slices: Ensure the wood slices are smooth and clean. Sand any rough edges if necessary.
- Paint Your Design: Let your kids paint festive designs on the wood slices, such as snowflakes, Christmas trees, or Santa faces. Allow the paint to dry completely.
- Seal the Paint (Optional): For added durability, apply a layer of varnish over the painted designs. Let it dry according to the varnish instructions.
- Create a Hanger: Attach a loop of string or ribbon to the top of each wood slice for hanging.
- Hang Your Ornaments: Display your painted wood slice ornaments on your tree or around your home.
Painted Glass Ornaments
Glass ornaments can be painted with intricate designs or simple patterns for a stunning effect.
Materials Needed:
- Clear glass or plastic ornaments
- Acrylic paints
- Paintbrushes
- Ribbon (for hanging)
Step-by-Step Instructions:
- Prepare the Ornaments: Remove the top hanger from the glass or plastic ornaments.
- Paint the Inside: Pour a small amount of paint inside the ornament and swirl it around to cover the interior. Let it dry upside down in a cup to drain excess paint.
- Paint the Outside: Use paintbrushes to add designs on the outside of the ornament. Allow the paint to dry completely.
- Replace the Hanger: Once the paint is dry, replace the top hanger.
- Add a Ribbon: Tie a piece of ribbon to the top for hanging.
- Hang Your Ornaments: Display your painted glass ornaments on your tree or as part of your holiday decor.
Painted Clay Ornaments
Clay ornaments offer a blank canvas for all kinds of creative designs.
Materials Needed:
- Air-dry clay or oven-bake clay
- Rolling pin
- Cookie cutters
- Acrylic paints
- Paintbrushes
- String or ribbon (for hanging)
- Straw (for making holes)
Step-by-Step Instructions:
- Prepare the Clay: Roll out the clay to about 1/4 inch thick.
- Cut Out Shapes: Use cookie cutters to cut out festive shapes from the clay.
- Create Holes: Use a straw to make a hole at the top of each ornament for hanging.
- Let the Clay Dry: Allow the clay to air dry according to the package instructions, or bake it if using oven-bake clay.
- Paint the Ornaments: Once dry, paint the clay ornaments with festive designs. Allow the paint to dry completely.
- Create a Hanger: Thread a piece of string or ribbon through the hole and tie a knot.
- Hang Your Ornaments: Display your painted clay ornaments on your tree or around your home.
These creative painting ornaments are a wonderful way to engage kids in holiday crafting. They offer endless possibilities for customization and result in beautiful, handmade decorations for your Christmas tree. Enjoy making these artistic ornaments together!
Ornaments with Glitter and Sparkles
Glitter and sparkles add a magical touch to Christmas ornaments, making them shine and shimmer on your tree. Here are some dazzling ornament ideas that kids will love to make.
Glitter Pinecones
Transform simple pinecones into sparkling ornaments with a touch of glitter.
Materials Needed:
- Pinecones
- Glue (liquid or spray adhesive)
- Glitter (various colors)
- String or ribbon (for hanging)
Step-by-Step Instructions:
- Apply Glue: Apply glue to the tips of the pinecone scales. You can use a brush to apply liquid glue or spray adhesive for even coverage.
- Add Glitter: Sprinkle glitter over the glued areas, covering the pinecone tips thoroughly. Shake off any excess glitter.
- Let Dry: Allow the glue and glitter to dry completely.
- Create a Hanger: Tie a piece of string or ribbon around the top of the pinecone for hanging.
- Hang Your Pinecones: Display your glittering pinecones on the tree or around your home for a sparkling effect.
Glitter Ball Ornaments
Clear ball ornaments filled with glitter make for a simple yet stunning decoration.
Materials Needed:
- Clear glass or plastic ball ornaments
- Clear glue or floor polish
- Fine glitter (various colors)
- Funnel
- Ribbon (for hanging)
Step-by-Step Instructions:
- Prepare the Ornaments: Remove the top hanger from the ball ornament.
- Add Glue: Pour a small amount of clear glue or floor polish into the ornament. Swirl it around to coat the inside completely.
- Add Glitter: Use a funnel to pour glitter into the ornament. Swirl and shake the ornament to cover the inside with glitter.
- Remove Excess: Pour out any excess glitter and let the ornament dry completely.
- Replace the Hanger: Once dry, replace the top hanger.
- Add a Ribbon: Tie a piece of ribbon to the top for hanging.
- Hang Your Ornaments: Display your glitter ball ornaments on your tree for a dazzling effect.
Sparkly Star Ornaments
These sparkly star ornaments are easy to make and add a touch of magic to your tree.
Materials Needed:
- Star-shaped cardboard cutouts or wooden stars
- Glue
- Glitter (various colors)
- Paintbrushes
- String or ribbon (for hanging)
Step-by-Step Instructions:
- Apply Glue: Use a paintbrush to apply glue evenly over the surface of the star.
- Add Glitter: Sprinkle glitter over the glued areas, covering the star completely. Shake off any excess glitter.
- Let Dry: Allow the glue and glitter to dry completely.
- Create a Hanger: Glue a loop of string or ribbon to the back of the star for hanging.
- Hang Your Stars: Display your sparkly star ornaments on the tree or around your home for a shimmering effect.
These glitter and sparkles ornaments are sure to add a touch of festive magic to your Christmas decor. They are easy to make and allow kids to explore their creativity with colors and glitter. Enjoy making these sparkling decorations together!
Ornaments with Food
Creating ornaments with food items is not only fun but also adds a delightful scent and unique charm to your Christmas tree. Here are some tasty and aromatic ornament ideas.
Popcorn Garland
Popcorn garlands are a classic and nostalgic Christmas decoration.
Materials Needed:
- Popcorn (plain, unsalted)
- Needle
- Thread or fishing line
- Cranberries (optional, for added color)
Step-by-Step Instructions:
- Prepare the Popcorn: Pop the popcorn and let it cool completely. Make sure it is plain and unsalted.
- Thread the Needle: Thread a needle with a long piece of thread or fishing line.
- String the Popcorn: Carefully push the needle through the center of each popcorn piece, sliding it down the thread. Add cranberries intermittently for added color.
- Create a Garland: Continue stringing the popcorn and cranberries until you reach your desired length.
- Secure the Ends: Tie knots at both ends of the thread to secure the popcorn in place.
- Hang Your Garland: Drape the popcorn garland around your tree or along a mantel for a festive touch.
Cinnamon Stick Ornaments
Cinnamon stick ornaments are easy to make and fill your home with a lovely, warm scent.
Materials Needed:
- Cinnamon sticks
- Twine or ribbon
- Hot glue gun
- Decorative items (buttons, beads, dried fruit slices)
Step-by-Step Instructions:
- Arrange the Sticks: Bundle a few cinnamon sticks together and tie them with twine or ribbon. Secure with a dab of hot glue if necessary.
- Decorate: Glue on buttons, beads, or dried fruit slices to decorate the cinnamon stick bundle.
- Create a Hanger: Tie a loop of twine or ribbon to the top of the bundle for hanging.
- Hang Your Ornaments: Display your cinnamon stick ornaments on the tree or around your home for a fragrant decoration.
Gingerbread Ornaments
Gingerbread ornaments are not only decorative but also smell delicious.
Materials Needed:
- Gingerbread dough (homemade or store-bought)
- Rolling pin
- Cookie cutters
- Straw (for making holes)
- String or ribbon (for hanging)
- Icing and decorations (optional)
Recipe and Instructions:
- Prepare the Dough: Roll out the gingerbread dough to about 1/4 inch thick.
- Cut Out Shapes: Use cookie cutters to cut out festive shapes from the dough.
- Create Holes: Use a straw to make a hole at the top of each ornament for hanging.
- Bake: Place the cutouts on a baking sheet and bake according to the dough recipe instructions. Let them cool completely.
- Decorate: Once cooled, decorate the gingerbread ornaments with icing and other decorations if desired.
- Create a Hanger: Thread a piece of string or ribbon through the hole and tie a knot.
- Hang Your Ornaments: Display your gingerbread ornaments on the tree or around your home for a charming and fragrant touch.
These food-based ornaments are a fun and festive way to decorate your tree. They bring a cozy, homemade feel to your Christmas decorations and fill your home with delightful scents. Enjoy making these tasty and aromatic ornaments with your kids!
Interactive and Sensory Ornaments
Interactive and sensory ornaments are perfect for engaging children’s senses and providing a hands-on experience. These ornaments are not only fun to make but also offer a unique way to explore textures, sounds, and visuals.
Jingle Bell Ornaments
Jingle bell ornaments add a delightful sound to your Christmas tree and are easy for kids to make.
Materials Needed:
- Jingle bells (various sizes)
- Pipe cleaners or ribbon
- Beads (optional, for added decoration)
Step-by-Step Instructions:
- Thread the Bells: Thread jingle bells onto a pipe cleaner or ribbon, spacing them out as desired.
- Add Beads (Optional): For extra decoration, add beads between the jingle bells.
- Secure the Ends: Twist the ends of the pipe cleaner together or tie a knot in the ribbon to secure the bells in place.
- Create a Hanger: Form a loop with the pipe cleaner or ribbon for hanging.
- Hang Your Ornaments: Display your jingle bell ornaments on the tree for a musical and festive touch.
Sensory Bag Ornaments
Sensory bag ornaments are great for younger children, providing a tactile experience.
Materials Needed:
- Small, clear plastic bags (like ziplock bags)
- Hair gel or liquid soap
- Glitter, sequins, or small beads
- Duct tape or colorful tape
- String or ribbon (for hanging)
Step-by-Step Instructions:
- Fill the Bags: Partially fill the plastic bags with hair gel or liquid soap.
- Add Decorations: Add glitter, sequins, or small beads to the bags.
- Seal and Secure: Seal the bags tightly and reinforce the edges with duct tape or colorful tape to prevent leaks.
- Create a Hanger: Attach a loop of string or ribbon to the top of the bag with tape.
- Hang Your Ornaments: Display your sensory bag ornaments on the tree or let kids play with them for a fun, tactile experience.
Snow Globe Ornaments
Snow globe ornaments are visually captivating and fun to shake, adding a whimsical element to your tree.
Materials Needed:
- Clear plastic or glass ornaments with removable tops
- Glitter
- Small plastic figures or decorations (like miniature trees or snowmen)
- Water or clear glue
- Funnel
- Hot glue gun (optional, for sealing)
Step-by-Step Instructions:
- Remove the Top: Take off the top of the clear ornament.
- Add Figures and Glitter: Use a funnel to add glitter and small plastic figures or decorations inside the ornament.
- Fill with Liquid: Fill the ornament with water or clear glue, leaving a small space at the top.
- Seal the Ornament: Replace the top of the ornament. If needed, use a hot glue gun to seal it tightly.
- Create a Hanger: Attach a loop of string or ribbon to the top for hanging.
- Shake and Hang: Shake the ornament gently to see the snow globe effect, then hang it on your tree for a magical touch.
These interactive and sensory ornaments are a fantastic way to engage children in the Christmas crafting process. They stimulate the senses and provide a hands-on, playful experience that kids will love. Enjoy making these unique ornaments together!
Displaying and Storing Your Ornaments
Once you and your kids have created a collection of beautiful DIY Christmas ornaments, it’s important to display them proudly and store them safely for future holiday seasons.
Creative Ways to Display Homemade Ornaments
On the Christmas Tree:
- Traditional Hanging: Use hooks or ribbons to hang ornaments on the tree. Mix them with store-bought ornaments for a personal touch.
- Themed Sections: Create themed sections on your tree, grouping similar ornaments together, such as nature-inspired ornaments on one side and glitter ornaments on another.
- Family Tree: Dedicate a smaller tree to only homemade ornaments, creating a family tree that showcases your crafting efforts.
Around the House:
- Garlands: String ornaments together to create festive garlands. Hang them along mantels, staircases, or windows.
- Wreaths: Attach small ornaments to a plain wreath for a personalized holiday decoration.
- Centerpieces: Incorporate homemade ornaments into table centerpieces. Fill a clear vase or bowl with ornaments for a colorful and festive look.
- Window Displays: Hang ornaments in windows using suction cups or hooks, allowing light to shine through them and highlight their beauty.
Tips for Storing Ornaments to Preserve Them
Preparation for Storage:
- Clean and Dry: Ensure all ornaments are clean and dry before storing them. Remove any dust or debris.
- Repair Damage: Fix any broken or damaged ornaments before storing them. This prevents further damage and keeps your collection intact.
Storage Methods:
- Individual Wrapping: Wrap each ornament in tissue paper, bubble wrap, or soft cloth to protect them from scratches and breakage.
- Compartments: Use storage boxes with compartments to keep ornaments separated and organized. Egg cartons or wine boxes can be repurposed for smaller ornaments.
- Labeling: Label storage boxes with the type of ornaments inside, making it easier to find specific ones next year.
- Climate Control: Store ornaments in a cool, dry place to prevent damage from heat or moisture. Avoid attics or basements if they are prone to extreme temperatures or humidity.
Special Considerations:
- Fragile Ornaments: Place delicate or fragile ornaments in sturdy containers with extra padding to prevent breakage.
- Heirloom Ornaments: Store valuable or sentimental ornaments separately in a safe place, ensuring they are well-protected.
By displaying your homemade ornaments creatively and storing them properly, you can enjoy your handcrafted treasures for many holiday seasons to come. These tips will help preserve your hard work and create lasting memories with your beautiful DIY Christmas ornaments.
Conclusion
Crafting DIY Christmas ornaments with kids is a joyful and rewarding activity that brings families closer together. It fosters creativity, patience, and fine motor skills while creating lasting memories and beautiful decorations. Here’s a quick recap of what we’ve covered:
- Preparation and Safety: Gather all necessary materials, create a safe crafting environment, and tailor projects to the age and skill level of your kids.
- Classic Ornaments: Simple, timeless projects like paper snowflakes, salt dough ornaments, and popsicle stick Christmas trees.
- Nature-Inspired Ornaments: Using natural materials to create pinecone ornaments, dried orange slices, and twig stars.
- Upcycled Ornaments: Turning everyday items into festive decorations like bottle cap snowmen, CD ornaments, and toilet paper roll reindeer.
- Personalized Ornaments: Adding a special touch with photo frame ornaments, handprint ornaments, and initial ornaments.
- Fabric and Felt Ornaments: Soft and cozy projects like felt Christmas trees, fabric ball ornaments, and sock snowmen.
- Ornaments with Beads and Buttons: Colorful and shiny creations such as beaded candy canes, button wreaths, and pipe cleaner and bead ornaments.
- Creative Painting Ornaments: Artistic projects like painted wood slices, glass ornaments, and clay ornaments.
- Ornaments with Glitter and Sparkles: Adding a magical touch with glitter pinecones, glitter ball ornaments, and sparkly star ornaments.
- Ornaments with Food: Deliciously scented decorations like popcorn garlands, cinnamon stick ornaments, and gingerbread ornaments.
- Interactive and Sensory Ornaments: Engaging the senses with jingle bell ornaments, sensory bag ornaments, and snow globe ornaments.
- Displaying and Storing Your Ornaments: Creative ways to display your creations and tips for storing them safely for future holidays.
Making Christmas ornaments is more than just a craft; it’s an opportunity to bond with your children, nurture their creativity, and create cherished family traditions. Each ornament you make together holds a story and a memory, turning your Christmas tree into a gallery of family love and joy.
Final Thoughts and Holiday Wishes
As you embark on your ornament-making journey, remember that the process is just as important as the finished product. Enjoy the time spent together, laugh at the little mishaps, and celebrate the creativity and effort that goes into each handmade decoration.
May your holidays be filled with warmth, joy, and the sparkle of your beautiful DIY ornaments. Happy crafting and Merry Christmas!