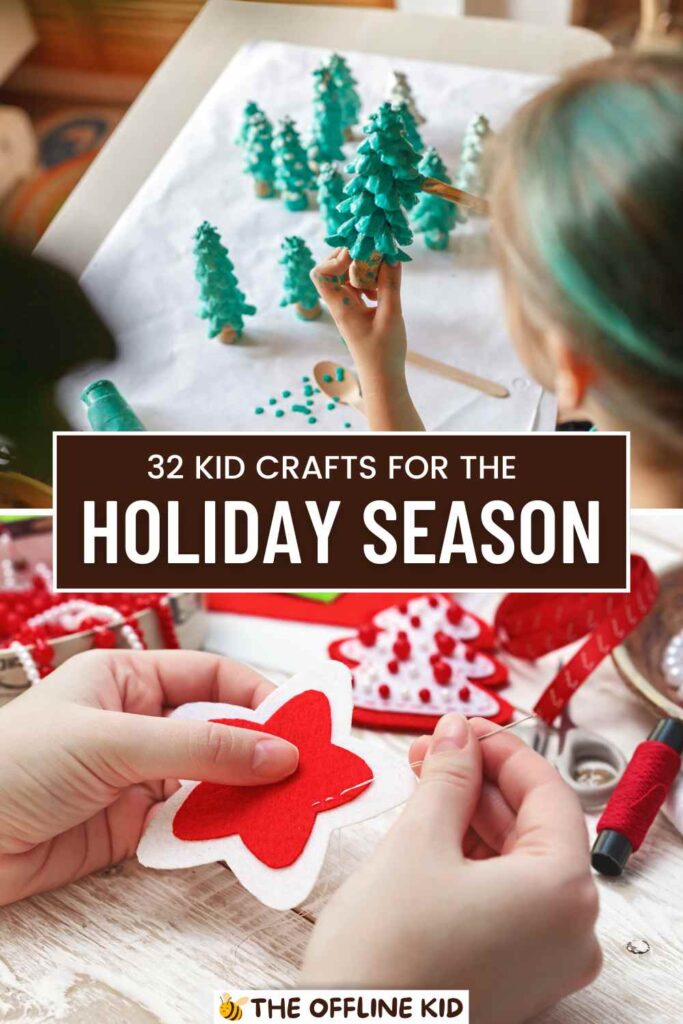
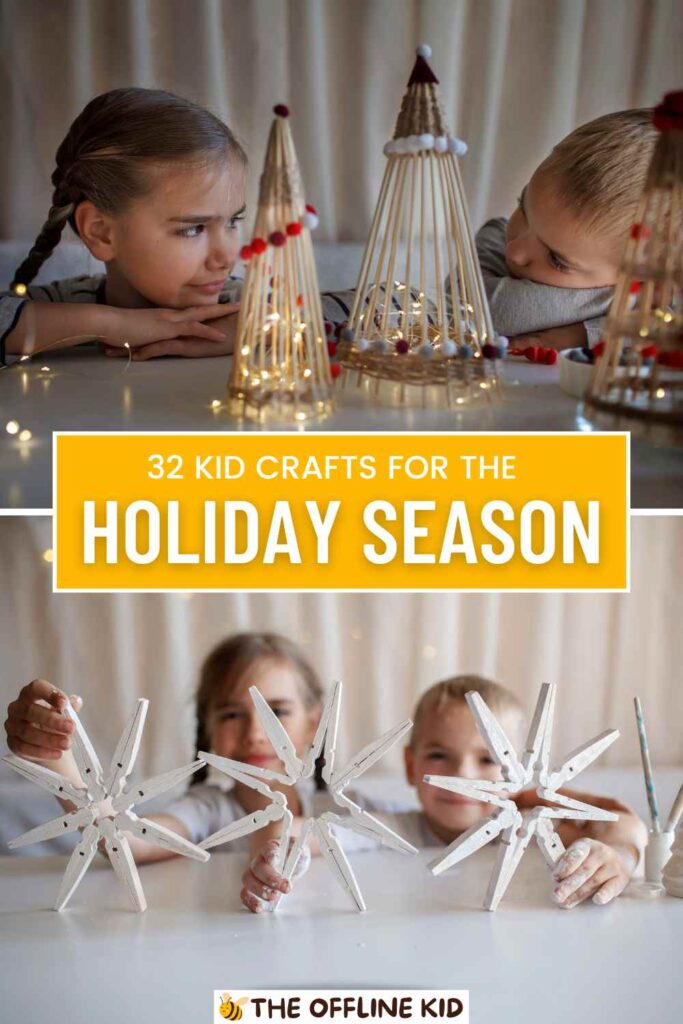
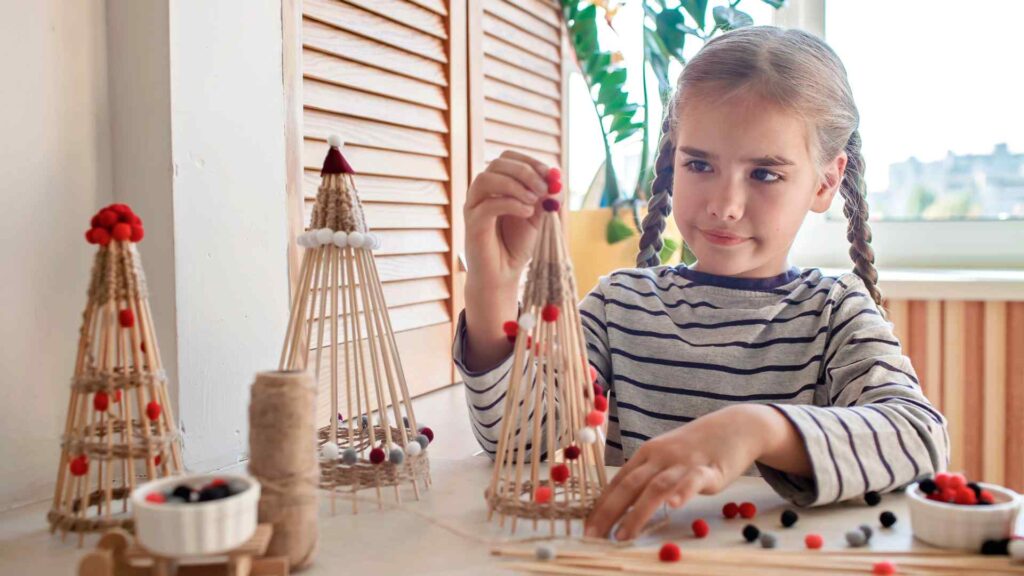
Dive into our ultimate guide packed with fun and festive Christmas crafts for kids.
From paper snowflakes to gingerbread houses, these creative projects will bring joy and holiday spirit to your home.
Paper Crafts
Paper Snowflakes
Creating paper snowflakes is a classic and simple Christmas craft that kids of all ages can enjoy. Here’s how to make beautiful snowflakes to decorate your home.
Materials Needed:
- White paper or colored construction paper
- Scissors
- Glitter (optional)
- Glue (optional)
Instructions:
- Fold the Paper: Start with a square piece of paper. Fold it in half diagonally to form a triangle. Fold the triangle in half again to form a smaller triangle.
- Create Triangular Folds: Fold the triangle into thirds, bringing the left and right points across the center to meet. You may need to adjust the folds slightly to make them even.
- Trim Excess Paper: Cut off the extra points at the bottom of the folded paper so you’re left with a neat triangle.
- Cut Out Shapes: Using scissors, cut small shapes out along the edges of the folded paper. Be creative with your designs—cut triangles, circles, or other shapes.
- Unfold the Snowflake: Carefully unfold the paper to reveal your snowflake. Each one will be unique!
- Add Glitter (Optional): If you want to add some sparkle, lightly brush glue on parts of your snowflake and sprinkle glitter over it.
Christmas Cards
Creating personalized Christmas cards is a wonderful way for kids to express their creativity and spread holiday cheer.
Materials Needed:
- Blank cards or cardstock
- Markers, crayons, or colored pencils
- Stickers, glitter, and other decorations
- Glue
- Scissors
Instructions:
- Design the Front: Let your kids draw and color festive designs on the front of the card. Ideas include Christmas trees, snowmen, Santa Claus, or reindeer.
- Add Decorations: Use stickers, glitter, and other decorations to enhance the card’s design. Encourage kids to be creative!
- Write a Message: Help your child write a heartfelt message inside the card. This could be a simple “Merry Christmas!” or a longer, more personal note.
- Personalize: Add any additional touches, such as a family photo or a small piece of artwork, to make the card extra special.
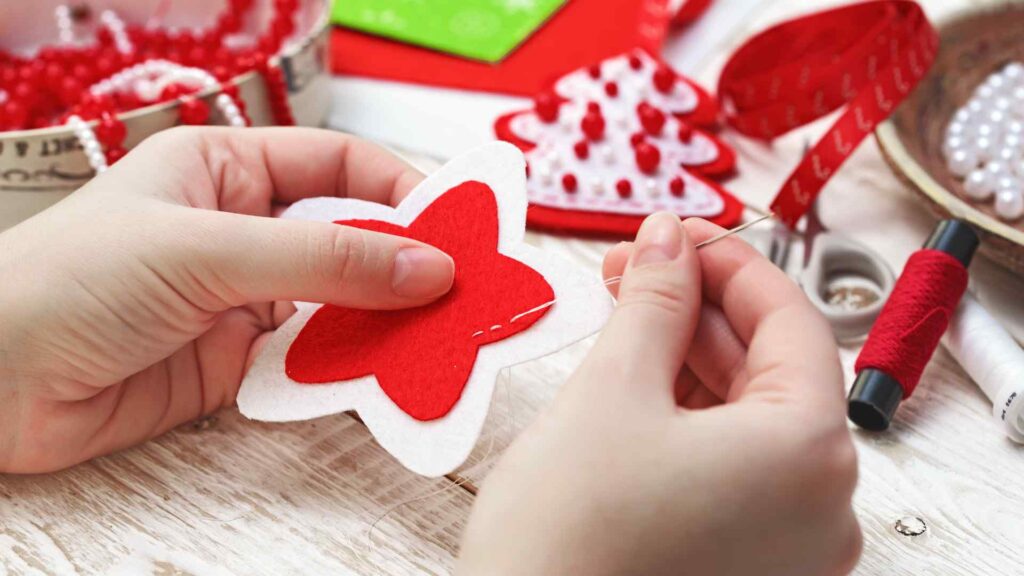
Paper Ornaments
Paper ornaments are easy to make and can be customized to match your Christmas decor.
Materials Needed:
- Colored construction paper
- Scissors
- Glue
- Ribbon or string
- Markers and stickers for decorating
Instructions:
- Choose a Shape: Decide on the shapes for your ornaments, such as stars, circles, or hearts. Draw and cut these shapes out of construction paper.
- Decorate: Let your kids decorate the shapes using markers, stickers, and other craft supplies.
- Assemble the Ornament: Once decorated, glue two identical shapes together with a piece of ribbon or string sandwiched between them for hanging.
- Hang on the Tree: Allow the glue to dry completely, then hang the ornaments on your Christmas tree or around your home.
Advent Calendars
Creating a homemade advent calendar is a fun way to count down the days until Christmas.
Materials Needed:
- Large sheet of cardboard or poster board
- Small paper bags or envelopes
- Number stickers or markers
- Glue or tape
- Small treats or notes for each day
Instructions:
- Prepare the Base: Cut a large sheet of cardboard or poster board to your desired size. This will be the base of your advent calendar.
- Attach the Bags or Envelopes: Arrange and glue small paper bags or envelopes onto the base, ensuring you have one for each day leading up to Christmas.
- Number Each Day: Use number stickers or markers to label each bag or envelope with the dates from December 1st to 24th.
- Fill with Surprises: Place a small treat, toy, or note inside each bag or envelope.
- Decorate: Decorate the advent calendar with holiday-themed drawings, stickers, or other embellishments.
- Display: Hang your advent calendar in a prominent place and enjoy opening a new surprise each day!
These paper crafts are not only fun and easy but also provide a wonderful opportunity for kids to develop their creativity and enjoy the festive season.

Nature-Inspired Crafts
Pinecone Ornaments
Pinecone ornaments are a beautiful way to bring a touch of nature into your Christmas decor. They’re easy to make and can be customized in many ways.
Materials Needed:
- Pinecones (collected from outside or purchased)
- Paint (white, gold, silver, or any festive color)
- Glitter (optional)
- Ribbon or string
- Glue
- Small decorative items (e.g., beads, tiny bells)
Instructions:
- Clean the Pinecones: If you’ve collected pinecones from outside, make sure to clean them thoroughly. You can rinse them in water and let them dry completely.
- Paint the Pinecones: Using a paintbrush, coat the pinecones with paint. You can paint them solid colors or create an ombre effect. Let the paint dry.
- Add Glitter (Optional): If you want to add some sparkle, apply a thin layer of glue to the tips of the pinecone scales and sprinkle glitter over them.
- Attach Ribbon: Cut a piece of ribbon or string and tie it around the top of the pinecone. Secure it with a dab of glue to create a loop for hanging.
- Decorate: Add small decorative items like beads or tiny bells using glue. Let everything dry completely.
- Hang on the Tree: Once dry, your pinecone ornaments are ready to hang on the Christmas tree or around your home.
Twig Stars
Twig stars are rustic and charming decorations that kids can help create. They’re perfect for adding a natural touch to your holiday decor.
Materials Needed:
- Twigs (collected from outside)
- String or twine
- Glue
- Paint (optional)
- Glitter (optional)
Instructions:
- Collect Twigs: Gather straight twigs from your yard or a park. Try to find twigs of similar thickness and length.
- Create the Star Shape: Arrange five twigs into a star shape. Use glue to secure the points where the twigs intersect. Let the glue dry.
- Tie with String: For extra stability, tie the intersections with string or twine. This also adds a rustic look.
- Decorate (Optional): You can leave the twig stars natural or paint them in festive colors. Add glitter for extra sparkle if desired.
- Hang the Stars: Attach a piece of string or twine to the top point of the star for hanging. Display your twig stars on the Christmas tree or around your home.
Leaf Garlands
Leaf garlands are a fun and eco-friendly way to decorate for the holidays. Kids will love collecting leaves and turning them into festive decor.
Materials Needed:
- Leaves (collected from outside)
- String or twine
- Glue
- Paint (optional)
- Glitter (optional)
Instructions:
- Collect and Prepare Leaves: Gather a variety of leaves in different shapes and sizes. Make sure they are clean and dry.
- Preserve the Leaves: To keep the leaves from becoming brittle, you can press them between the pages of a heavy book for a few days. Alternatively, use a mixture of glycerin and water to soak the leaves for a few days.
- Decorate the Leaves (Optional): Paint the leaves in festive colors or add glitter. Let them dry completely.
- Create the Garland: Cut a piece of string or twine to your desired length. Using glue, attach the leaves to the string, spacing them evenly.
- Hang the Garland: Once all the leaves are attached and the glue is dry, hang the garland in a prominent place in your home, such as over a fireplace, along a staircase, or across a window.
These nature-inspired crafts are not only environmentally friendly but also provide a great opportunity for kids to connect with nature and enjoy the beauty of the season.
Edible Crafts
Gingerbread Houses
Building and decorating gingerbread houses is a timeless holiday tradition. This activity is perfect for kids and adults alike, offering endless opportunities for creativity.
Materials Needed:
- Gingerbread house kit (or homemade gingerbread pieces)
- Royal icing (for assembling and decorating)
- Various candies (gumdrops, candy canes, chocolate buttons, etc.)
- Small decorative items (sprinkles, edible glitter)
Instructions:
- Prepare the Gingerbread Pieces: If using a kit, follow the instructions to prepare the pieces. If making from scratch, bake and cut out the gingerbread pieces in advance.
- Assemble the House: Use royal icing to assemble the walls and roof of the house. Allow the icing to dry and harden to ensure stability.
- Decorate: Let your kids go wild with decorating! Use various candies and icing to create doors, windows, and other features. Add sprinkles and edible glitter for extra flair.
- Display or Eat: Once decorated, gingerbread houses can be used as festive decor or enjoyed as a tasty treat.
Christmas Cookies
Baking and decorating Christmas cookies is a fun and delicious way to get into the holiday spirit. Here are some simple ideas for festive cookies.
Materials Needed:
- Cookie dough (store-bought or homemade)
- Cookie cutters (Christmas-themed shapes)
- Icing (various colors)
- Sprinkles and other decorations
Instructions:
- Prepare the Dough: Roll out the cookie dough on a floured surface. Use cookie cutters to cut out festive shapes like stars, trees, and gingerbread men.
- Bake the Cookies: Place the cookies on a baking sheet and bake according to the recipe’s instructions. Allow them to cool completely.
- Decorate: Let the kids decorate the cookies using icing, sprinkles, and other edible decorations. Encourage them to be creative with their designs.
- Enjoy and Share: Enjoy the cookies with family and friends or package them as gifts.
Candy Cane Reindeer
Candy cane reindeer are a simple and adorable craft that kids can make and give as gifts or use as decorations.
Materials Needed:
- Candy canes
- Googly eyes
- Small red pom-poms (for noses)
- Brown pipe cleaners
- Glue
Instructions:
- Attach the Eyes and Nose: Glue two googly eyes near the curved part of the candy cane. Glue a red pom-pom below the eyes to create the reindeer’s nose.
- Create Antlers: Cut a brown pipe cleaner in half. Twist each half around the curved part of the candy cane to create antlers. You can shape the ends to look more like antlers.
- Add Finishing Touches: Let the glue dry completely. You can also add a small ribbon or bow around the candy cane for extra decoration.
- Display or Gift: Use the candy cane reindeer as decorations on your Christmas tree or give them as cute, edible gifts.
These edible crafts are not only fun to make but also provide delicious treats for the holiday season. They offer a perfect combination of creativity and enjoyment, making your Christmas celebrations even more special.
DIY Christmas Decorations
Salt Dough Ornaments
Salt dough ornaments are a fantastic way for kids to create lasting Christmas decorations. They’re easy to make and can be personalized in many ways.
Materials Needed:
- 4 cups all-purpose flour
- 1 cup salt
- 1.5 cups warm water
- Rolling pin
- Cookie cutters (Christmas shapes)
- Straw (for making holes)
- Paint and brushes
- Glitter (optional)
- Ribbon or string
Instructions:
- Make the Dough: In a large bowl, mix the flour and salt. Gradually add warm water and stir until a dough forms. Knead the dough until it’s smooth.
- Roll Out the Dough: On a floured surface, roll out the dough to about 1/4 inch thick.
- Cut Out Shapes: Use cookie cutters to cut out shapes from the dough. Use a straw to make a small hole at the top of each ornament for hanging.
- Bake the Ornaments: Place the shapes on a baking sheet and bake at 250°F (120°C) for 2-3 hours, or until completely dry and hard. Let them cool.
- Decorate: Paint the ornaments and add glitter if desired. Let the paint dry completely.
- Add Ribbon: Thread a piece of ribbon or string through the hole and tie a knot to create a loop for hanging.
- Hang on the Tree: Your salt dough ornaments are ready to hang on the Christmas tree or around your home.
Christmas Wreaths
Creating homemade Christmas wreaths is a fun and festive activity. Kids can help gather materials and decorate the wreaths.
Materials Needed:
- Wreath form (styrofoam, wire, or grapevine)
- Fresh or faux greenery (pine, holly, ivy)
- Floral wire
- Ribbon
- Decorative items (pinecones, berries, ornaments)
- Glue gun
Instructions:
- Prepare the Wreath Form: Choose a wreath form that suits your style and size preference.
- Attach Greenery: Use floral wire to attach greenery to the wreath form. Layer different types of greenery for a fuller look.
- Add Decorations: Glue or wire on additional decorative items like pinecones, berries, and ornaments. Get creative with your design!
- Attach a Bow: Make a bow with the ribbon and attach it to the top or bottom of the wreath.
- Hang the Wreath: Use a loop of ribbon or a wreath hanger to display your creation on your door or wall.
Christmas Tree Toppers
Creating your own Christmas tree toppers can be a fun project that adds a personal touch to your holiday decor. Here are a few ideas:
Materials Needed:
- For a Star Topper:
- Cardboard or foam board
- Gold or silver paint
- Glitter
- Hot glue gun
- Decorative gems or beads (optional)
- For an Angel Topper:
- White fabric or felt
- Pipe cleaners
- Wooden bead (for the head)
- Craft feathers or cotton balls
- Ribbon
Instructions for Star Topper:
- Cut Out the Star: Draw and cut out a star shape from cardboard or foam board.
- Paint and Decorate: Paint the star with gold or silver paint. While the paint is still wet, sprinkle glitter over the star. Let it dry completely.
- Add Details: Glue on decorative gems or beads if desired for extra sparkle.
- Attach to the Tree: Use a hot glue gun to attach a cardboard tube or sturdy wire to the back of the star. This will help secure it to the top of the tree.
Instructions for Angel Topper:
- Make the Body: Form the body of the angel by wrapping white fabric or felt into a cone shape. Secure with hot glue.
- Create the Head: Glue a wooden bead on top of the cone for the head.
- Add Wings and Halo: Use pipe cleaners to form wings and a halo. Attach feathers or cotton balls to the wings for a fluffy effect.
- Decorate: Add ribbon and other embellishments to complete the angel.
- Attach to the Tree: Secure the angel to the top of the tree using a wire or pipe cleaner.
These DIY Christmas decorations are perfect for adding a homemade touch to your holiday festivities. They’re fun to make and will bring a unique charm to your Christmas decor.

Fun and Easy Crafts for Younger Kids
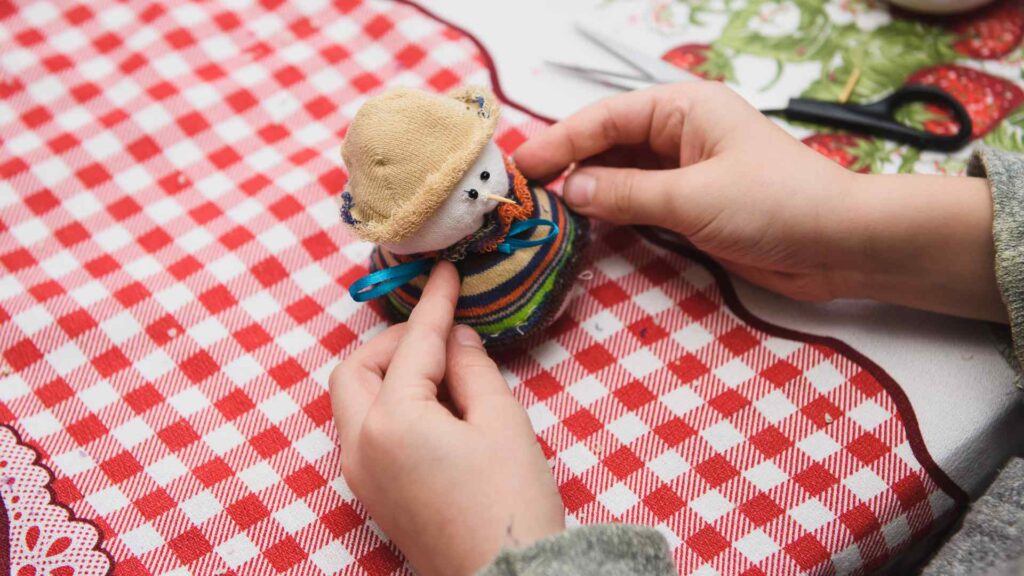
Pom-Pom Snowmen
Pom-pom snowmen are an adorable and simple craft that younger kids will love. They can create their own little winter friends with just a few materials.
Materials Needed:
- White yarn
- Scissors
- Glue
- Black beads or buttons (for eyes)
- Orange felt (for nose)
- Small twigs (for arms)
- Tiny fabric scraps or ribbons (for scarves)
Instructions:
- Make the Pom-Poms: Wrap white yarn around your fingers or a pom-pom maker until it’s thick and full. Slide the yarn off carefully and tie it tightly in the middle. Cut the loops on both sides to create a fluffy pom-pom. Make two pom-poms, one slightly smaller for the head.
- Assemble the Snowman: Glue the smaller pom-pom (head) on top of the larger one (body).
- Add the Face and Arms: Glue black beads or buttons on the head for eyes. Cut a small triangle from orange felt and glue it on for the nose. Insert small twigs into the sides of the body for arms.
- Add a Scarf: Tie a tiny fabric scrap or ribbon around the snowman’s neck as a scarf.
- Display: Let the glue dry completely, then display your pom-pom snowmen around your home.
Handprint Crafts
Handprint crafts are a wonderful way for younger kids to create personalized Christmas decorations. They are simple, fun, and capture a moment in time.
Handprint Christmas Trees:
Materials Needed:
- Green paint
- White paper or canvas
- Brown paint or marker
- Red and yellow paint (for ornaments and star)
- Paintbrushes
Instructions:
- Paint the Handprint Tree: Help your child paint their hand with green paint and press it onto the paper or canvas, fingers spread apart. Repeat this process several times, layering handprints to create the shape of a Christmas tree.
- Add the Trunk: Use brown paint or a marker to draw the tree trunk at the bottom.
- Decorate the Tree: Once the green paint is dry, use red and yellow paint to add ornaments and a star to the tree.
- Display: Let everything dry completely and display your handprint Christmas tree.
Handprint Reindeer:
Materials Needed:
- Brown paint
- White paper or canvas
- Red pom-pom or red paint (for nose)
- Googly eyes
- Black marker
- Glue
Instructions:
- Paint the Handprint Reindeer: Paint your child’s hand with brown paint and press it onto the paper or canvas, fingers spread apart. This will be the reindeer’s head and antlers.
- Add Eyes and Nose: Glue googly eyes onto the reindeer’s head. Glue a red pom-pom or use red paint to create the nose.
- Draw the Face: Use a black marker to add details to the reindeer’s face, like a mouth and eyebrows.
- Display: Let the paint and glue dry completely, then display your handprint reindeer.
Paper Plate Crafts
Paper plate crafts are easy and versatile, making them perfect for younger kids. Here are a few ideas for festive Christmas-themed paper plate crafts.
Paper Plate Santa:
Materials Needed:
- Paper plates
- Red, white, and black construction paper
- Cotton balls
- Glue
- Scissors
- Markers
Instructions:
- Create Santa’s Hat: Cut a triangle from red construction paper for Santa’s hat. Glue it to the top of the paper plate.
- Add the Face: Draw Santa’s eyes, nose, and mouth on the paper plate using markers.
- Add the Beard: Glue cotton balls around the edge of the paper plate to create Santa’s beard. Add a cotton ball to the tip of the hat.
- Add Details: Cut and glue small pieces of white and black construction paper for Santa’s hat trim and belt.
- Display: Let everything dry completely and display your Paper Plate Santa.
Paper Plate Reindeer:
Materials Needed:
- Paper plates
- Brown paint
- Red pom-pom or red construction paper (for nose)
- Googly eyes
- Brown construction paper (for antlers)
- Glue
- Scissors
- Markers
Instructions:
- Paint the Plate: Paint the paper plate brown and let it dry completely.
- Add the Face: Glue googly eyes and a red pom-pom or a red circle cut from construction paper onto the plate for the reindeer’s nose.
- Create Antlers: Cut antlers from brown construction paper and glue them to the top of the plate.
- Add Details: Use markers to add any additional details, such as a mouth or spots on the antlers.
- Display: Let everything dry completely and display your Paper Plate Reindeer.
These fun and easy crafts are perfect for younger kids, allowing them to get creative while celebrating the holiday season. They also make great keepsakes that parents can treasure for years to come.
Recycled Christmas Crafts
Bottle Cap Snowmen
Turning old bottle caps into snowmen is a fun and eco-friendly craft that kids will enjoy. These cute little snowmen can be used as ornaments or decorations.
Materials Needed:
- Bottle caps (cleaned and dried)
- White paint
- Black and orange markers or paint
- Small buttons
- Ribbon or string
- Glue
- Small piece of fabric or felt (for the scarf)
Instructions:
- Paint the Bottle Caps: Paint the inside of each bottle cap white and let them dry completely.
- Create the Snowman Face: Use black and orange markers or paint to add eyes, a mouth, and a carrot nose to one of the bottle caps.
- Assemble the Snowman: Glue three bottle caps together in a vertical line, with the face on top. Allow the glue to dry.
- Add Buttons and Scarf: Glue small buttons onto the middle and bottom bottle caps. Tie a small piece of fabric or felt around the “neck” of the snowman for a scarf.
- Attach Ribbon: Glue a loop of ribbon or string to the back of the top bottle cap for hanging.
- Display: Once everything is dry, hang your bottle cap snowman on the Christmas tree or use as a decoration.
Cardboard Christmas Trees
Using old cardboard boxes to create Christmas trees is a great way to recycle materials and make fun decorations.
Materials Needed:
- Cardboard
- Green paint
- Scissors
- Glue
- Markers, glitter, and other decorations
- Small star (optional)
Instructions:
- Cut Out Tree Shapes: Cut out two identical Christmas tree shapes from the cardboard.
- Create Slots: Cut a vertical slot from the top to the middle of one tree shape and from the bottom to the middle of the other tree shape. This will allow them to fit together and stand up.
- Paint the Trees: Paint both tree shapes green and let them dry completely.
- Assemble the Tree: Fit the two tree shapes together using the slots you cut. The tree should now stand up on its own.
- Decorate: Use markers, glitter, and other decorations to add ornaments, garlands, and other details to the tree. You can also add a small star to the top if desired.
- Display: Once decorated, display your cardboard Christmas tree as a centerpiece or decoration.
CD Ornaments
Repurposing old CDs into Christmas ornaments is a fun and shiny craft that kids will love.
Materials Needed:
- Old CDs
- Paint (acrylic works best)
- Glitter
- Stickers, gems, and other decorations
- Ribbon or string
- Glue
Instructions:
- Paint the CDs: Paint the shiny side of the CDs with acrylic paint. You can use solid colors or create patterns. Let the paint dry completely.
- Add Glitter: Apply glue to parts of the painted CD and sprinkle glitter over the glue. Shake off the excess glitter.
- Decorate: Use stickers, gems, and other decorations to embellish the CD. Be creative and make each ornament unique.
- Attach Ribbon: Glue a loop of ribbon or string to the top of the CD for hanging.
- Display: Once everything is dry, hang your CD ornaments on the Christmas tree or use them to decorate windows and walls.
These recycled Christmas crafts are a great way to teach kids about the importance of reusing materials while creating beautiful and festive decorations for the holiday season.
Holiday-Themed Art Projects
Christmas Paintings
Encouraging kids to create Christmas-themed paintings is a wonderful way to get them excited about the holiday season while also developing their artistic skills.
Materials Needed:
- Canvas or thick paper
- Paint (acrylic or tempera)
- Paintbrushes
- Palette for mixing colors
- Aprons or old clothes (to protect from paint)
Instructions:
- Set Up the Painting Area: Cover the table with newspaper or a plastic tablecloth to protect it. Set up the canvases or paper, paint, and brushes.
- Choose a Theme: Help kids decide what they want to paint. Ideas include Christmas trees, snowmen, Santa Claus, reindeer, or festive scenes like a winter village.
- Sketch the Design (Optional): For younger kids, it might be helpful to sketch a simple outline of their design on the canvas or paper before they start painting.
- Start Painting: Let the kids paint their Christmas scenes. Encourage them to use bright, festive colors and add lots of details.
- Dry and Display: Allow the paintings to dry completely. Display their artwork around the house or give it as gifts to family and friends.
Decorative Mason Jars
Decorative mason jars can be used as candle holders, vases, or simply as festive decorations. This craft is easy and versatile, perfect for kids of all ages.
Materials Needed:
- Mason jars
- Acrylic paint
- Paintbrushes
- Glitter
- Ribbon or twine
- Small decorations (stickers, gems, etc.)
- Tea light candles (if using as candle holders)
Instructions:
- Clean the Jars: Make sure the mason jars are clean and dry before starting.
- Paint the Jars: Paint the outside of the jars with acrylic paint. You can create solid colors, stripes, or other patterns. Let the paint dry completely.
- Add Glitter: Apply glue to parts of the jar and sprinkle glitter over it. Shake off the excess glitter.
- Decorate: Use ribbon, twine, stickers, gems, and other decorations to embellish the jars. Get creative with your designs!
- Use as Candle Holders: If using the jars as candle holders, place a tea light candle inside. If using as vases, fill with flowers or holiday greenery.
- Display: Place your decorative mason jars around the house to add a festive touch to your holiday decor.
Christmas Collages
Creating Christmas collages is a fun and creative activity that allows kids to use a variety of materials to make unique holiday artwork.
Materials Needed:
- Magazines, wrapping paper, old Christmas cards
- Scissors
- Glue sticks
- Large sheets of paper or cardstock
- Markers and crayons
Instructions:
- Gather Materials: Collect old magazines, wrapping paper, and Christmas cards. These will be used to cut out images for the collage.
- Choose a Theme: Decide on a theme for the collage. It could be a winter scene, a Christmas tree, Santa’s workshop, or anything festive.
- Cut Out Images: Have the kids cut out images and shapes from the magazines, wrapping paper, and cards that fit their theme.
- Arrange and Glue: Arrange the cut-out images on the large sheet of paper or cardstock. Once they’re happy with the arrangement, glue the pieces down.
- Add Details: Use markers and crayons to add extra details and finishing touches to the collage.
- Display: Let the glue dry completely, then display the collages around the house or give them as holiday gifts.
These holiday-themed art projects are perfect for fostering creativity and adding a personal touch to your Christmas decorations. Kids will love seeing their artwork displayed proudly throughout the holiday season.

Homemade Christmas Gifts
Scented Sachets
Scented sachets are easy to make and can be customized with different scents and decorations. They make perfect gifts for friends and family.
Materials Needed:
- Small fabric squares (cotton or muslin)
- Dried lavender, rose petals, or other dried flowers
- Essential oils (optional)
- Needle and thread or fabric glue
- Ribbon or twine
Instructions:
- Prepare the Fabric: Cut the fabric into small squares, approximately 4×4 inches each.
- Fill the Sachets: Place a small handful of dried flowers in the center of each fabric square. Add a few drops of essential oil for extra fragrance if desired.
- Seal the Sachets: Fold the fabric squares in half, bringing the corners together to form a small pouch. Sew the edges closed using needle and thread, or use fabric glue for a no-sew option.
- Add Ribbon: Tie a piece of ribbon or twine around the top of each sachet to secure it and add a decorative touch.
- Gift: Your scented sachets are ready to be given as thoughtful, homemade gifts.
Handmade Christmas Cards
Creating handmade Christmas cards is a heartfelt way to send holiday greetings to loved ones. Kids can get creative with their designs and messages.
Materials Needed:
- Blank cards or cardstock
- Markers, crayons, colored pencils
- Stickers, glitter, and other decorations
- Glue
- Scissors
Instructions:
- Design the Front: Let your kids draw and color festive designs on the front of the card. Ideas include Christmas trees, snowmen, Santa Claus, or reindeer.
- Add Decorations: Use stickers, glitter, and other decorations to enhance the card’s design. Encourage kids to be creative!
- Write a Message: Help your child write a heartfelt message inside the card. This could be a simple “Merry Christmas!” or a longer, more personal note.
- Personalize: Add any additional touches, such as a family photo or a small piece of artwork, to make the card extra special.
- Send: Once the cards are finished, they can be sent to friends and family to spread holiday cheer.
Personalized Photo Frames
Personalized photo frames make wonderful gifts that can be cherished for years. Kids can decorate the frames and add their favorite photos.
Materials Needed:
- Plain photo frames (wood or plastic)
- Paint and paintbrushes
- Stickers, gems, and other decorations
- Glue
- Family photos or printed pictures
Instructions:
- Paint the Frame: Let your kids paint the photo frames in their favorite colors. They can use solid colors, stripes, or patterns. Let the paint dry completely.
- Decorate: Use stickers, gems, and other decorations to embellish the frames. Encourage kids to get creative and make the frames unique.
- Add Photos: Once the frames are decorated and dry, insert a family photo or a printed picture.
- Gift: The personalized photo frames are now ready to be given as special, homemade gifts.
Hot Chocolate Kits
Hot chocolate kits are a delightful and delicious gift that kids can easily assemble. They’re perfect for cozying up on a cold winter day.
Materials Needed:
- Mason jars or clear bags
- Hot chocolate mix
- Mini marshmallows
- Chocolate chips
- Crushed candy canes
- Ribbon and gift tags
Instructions:
- Layer the Ingredients: In each mason jar or clear bag, layer the hot chocolate mix, mini marshmallows, chocolate chips, and crushed candy canes.
- Seal and Decorate: Seal the jars or bags. Tie a piece of ribbon around the top and attach a gift tag with instructions for making the hot chocolate.
- Add a Personal Touch: Have your kids write a personalized message on each gift tag.
- Gift: These hot chocolate kits are ready to be given as cozy, homemade gifts.
Homemade Bath Bombs
Making bath bombs is a fun and fragrant craft that results in a relaxing gift perfect for anyone who loves a good soak in the tub.
Materials Needed:
- 1 cup baking soda
- 1/2 cup citric acid
- 1/2 cup Epsom salts
- 1/2 cup cornstarch
- Water
- Essential oils
- Food coloring (optional)
- Silicone molds
- Mixing bowls
- Whisk
Instructions:
- Mix Dry Ingredients: In a large bowl, whisk together the baking soda, citric acid, Epsom salts, and cornstarch.
- Add Essential Oils and Coloring: In a small bowl, combine water, essential oils, and food coloring if desired. Slowly add this mixture to the dry ingredients, whisking continuously. The mixture should be the texture of damp sand.
- Fill the Molds: Press the mixture firmly into silicone molds. Let the bath bombs dry and harden for at least 24 hours.
- Remove from Molds: Carefully remove the bath bombs from the molds.
- Gift: Package the bath bombs in a decorative jar or bag, and they’re ready to be given as relaxing, homemade gifts.
These homemade Christmas gifts are thoughtful, fun to make, and perfect for spreading holiday cheer. They offer a personal touch that store-bought gifts simply can’t match.
Interactive Christmas Activities
Christmas Bingo
Christmas Bingo is a fun and engaging game that kids of all ages can enjoy. It’s perfect for holiday parties or cozy family nights.
Materials Needed:
- Bingo cards with Christmas-themed images (can be printed or homemade)
- Markers or bingo chips
- A bowl or bag for drawing images
- Prizes (optional)
Instructions:
- Create or Print Bingo Cards: Design bingo cards with Christmas-themed images like Santa, reindeer, Christmas trees, presents, and snowflakes. You can find printable templates online or create your own.
- Prepare the Drawing Images: Cut out small images that match the ones on the bingo cards and place them in a bowl or bag.
- Distribute the Bingo Cards: Give each player a bingo card and some markers or bingo chips.
- Play the Game: Draw one image at a time from the bowl or bag and show it to the players. Players mark the corresponding image on their bingo cards.
- Win Prizes: The first player to get a complete row (horizontal, vertical, or diagonal) shouts “Bingo!” and wins a prize. Continue playing until all prizes are given out or everyone has had a chance to win.
Christmas Scavenger Hunt
A Christmas scavenger hunt is an exciting way to keep kids entertained and active. Hide Christmas-themed items around the house or yard and let the hunt begin!
Materials Needed:
- Christmas-themed items to hide (e.g., ornaments, candy canes, small toys)
- Scavenger hunt list (can be written or printed)
- Small bags or baskets for collecting items
- Prizes (optional)
Instructions:
- Prepare the List: Create a list of Christmas-themed items for the kids to find. Include pictures or descriptions to make it easier for younger children.
- Hide the Items: Hide the items around the house or yard in safe, accessible places.
- Distribute the List: Give each child a scavenger hunt list and a small bag or basket for collecting the items.
- Start the Hunt: Set a timer and let the kids search for the hidden items. The first one to find all the items or the most items wins a prize.
- Celebrate: Give out prizes or small treats to all participants for their effort and enthusiasm.
Christmas Carol Karaoke
Christmas Carol Karaoke is a lively and festive activity that brings out the singer in everyone. It’s great for family gatherings and holiday parties.
Materials Needed:
- Karaoke machine or a device to play karaoke tracks (YouTube, karaoke apps)
- Microphones
- Christmas carol lyrics
- Decorations to set the stage
Instructions:
- Set Up the Karaoke Area: Decorate an area of your home to create a festive stage for karaoke. Set up the karaoke machine or device with speakers.
- Choose the Songs: Select a variety of Christmas carols and holiday songs. Prepare the lyrics so everyone can sing along.
- Start Singing: Take turns singing Christmas carols. Encourage everyone to join in, regardless of singing ability.
- Add Fun Elements: Use props like Santa hats, reindeer antlers, and festive scarves to make the performance more fun.
- Celebrate: Give out small prizes for the best performance, funniest song, or most enthusiastic singer.
Christmas Story Time
Christmas Story Time is a wonderful way to share holiday tales and traditions with kids. Reading together creates a cozy, festive atmosphere.
Materials Needed:
- Christmas-themed books
- Cozy blankets and pillows
- Hot chocolate and snacks (optional)
Instructions:
- Choose the Books: Select a few Christmas-themed books or stories to read. Classics like “The Night Before Christmas” and “How the Grinch Stole Christmas” are always popular.
- Create a Cozy Space: Set up a comfortable reading area with blankets, pillows, and soft lighting.
- Read Aloud: Gather the kids and read the stories aloud. Use expressive voices and gestures to make the story more engaging.
- Discuss the Stories: After each story, talk about the characters, plot, and moral of the story. Encourage kids to share their thoughts and favorite parts.
- Enjoy Treats: Serve hot chocolate and snacks to make the experience even more special.
DIY Christmas Puzzles
Creating and solving DIY Christmas puzzles is a fun and educational activity for kids. They can design their own puzzles and then solve them.
Materials Needed:
- Blank puzzle templates or heavy cardstock
- Markers, crayons, or colored pencils
- Scissors
- Christmas-themed images or designs
Instructions:
- Design the Puzzle: Let the kids draw Christmas-themed images or designs on the blank puzzle templates or heavy cardstock. They can draw Christmas trees, Santa, snowmen, or any other festive scenes.
- Cut the Puzzle Pieces: Once the drawing is complete, carefully cut the puzzle into pieces. For younger kids, keep the pieces larger and simpler.
- Mix and Solve: Mix up the puzzle pieces and challenge the kids to put them back together.
- Trade and Solve: Have kids trade puzzles and solve each other’s creations for added fun.
These interactive Christmas activities are perfect for keeping kids entertained and engaged during the holiday season. They foster creativity, teamwork, and holiday spirit, making the festive season even more memorable.
Christmas Crafts for Kids with Special Needs
Sensory Bottles
Sensory bottles are calming and visually stimulating, making them ideal for kids with special needs. They can be customized with different materials and colors to match the holiday season.
Materials Needed:
- Clear plastic bottles with lids
- Water
- Glitter
- Sequins, small beads, or other tiny decorations
- Food coloring (optional)
- Hot glue gun (for sealing the bottles)
Instructions:
- Fill the Bottle: Fill the bottle about three-quarters full with water.
- Add Decorations: Add glitter, sequins, small beads, and other tiny decorations to the bottle. Use Christmas colors like red, green, gold, and silver.
- Add Food Coloring (Optional): Add a few drops of food coloring to the water to give it a festive hue.
- Seal the Bottle: Once everything is added, securely close the lid. Use a hot glue gun to seal the lid shut, ensuring it won’t open.
- Shake and Enjoy: Shake the bottle to mix the contents and watch the mesmerizing movement. These sensory bottles can be used as calming tools or just for fun.
Textured Christmas Cards
Creating textured Christmas cards is a tactile activity that kids with special needs will enjoy. It combines creativity with sensory exploration.
Materials Needed:
- Blank cards or cardstock
- Glue
- Various textured materials (felt, sandpaper, fabric scraps, cotton balls, etc.)
- Markers and crayons
Instructions:
- Design the Card: Help kids decide on a design for their card. It could be a Christmas tree, snowman, Santa, or any other festive theme.
- Add Textures: Glue different textured materials onto the card to create the design. For example, use felt for Santa’s suit, cotton balls for his beard, and sandpaper for the sleigh.
- Decorate: Use markers and crayons to add additional details to the card.
- Write a Message: Inside the card, help kids write a holiday greeting or message.
- Share: These textured cards can be given as special, personalized gifts to family and friends.
Christmas Playdough
Homemade Christmas playdough is a fun and tactile activity. Kids can mold and shape the dough into various holiday-themed creations.
Materials Needed:
- 2 cups flour
- 1 cup salt
- 2 tablespoons cream of tartar
- 2 tablespoons vegetable oil
- 1-1.5 cups boiling water
- Food coloring (red and green)
- Essential oils (peppermint or cinnamon for scent, optional)
- Glitter (optional)
Instructions:
- Mix Dry Ingredients: In a large bowl, mix the flour, salt, and cream of tartar.
- Add Wet Ingredients: Add the vegetable oil and boiling water (start with 1 cup and add more if needed). Mix until a dough forms.
- Divide and Color: Divide the dough into two parts. Add red food coloring to one part and green food coloring to the other. Add a few drops of essential oil for a festive scent and glitter for sparkle, if desired.
- Knead the Dough: Knead each portion of dough until the color is evenly distributed and the dough is smooth.
- Play and Create: Let kids use the playdough to create Christmas shapes like trees, stars, and candy canes.
Sensory Christmas Trees
Creating sensory Christmas trees combines crafting with sensory exploration. Kids can use different materials to decorate their tree, making it a fun and engaging activity.
Materials Needed:
- Green construction paper or cardstock
- Scissors
- Glue
- Various sensory materials (pom-poms, buttons, feathers, felt pieces, foam shapes, etc.)
Instructions:
- Cut Out the Tree: Cut a large Christmas tree shape out of green construction paper or cardstock.
- Add Textures: Provide kids with various sensory materials to glue onto the tree. They can use pom-poms for ornaments, buttons for lights, feathers for texture, and felt pieces for additional decorations.
- Decorate the Tree: Let kids decorate the tree however they like, adding different textures and colors.
- Display: Once the tree is decorated and the glue is dry, display it in a prominent place. These sensory Christmas trees make wonderful decorations and provide a tactile experience.
Christmas Sensory Bags
Sensory bags are great for tactile play and can be easily customized with different Christmas-themed items.
Materials Needed:
- Ziplock bags
- Hair gel or clear hair conditioner
- Small Christmas-themed items (glitter, sequins, beads, tiny ornaments, etc.)
- Duct tape (to seal the edges)
Instructions:
- Fill the Bag: Squeeze some hair gel or clear hair conditioner into the ziplock bag. Add small Christmas-themed items.
- Seal the Bag: Close the ziplock bag, ensuring there’s no air inside. Use duct tape to seal the edges for extra security.
- Squish and Explore: Let kids squish and manipulate the sensory bag, exploring the different textures and items inside. These bags are perfect for calming sensory play.
These Christmas crafts are designed to be inclusive and engaging for kids with special needs, offering a variety of sensory experiences and creative opportunities. They help in developing fine motor skills and provide a fun way to celebrate the holiday season.
Christmas Science Experiments
Exploding Snowman Baking Soda Experiment
This exciting experiment uses simple household ingredients to create a fun and fizzy reaction, perfect for curious young scientists.
Materials Needed:
- Baking soda
- Vinegar
- Sandwich-sized ziplock bags
- Permanent markers
- Small cups
- Warm water
- Glitter (optional)
Instructions:
- Draw a Snowman: Use permanent markers to draw a snowman on the outside of the ziplock bag.
- Prepare the Baking Soda: Place a few tablespoons of baking soda in a small cup. If desired, mix in some glitter for a sparkly effect.
- Fill the Bag with Vinegar: Pour about half a cup of vinegar into the ziplock bag.
- Add Water: Add a few tablespoons of warm water to the vinegar in the bag.
- Combine and Seal Quickly: When ready, pour the baking soda into the ziplock bag, quickly seal it, and step back. Watch as the snowman “explodes” due to the reaction between the baking soda and vinegar.
Magic Milk Christmas Colors
This colorful experiment demonstrates the interaction between milk, soap, and food coloring, creating a magical effect that kids will love.
Materials Needed:
- Whole milk
- Food coloring (red and green)
- Dish soap
- Cotton swabs
- Shallow dish or pie pan
Instructions:
- Pour the Milk: Pour enough milk into the shallow dish to cover the bottom.
- Add Food Coloring: Add several drops of red and green food coloring to the milk. Try to space the drops out evenly.
- Prepare the Soap: Dip a cotton swab into the dish soap.
- Create the Magic: Gently touch the soapy cotton swab to the surface of the milk near the food coloring drops. Watch as the colors explode and move, creating beautiful patterns.
Christmas Slime
Making Christmas slime is a fun and messy experiment that combines science with sensory play. Customize the slime with festive colors and glitter.
Materials Needed:
- 1 cup white school glue
- 1 teaspoon baking soda
- 2 tablespoons contact lens solution (containing boric acid)
- Red and green food coloring
- Glitter
- Mixing bowls and spoons
Instructions:
- Mix the Glue and Baking Soda: In a mixing bowl, combine the white glue and baking soda. Stir until well mixed.
- Add Color and Glitter: Divide the mixture into two bowls. Add red food coloring and red glitter to one bowl, and green food coloring and green glitter to the other. Mix well.
- Add the Contact Lens Solution: Add 1 tablespoon of contact lens solution to each bowl. Stir until the slime begins to form. If the slime is too sticky, add a bit more contact lens solution.
- Knead the Slime: Once the slime forms, take it out of the bowl and knead it with your hands until it reaches the desired consistency.
- Play: Enjoy stretching, squishing, and playing with your festive Christmas slime.
Ice Lanterns
Creating ice lanterns is a beautiful winter experiment that combines science and art. These lanterns can be displayed outside as festive decorations.
Materials Needed:
- Balloons
- Water
- Food coloring (optional)
- Tea light candles (battery-operated preferred)
- Freezer or outdoor space if temperatures are below freezing
Instructions:
- Fill the Balloons: Fill the balloons with water and add a few drops of food coloring if desired. Tie the balloons securely.
- Freeze the Balloons: Place the water-filled balloons in the freezer or outside if it’s cold enough. Allow them to freeze completely (this may take several hours or overnight).
- Remove the Balloons: Once frozen, cut the balloon and peel it away from the ice. You should have a solid ice sphere.
- Create a Candle Holder: Use warm water to melt a small flat area on the bottom of the ice sphere so it can stand upright. Also, melt a small indentation on the top to hold a tea light candle.
- Display: Place a battery-operated tea light candle in the indentation and display your ice lanterns outside for a beautiful, glowing effect.
Christmas Tree Eruptions
This fun and fizzy experiment lets kids create their own miniature erupting Christmas trees using simple kitchen ingredients.
Materials Needed:
- Baking soda
- Vinegar
- Green food coloring
- Dish soap
- Small plastic cups or bowls
- Small funnel
- Tray or large dish to contain the mess
Instructions:
- Prepare the Baking Soda: Fill the small plastic cups or bowls with baking soda.
- Add Food Coloring and Soap: Mix a few drops of green food coloring and a squirt of dish soap into each cup of baking soda.
- Create the Tree Shape: Use your fingers or a small tool to shape the baking soda into a cone shape, resembling a Christmas tree.
- Prepare for Eruption: Place the baking soda “trees” on a tray or large dish to contain the mess.
- Add Vinegar: Using a small funnel, slowly pour vinegar over the baking soda trees and watch as they fizz and erupt, creating a fun and colorful effect.
These Christmas science experiments are a great way to combine learning with holiday fun. They provide hands-on experiences that teach basic scientific principles while keeping kids engaged and entertained during the festive season.