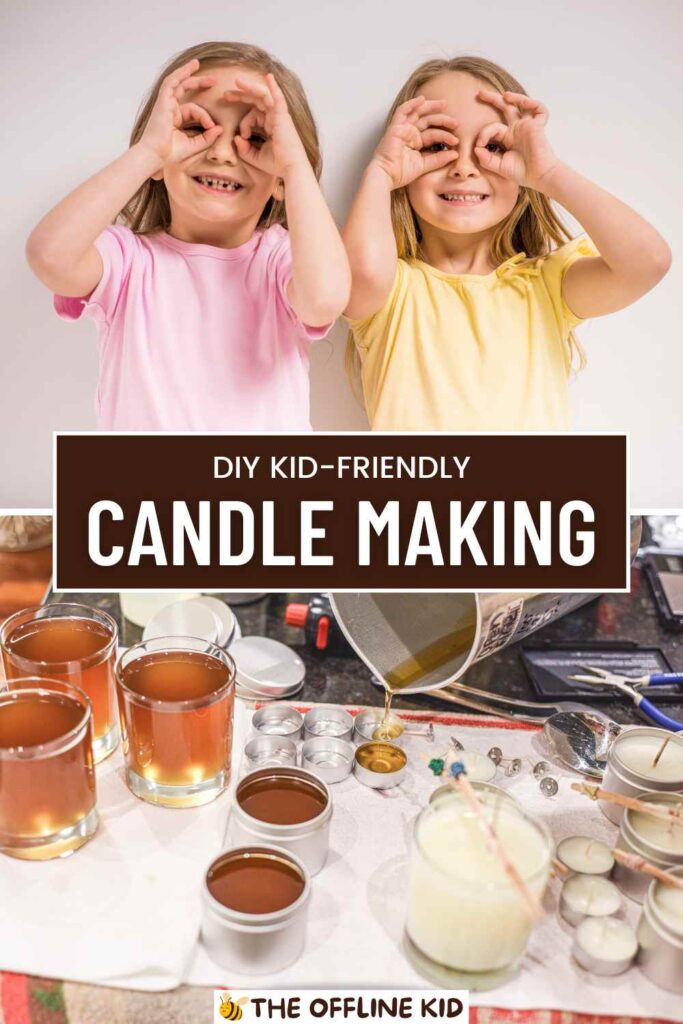
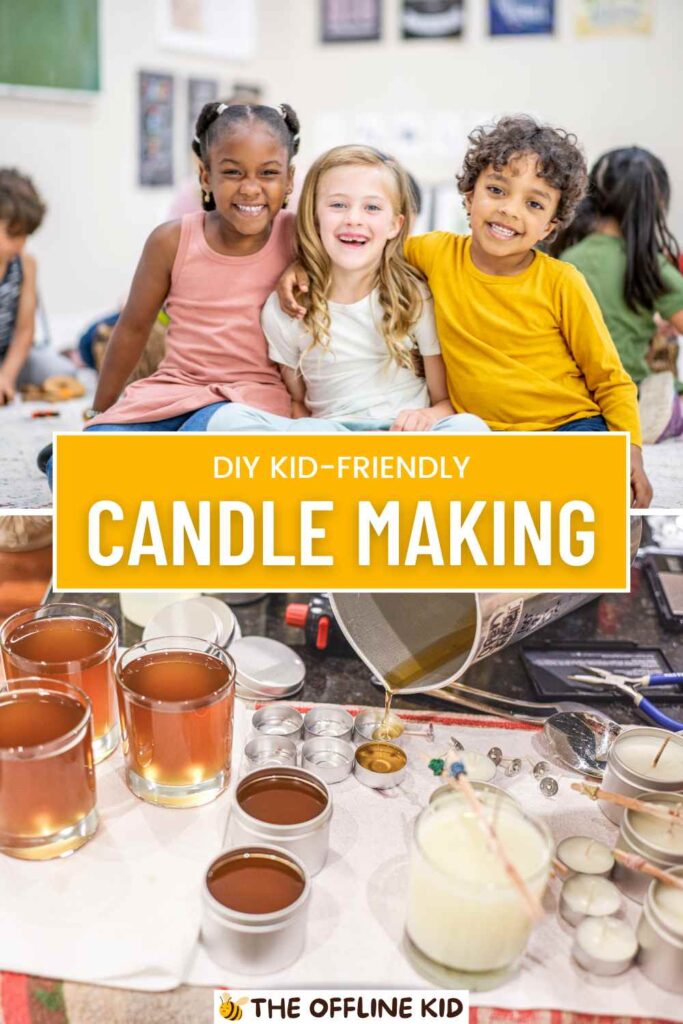
Dive into the enchanting world of candle making with your kids!
This guide offers safe, creative, and engaging DIY projects that foster imagination and bonding, making it a perfect activity for the whole family.
Why Candle Making is a Great Activity for Kids
Candle making is more than just a fun craft; it’s an opportunity to create lasting memories and teach valuable skills. Here’s why this activity is perfect for kids and families alike.
Benefits of Crafting Together
Enhancing Creativity and Imagination
- Expressive Art: Candle making allows kids to express themselves creatively. From choosing colors to adding scents and decorations, every step is a chance for them to make something uniquely theirs.
- Exploration of Ideas: Kids can experiment with different shapes, sizes, and combinations, sparking their imagination and encouraging them to think outside the box.
- Storytelling: Encourage your kids to create a story behind each candle they make. Whether it’s a candle inspired by a favorite book, a memory, or a holiday, this adds an extra layer of creativity to the process.
Teaching Patience and Focus
- Step-by-Step Process: Candle making involves several steps, each requiring patience. Kids learn to follow instructions carefully, understanding that good things take time.
- Delayed Gratification: Waiting for the wax to melt, cool, and set teaches kids the value of patience and the satisfaction that comes from waiting for something to be ready.
- Attention to Detail: Pouring wax, setting wicks, and decorating the candles demand concentration. This helps improve their focus and attention to detail in a fun, engaging way.
Strengthening Parent-Child Bonding
- Quality Time Together: In today’s busy world, finding activities that allow you to spend quality time with your kids is essential. Candle making is a hands-on activity that requires collaboration and communication, fostering a deeper connection.
- Shared Accomplishment: Working together to create something beautiful gives both parents and kids a sense of shared accomplishment. It’s a project you can both be proud of, strengthening your bond as you craft and create.
- Building Trust: As you guide your kids through the process, they learn to trust your guidance, and you, in turn, get to see their independence and skills grow.
Learning Opportunities
Understanding Basic Science Concepts
- Melting and Solidifying: Candle making offers a tangible way for kids to learn about the states of matter. As they watch solid wax melt and then cool back into a solid form, they can grasp the concept of phase changes in a fun, hands-on way.
- Heat Transfer: Discussing how heat is needed to melt the wax and how it dissipates as the wax cools introduces them to basic principles of heat transfer.
- Chemical Reactions: If you’re using scented oils or colorants, explain how mixing different substances can lead to new creations, giving them an introduction to the idea of chemical reactions.
Encouraging Artistic Expression
- Color Theory: Choosing and mixing colors to create custom candles is a great way to teach kids about color theory. They’ll learn how primary colors mix to create new hues and how different shades can affect the overall aesthetic.
- Scent Blending: Creating unique scent combinations allows kids to experiment with their sense of smell, learning how different fragrances complement or contrast with each other.
- Designing Themes: Encourage your kids to design candles around specific themes, whether it’s a season, a holiday, or a favorite animal. This helps them organize their artistic ideas and create cohesive projects.
Hands-On Learning About Shapes and Measurements
- Using Molds: Whether using pre-made molds or creating custom shapes, kids will learn about geometry and spatial reasoning as they work with different forms.
- Measuring Ingredients: Candle making requires precise measurements of wax, scents, and colorants. This is a practical way to teach kids about measurement and volume, skills that are useful in many areas of life.
- Estimating Time: From melting wax to waiting for candles to set, time estimation becomes an integral part of the process, helping kids understand and manage time better.
By combining creativity with learning, candle making becomes a multifaceted activity that’s both enjoyable and educational. It’s an excellent way to engage kids in a meaningful craft that they’ll remember and cherish for years to come.
Essential Safety Tips
Safety is the most critical aspect of any activity involving heat and potentially hazardous materials, especially when kids are involved.
By following these essential safety tips, you can ensure that your candle-making experience is not only fun but also safe for everyone.
Setting Up a Safe Work Area
Choosing the Right Workspace
- Well-Ventilated Area: Candle making involves melting wax, which can release fumes. Ensure your workspace is well-ventilated by opening windows or using fans to keep the air circulating. This helps to prevent any buildup of fumes and keeps the environment safe for kids.
- Flat, Stable Surfaces: Use a flat, stable surface to avoid spills and accidents. A sturdy table or countertop is ideal, and it’s a good idea to cover it with newspaper or a heat-resistant mat to protect against spills and drips.
- Away from Distractions: Choose a quiet area away from distractions like TVs or loud noises. This helps kids focus on the task at hand and reduces the risk of accidents caused by lack of attention.
Importance of Supervision and Setting Rules
- Constant Supervision: Always supervise your children during the entire candle-making process. Even if they’re just stirring the wax or adding color, your presence is crucial to ensure they’re handling everything safely.
- Establishing Ground Rules: Before starting, set clear rules such as no running or playing near the hot wax, keeping hands away from the melting pot, and asking for help when needed. Reinforce these rules regularly to keep safety top of mind.
- Designating a Safe Zone: Create a “safe zone” where hot materials and tools are kept. Teach kids to stay clear of this area unless they’re working on the project under your guidance.
Safety Gear and Tools
Using Protective Gear
- Aprons and Gloves: Equip your kids with aprons to protect their clothing from spills and splashes. Heat-resistant gloves are also essential, especially for older kids who may handle the melting pot or pour the wax.
- Goggles: While not always necessary, safety goggles can add an extra layer of protection against any accidental splashes of hot wax.
- Hair Tied Back: If your kids have long hair, make sure it’s tied back to prevent it from coming into contact with the hot wax or open flames.
Safe Handling of Hot Wax and Tools
- Melting the Wax: Always use a double boiler or a dedicated wax melting pot to melt the wax. This method reduces the risk of overheating and keeps the wax at a controlled temperature. Never melt wax directly over an open flame.
- Pouring Wax Safely: When it’s time to pour the wax, do so slowly and carefully to avoid spills. If your kids are pouring, assist them by holding the container steady and guiding their hands.
- Handling Tools: Make sure kids understand the proper way to handle tools such as thermometers, ladles, and stirring sticks. Emphasize the importance of not touching the hot surfaces of these tools.
Fire Safety and First Aid Tips
- Fire Safety Precautions: Keep a fire extinguisher or a bucket of water nearby in case of emergencies. Teach your kids about the dangers of fire and the importance of staying calm and calling for help if anything goes wrong.
- First Aid Knowledge: Have a basic first aid kit on hand with supplies for minor burns or cuts. Teach your kids what to do if they accidentally burn themselves, such as running the burn under cool water immediately and alerting an adult.
- Safe Extinguishing of Flames: If you’re using a candle flame during the process (such as to seal a wick), make sure your kids know how to extinguish the flame safely, either by using a candle snuffer or blowing it out carefully.
By preparing a safe environment and teaching your kids the importance of safety, you can prevent accidents and make the candle-making experience enjoyable for everyone involved.
These precautions will also give you peace of mind, allowing you to focus on the fun and creativity of the project.
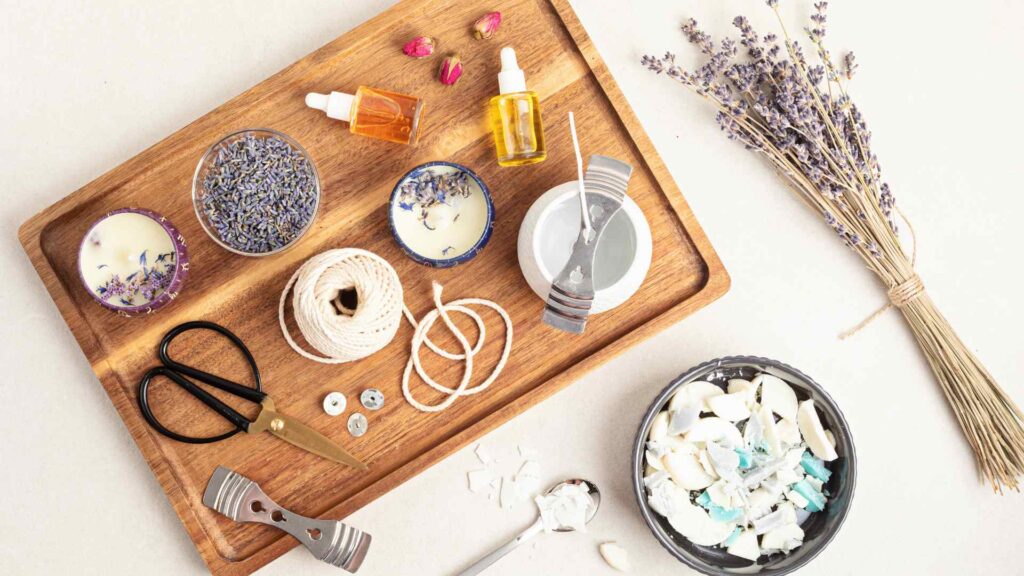
Basic Candle Making Materials and Tools
Before diving into the fun of candle making, it’s essential to gather all the necessary materials and tools.
This section will guide you through the basics, helping you choose the right supplies for a safe and enjoyable candle-making experience with your kids.
Materials Needed
Wax Types and Their Pros and Cons
- Paraffin Wax
- Pros: Easy to use, widely available, and cost-effective.
- Cons: Derived from petroleum, which may not be ideal for those looking for a natural option. Can produce soot and release chemicals when burned.
- Best For: Beginners and simple projects where cost is a concern.
- Soy Wax
- Pros: Made from natural soybeans, biodegradable, burns cleaner and longer than paraffin. Ideal for a more eco-friendly approach.
- Cons: Slightly more expensive than paraffin and may require more careful handling due to lower melting points.
- Best For: Eco-conscious families or those looking for a more natural alternative.
- Beeswax
- Pros: 100% natural, burns slowly and cleanly, with a pleasant natural scent. It also produces a beautiful golden hue.
- Cons: Can be more expensive and has a higher melting point, which requires careful handling.
- Best For: Those who prefer natural, sustainable products and are looking for a luxurious, long-lasting candle.
Wicks and Wick Holders
- Cotton Wicks
- Pros: Commonly used and easy to work with. They provide a steady burn and are available in various sizes.
- Cons: Need to be matched correctly with the candle size to avoid issues like tunneling or uneven burning.
- Best For: General candle-making projects, especially for beginners.
- Wooden Wicks
- Pros: Provide a unique crackling sound reminiscent of a fireplace, adding a cozy element to the candle.
- Cons: Can be harder to light and may require a little more care during the setting process.
- Best For: Decorative candles where ambiance is key.
- Wick Holders
- Importance: These are essential for keeping the wick centered as the wax cools and hardens. They help ensure an even burn and are crucial for the overall quality of the candle.
- Types: Metal or wooden wick holders, or even simple household items like chopsticks or pencils can be used.
Scents and Essential Oils
- Fragrance Oils
- Pros: Available in a wide variety of scents, from floral to fruity, and are specially formulated for candle making.
- Cons: Some may contain synthetic ingredients, so choose high-quality oils if you’re concerned about purity.
- Best For: Creating strong, lasting scents in candles.
- Essential Oils
- Pros: Natural and therapeutic, essential oils can add a calming or invigorating effect to your candles.
- Cons: They can be more expensive and may not be as strong or long-lasting as fragrance oils in candles.
- Best For: Families interested in natural, aromatherapy candles.
Dyes and Colorants
- Liquid Dyes
- Pros: Easy to mix into the wax and create vibrant, consistent colors.
- Cons: Can be messy if not handled carefully and may require precise measuring for consistent results.
- Best For: Projects where specific, bold colors are desired.
- Color Blocks
- Pros: Solid blocks that can be shaved or chopped into small pieces and melted with the wax. They offer excellent control over the intensity of the color.
- Cons: Requires a bit more effort to mix thoroughly.
- Best For: Those looking to create custom shades or multi-colored candles.
- Natural Colorants
- Pros: Derived from natural sources like herbs, spices, and flowers, these are perfect for creating a more organic candle.
- Cons: Colors may be more muted and less predictable.
- Best For: Eco-friendly projects or those aiming for a natural look.
Containers and Molds
- Glass Jars
- Pros: Widely available, durable, and safe for candle making. They also allow for easy customization with labels and decorations.
- Cons: Can become hot to the touch, so handle with care when candles are lit.
- Best For: Beginners and general-purpose candles.
- Tin Containers
- Pros: Lightweight, portable, and available in various shapes and sizes. They also cool down faster than glass.
- Cons: May dent easily and might not have the same aesthetic appeal as glass.
- Best For: Travel candles or projects where weight is a concern.
- Silicone Molds
- Pros: Flexible, easy to remove candles from, and available in a variety of fun shapes, perfect for kids.
- Cons: May require additional support during the pouring and setting process to avoid spills.
- Best For: Creative projects with unique shapes, such as holiday or themed candles.
Tools for Candle Making
Double Boiler or Melting Pot
- Double Boiler
- How It Works: A double boiler gently melts wax by placing a pot of wax inside a larger pot of boiling water, reducing the risk of overheating.
- Pros: Safe and easy to control the temperature.
- Cons: Requires careful handling to avoid water mixing with the wax.
- Best For: Beginners or anyone looking for a safe melting method.
- Dedicated Melting Pot
- How It Works: Electric melting pots designed specifically for candle making. They offer precise temperature control and ease of use.
- Pros: Convenient and designed for the purpose, reducing the chance of errors.
- Cons: Can be more expensive than using a simple double boiler setup.
- Best For: Serious hobbyists or those making candles frequently.
Thermometer for Wax Temperature
- Importance: Keeping the wax at the right temperature is crucial to avoid issues like cracking or uneven burning. A thermometer allows you to monitor the wax closely.
- Types: Use a candy or digital thermometer that can clip onto the side of the pot for easy monitoring.
- Best Practices: Keep the wax at the recommended temperature for the type of wax you’re using, and avoid overheating to ensure a smooth pour.
Stirring Sticks and Ladles
- Stirring Sticks
- Function: Used for mixing dyes, scents, and wax thoroughly. Wooden or silicone sticks work well.
- Tip: Use separate sticks for different colors or scents to avoid contamination.
- Ladles
- Function: Used for pouring melted wax into containers or molds with precision.
- Tip: Opt for a ladle with a spout to make pouring easier and reduce the risk of spills.
By gathering the right materials and tools, you set the foundation for a successful candle-making experience.
Whether you’re crafting simple container candles or experimenting with layered designs, having the appropriate supplies ensures that the process is smooth, enjoyable, and safe for everyone involved.
Preparing for Your Candle Making Session
Preparation is key to a smooth and enjoyable candle-making experience, especially when working with kids.
This section will guide you through planning your project, gathering materials, and setting expectations to ensure everything runs seamlessly.
Planning Your Project
Choosing a Project Based on Skill Level and Age
- Beginner-Friendly Projects: If this is your first time making candles with your kids, start with a simple project like basic container candles. These are straightforward, require fewer materials, and are less time-consuming, making them ideal for younger children or those new to crafting.
- Intermediate Projects: As your kids become more comfortable with the basics, you can introduce more complex projects like layered candles or scented wax melts. These involve additional steps and techniques, providing a fun challenge for kids who are ready to advance.
- Advanced Projects: For older kids or those with more experience, consider projects like molded candles or experimenting with custom scents and colors. These projects allow for more creativity and skill development but require careful supervision.
Gathering and Organizing Materials
- Creating a Checklist: Before starting, make a checklist of all the materials and tools you’ll need for your project. This includes wax, wicks, containers, scents, dyes, and any additional tools like a double boiler or thermometer.
- Setting Up a Workstation: Organize your workspace by laying out all the materials and tools you’ll need. Ensure everything is within reach to avoid unnecessary movement during the process. This setup not only makes the process more efficient but also helps keep the environment safe and clutter-free.
- Pre-Measuring Ingredients: For younger kids, pre-measuring the wax, scents, and dyes can simplify the process and keep things moving smoothly. This allows them to focus on the fun aspects of the project without getting overwhelmed by precise measurements.
Pre-Making Discussions
Talking About Safety Rules and Expectations
- Reinforce Safety Measures: Before you begin, review the safety rules discussed earlier. Make sure your kids understand the importance of these rules, such as handling hot wax carefully, not touching tools that have been heated, and asking for help when needed.
- Setting Expectations: Explain what each step of the project will involve and what you’ll need from your kids during the process. For example, let them know they’ll need to be patient while the wax melts and careful when pouring it into the containers.
- Establishing Roles: Depending on your child’s age and skill level, assign specific roles or tasks. For instance, younger children might focus on choosing colors or decorating the containers, while older kids can help with stirring the wax or pouring it into molds.
Explaining the Steps Before Starting
- Walkthrough of the Process: Give your kids a quick rundown of what you’ll be doing from start to finish. This helps them understand the flow of the activity and what’s expected at each stage.
- Demonstrating Key Actions: If your kids are new to candle making, demonstrate key actions like how to stir the wax, pour it safely, or place the wick. Watching you perform these steps can make them feel more confident when it’s their turn.
- Encouraging Questions: Encourage your kids to ask questions if they’re unsure about any part of the process. This not only helps clear up any confusion but also makes them feel more involved and engaged in the project.
Setting the Mood for a Fun Session
Creating a Relaxed Atmosphere
- Background Music: Consider playing some soft, calming music in the background to create a relaxed atmosphere. Music can help keep the mood light and enjoyable, making the activity feel more like a fun family event than a task.
- Setting a Theme: You can make the session even more engaging by setting a theme for the candles you’re making. For example, if you’re making holiday candles, decorate the space with festive items, or if you’re making nature-inspired candles, bring in some natural elements like pinecones or flowers for inspiration.
Encouraging Creativity
- Inspiring Ideas: Encourage your kids to get creative with their candle designs. Whether it’s experimenting with color combinations, adding unique decorations, or creating custom scents, give them the freedom to express their creativity.
- Making it Personal: If you’re making candles as gifts, let your kids personalize them with special labels or tags. This not only makes the project more meaningful but also adds a personal touch to the finished product.
By carefully preparing for your candle-making session, you set the stage for a successful and enjoyable experience.
Planning, organizing, and discussing the process beforehand helps ensure that everything runs smoothly, allowing you and your kids to focus on the fun and creativity of the project.
Step-by-Step Guide to Simple Candle Making Projects
Now that you’re fully prepared and have all your materials ready, it’s time to dive into the actual candle-making process.
Below are step-by-step instructions for a variety of simple and fun projects that are perfect for kids. These projects range from basic container candles to more creative designs like layered and molded candles.
Project 1: Basic Container Candles
Materials Needed:
- Wax (paraffin, soy, or beeswax)
- Wicks with wick holders
- Glass jars or tin containers
- Fragrance oils or essential oils (optional)
- Liquid dye or color blocks (optional)
- Double boiler or melting pot
- Stirring stick
- Thermometer
- Ladle
Instructions:
- Prepare Your Containers:
- Place the wick in the center of the container, securing it with a wick holder or a dab of melted wax. Ensure the wick stands upright and is centered.
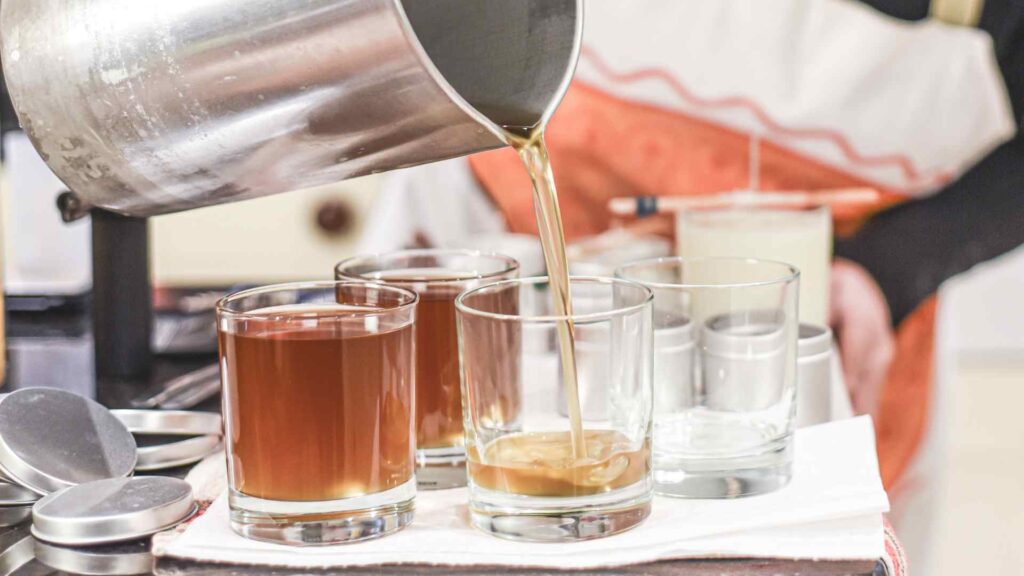
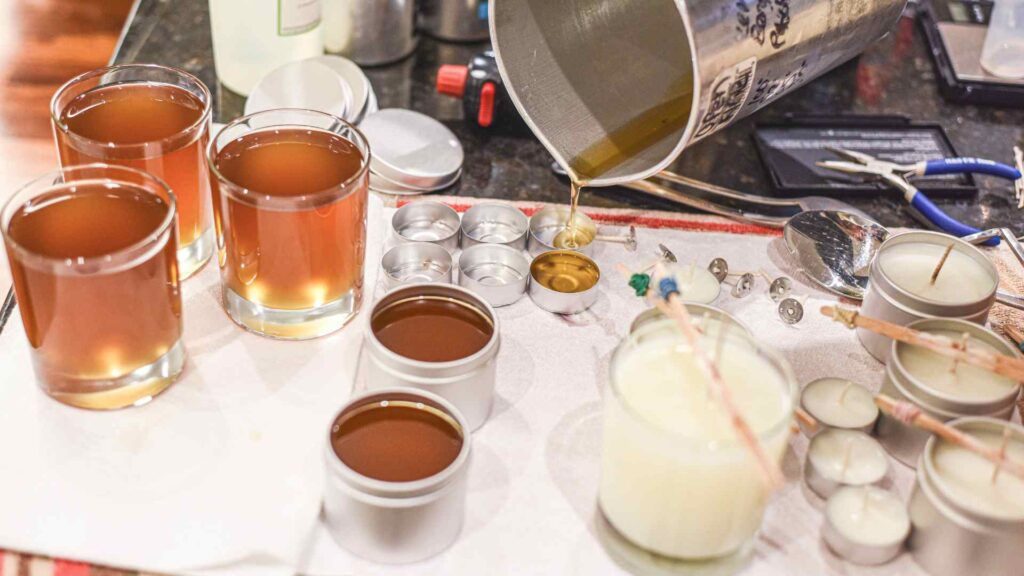
- Melt the Wax:
- Using a double boiler or melting pot, slowly melt the wax. Stir occasionally to ensure even melting. Monitor the temperature with a thermometer, keeping the wax between 160-180°F (70-82°C) for most wax types.
- Add Color and Fragrance:
- If desired, add liquid dye or color blocks to the melted wax and stir until fully dissolved. Then, add fragrance oils or essential oils (about 1 ounce of oil per pound of wax is a common ratio) and stir thoroughly.
- Pour the Wax:
- Carefully pour the melted wax into the prepared containers, leaving about ½ inch of space at the top. Pour slowly to avoid air bubbles and ensure an even surface.
- Let the Candles Set:
- Allow the candles to cool and harden at room temperature. This can take several hours. Once the wax is fully set, trim the wick to about ¼ inch above the surface.
- Decorate (Optional):
- Once the candles are fully cooled, let your kids decorate the containers with paint, stickers, or labels. This adds a personal touch, especially if the candles are intended as gifts.
- Enjoy:
- Your container candles are ready to use! Light them up and enjoy the soft glow and fragrance.
Tips:
- Prevent Cracks: To prevent cracks from forming in the wax as it cools, try to pour the wax when it’s slightly cooler (around 140°F or 60°C) and let it cool slowly at room temperature.
- Testing Scents: If you’re experimenting with different scents, make small test batches first to see how the fragrance performs in the candle.
Project 2: Layered Candles
Materials Needed:
- Wax (paraffin, soy, or beeswax)
- Wicks with wick holders
- Glass jars or other heat-resistant containers
- Multiple colors of dye
- Fragrance oils or essential oils (optional)
- Double boiler or melting pot
- Stirring stick
- Thermometer
- Ladle
Instructions:
- Prepare Your Containers:
- As with the basic container candles, place the wick in the center of your container and secure it with a wick holder.
- Melt the Wax for the First Layer:
- Melt the wax as described in the basic candle project. Add your chosen color and fragrance for the first layer. Stir well.
- Pour the First Layer:
- Pour a portion of the wax into the container, filling it to your desired height for the first layer. Allow this layer to cool and harden slightly before adding the next layer (about 20-30 minutes).
- Prepare and Pour Subsequent Layers:
- Repeat the melting, coloring, and pouring process for each additional layer, allowing each layer to cool and harden before adding the next. You can vary the colors to create a striped or gradient effect.
- Set and Trim the Wick:
- Once all layers are poured and have fully cooled, trim the wick to about ¼ inch above the top layer.
- Decorate (Optional):
- Add any decorative touches to the exterior of the container to match the colors or theme of the layered candle.
- Enjoy:
- Your layered candle is ready! Light it up and watch as each layer burns, revealing the next color.
Tips:
- Color Combinations: Encourage your kids to think creatively about color combinations. A rainbow-themed candle, for example, can be a fun and vibrant project.
- Timing: Make sure each layer has cooled enough to support the next without blending the colors, but not so much that they separate completely. A slightly warm base helps the layers adhere better.
Project 3: Molded Candles
Materials Needed:
- Wax (paraffin, soy, or beeswax)
- Wicks with wick holders
- Silicone molds in various shapes
- Fragrance oils or essential oils (optional)
- Liquid dye or color blocks (optional)
- Double boiler or melting pot
- Stirring stick
- Thermometer
- Ladle
Instructions:
- Prepare Your Molds:
- Choose silicone molds in fun shapes like stars, hearts, or animals. Place the wick in the center of the mold, securing it if necessary. Some molds come with a hole for the wick, making it easier to keep the wick in place.
- Melt the Wax:
- Melt the wax as you would for container candles. Add your desired color and fragrance, stirring well to mix evenly.
- Pour the Wax into Molds:
- Slowly pour the melted wax into the molds, ensuring the wick stays centered. Fill the molds to the top, but be careful not to overfill.
- Cool and Demold:
- Allow the wax to cool and harden completely before attempting to remove the candles from the molds. This may take several hours depending on the size of the molds.
- Remove and Trim:
- Gently remove the candles from the molds, taking care not to damage the shapes. Trim the wick to about ¼ inch.
- Decorate (Optional):
- Depending on the shape and design, you can paint or add decorative touches to the molded candles once they are set.
- Enjoy:
- Your molded candles are ready to use! These are perfect for special occasions or as gifts.
Tips:
- Choosing Molds: Silicone molds are the easiest to use because they are flexible and non-stick, making it simple to remove the finished candles. Choose molds that are designed for high temperatures to avoid any melting or damage.
- Creative Embellishments: For added fun, try embedding small decorations like glitter, dried flowers, or herbs into the wax before it fully hardens. Just make sure the decorations are safe to burn.
Project 4: Scented Wax Melts
Materials Needed:
- Wax (paraffin, soy, or beeswax)
- Silicone molds (small, decorative shapes work best)
- Fragrance oils or essential oils
- Liquid dye or color blocks (optional)
- Double boiler or melting pot
- Stirring stick
- Thermometer
- Ladle
Instructions:
- Prepare Your Molds:
- Select small silicone molds that are suitable for wax melts, such as flowers, hearts, or geometric shapes.
- Melt the Wax:
- Melt the wax in a double boiler or melting pot. Since wax melts are often heavily scented, this is a great opportunity to use stronger fragrances. Add your chosen fragrance and stir well.
- Add Color (Optional):
- If you’d like to add color, do so now by mixing in liquid dye or color blocks. Stir until the color is evenly distributed.
- Pour the Wax into Molds:
- Carefully pour the melted wax into the molds, filling each one completely. Be sure to work quickly, as the wax can cool rapidly in small molds.
- Cool and Remove:
- Allow the wax melts to cool and harden completely before popping them out of the molds. This usually takes about an hour.
- Package and Store:
- Store the wax melts in a cool, dry place until you’re ready to use them. You can also package them in small bags or boxes to give as gifts.
- Enjoy:
- To use, place a wax melt in a wax warmer or oil burner, and enjoy the fragrance as it fills the room.
Tips:
- Mix and Match Scents: Try creating a variety of scents so you have different options to choose from depending on your mood. You can even create themed sets, like “Spring Blossoms” or “Holiday Cheer.”
- Wax Melts as Gifts: Wax melts make excellent homemade gifts. Package them in a decorative box with a note about the scent for a personal touch.
These simple projects are perfect for getting started with candle making, offering a mix of creativity and learning. Each project can be adapted to suit your child’s age and skill level, ensuring a fun and rewarding experience for everyone involved.
Creative Ideas to Customize Your Candles
Once you’ve mastered the basics of candle making, it’s time to unleash your creativity! Customizing your candles adds a personal touch and allows you to explore different themes, designs, and effects.
In this section, we’ll dive into various ways you can make your candles truly unique, from decorating the exterior to experimenting with scents and colors.
Decorating the Exterior
Painting or Drawing on Containers
- Personalized Art: Let your kids express their artistic talents by painting or drawing directly on the candle containers. Use acrylic paint or permanent markers to create designs, patterns, or even write messages. This makes each candle a one-of-a-kind masterpiece.
- Themes and Holidays: Consider decorating candles according to specific themes or holidays. For example, paint pumpkins or ghosts on jars for Halloween, snowflakes for winter, or flowers for spring. This adds a festive touch and makes the candles perfect for seasonal décor.
- Stencils and Stickers: If freehand drawing isn’t your kids’ strong suit, use stencils or stickers to create clean, professional-looking designs. They can be removed after painting to reveal neat patterns or left on as part of the decoration.
Adding Labels or Tags
- Custom Labels: Create custom labels for your candles that include the scent, name of the candle, or a special message. This is particularly fun if you’re giving the candles as gifts. You can design these labels on the computer and print them out, or handwrite them for a personal touch.
- Decorative Tags: Attach decorative tags to the wicks or containers with twine or ribbon. The tags can feature a message, the name of the candle, or instructions for use. This is a simple way to elevate the presentation of your homemade candles.
Embellishments and Accents
- Ribbon and Twine: Wrap the base of the container with ribbon, twine, or yarn to add a rustic or elegant touch. Secure it with a small bow or knot, and consider adding a small charm or bead for extra flair.
- Natural Elements: Incorporate elements from nature, like dried flowers, leaves, or small branches, by gluing them to the outside of the container. This gives your candles a natural, earthy feel and is perfect for outdoor or seasonal themes.
- Glitter and Gems: For a bit of sparkle, add glitter or small adhesive gems to the outside of the containers. Just be sure not to place anything flammable too close to the flame.
Experimenting with Scents and Colors
Mixing Scents for Unique Combinations
- Layered Fragrances: Create candles with layered scents that complement each other as they burn. For instance, you can combine lavender and vanilla for a soothing aroma or citrus and mint for a refreshing scent. Each layer of wax can have a different fragrance, making the candle evolve as it burns.
- Themed Scents: Design candles around a particular theme using corresponding scents. For example, a “Beach Day” candle could feature coconut, sea salt, and lime, while a “Winter Wonderland” candle might include pine, cinnamon, and peppermint.
- Custom Blends: Encourage your kids to experiment by blending different fragrance oils to create their custom scent. This is a great way to engage their senses and creativity, allowing them to create something uniquely theirs.
Creating Multicolored Candles
- Layered Colors: Similar to layered scents, you can create candles with layered colors. Pour one color at a time, allowing each layer to cool slightly before adding the next. This technique works well for creating rainbow or ombre effects.
- Marbled Candles: For a more intricate design, swirl two or more colors together to create a marbled effect. This can be done by gently stirring the wax after pouring it into the container, creating a beautiful, fluid pattern.
- Themed Color Schemes: Match the candle colors to a specific theme or occasion. For example, use red, white, and blue for a patriotic candle, or gold and green for a festive holiday candle.
Incorporating Natural Elements
- Dried Flowers and Herbs
- Inside the Wax: Add dried flowers, herbs, or spices to the wax itself. These natural elements will be visible through the wax and release subtle fragrances as the candle burns. Lavender, rose petals, and rosemary are popular choices.
- On the Surface: Sprinkle dried flowers or herbs on the surface of the candle before it fully hardens. This creates a beautiful, textured finish and can be customized to match the candle’s scent.
- Essential Oils for Natural Fragrances
- Therapeutic Benefits: Essential oils not only provide natural, pure fragrances but also offer therapeutic benefits. Use lavender for relaxation, eucalyptus for clarity, or citrus for an uplifting atmosphere. This is a great way to introduce your kids to the basics of aromatherapy.
- Blending Oils: Mix different essential oils to create custom blends. Encourage your kids to think about how different scents make them feel and to create blends that evoke specific moods or memories.
Embedding Small Decorations
- Inside the Wax: Small, non-flammable decorations like beads, seashells, or small stones can be embedded inside the candle. As the candle burns, these decorations become more visible, adding a surprise element.
- On the Surface: Place small decorations on the surface of the candle before it fully sets. These can include items like small crystals, pieces of fruit peel, or tiny figurines. Just ensure they are placed far enough from the wick to avoid fire hazards.
Creating Themed Candles
Holiday and Seasonal Themes
- Winter Wonderland: Use cool colors like blues and whites, combined with scents like peppermint and pine, to create a candle that embodies the winter season. Add decorations like tiny snowflakes or a dusting of glitter for extra sparkle.
- Spring Blossoms: Create a bright, floral-themed candle using pastel colors and floral scents like rose, jasmine, or lilac. Consider adding dried flower petals inside or on top of the candle for a natural touch.
- Halloween Fun: For a spooky Halloween candle, use black and orange wax, and scents like pumpkin spice or cinnamon. Decorate the outside with Halloween-themed stickers or paint on ghostly faces.
Event-Specific Candles
- Birthday Candles: Design candles specifically for birthdays, using the recipient’s favorite colors and scents. Decorate with age-appropriate themes, like balloons or confetti, and consider adding a personalized label with their name and birthdate.
- Wedding or Anniversary Candles: Create elegant candles for weddings or anniversaries using classic colors like white, gold, or silver. Choose romantic scents like rose, vanilla, or sandalwood, and add embellishments like lace, pearls, or monograms.
By exploring these creative ideas, you can take your candle-making projects to the next level. Whether you’re adding a personal touch to your candles, experimenting with new scents and colors, or creating themed candles for special occasions, the possibilities are endless.
These customizations not only make your candles more beautiful and unique but also provide a fantastic opportunity for kids to express their creativity and develop their artistic skills.

Troubleshooting Common Candle Making Issues
Even with careful preparation and execution, candle making can sometimes present unexpected challenges.
Knowing how to troubleshoot common issues will help you and your kids achieve the best possible results. This section covers some of the most frequent problems and provides practical solutions.
Fixing Surface Imperfections
Addressing Uneven Surfaces or Sinkholes
- Problem: After the candle has cooled, you notice that the surface is uneven or there’s a sunken area (sinkhole) around the wick.
- Cause: This issue is often caused by the wax cooling too quickly, leading to an uneven surface or a hollow space in the center.
- Solution:
- Pour Additional Wax: To fix this, gently reheat a small amount of leftover wax to the same temperature you used originally. Pour this wax over the uneven or sunken area to fill it in. Allow it to cool and harden completely.
- Prevent Future Issues: To prevent this from happening in future candles, try pouring the wax at a slightly lower temperature (around 140°F or 60°C) and cool the candles more slowly, ideally in a warm room.
Smoothing Bumpy or Rough Surfaces
- Problem: The surface of your candle is bumpy or rough, rather than smooth and polished.
- Cause: This can happen if the wax was poured too hot or if it cooled too quickly, causing the surface to set unevenly.
- Solution:
- Surface Melting: Use a heat gun or a hairdryer on a low setting to gently melt the surface of the candle until it becomes smooth. Be careful not to overheat or melt too much of the wax.
- Polishing the Surface: Once the surface is smooth, let it cool slowly to maintain a polished finish.
Problems with Scent Throw
Improving the Strength of Candle Scents
- Problem: Your candle smells great when unlit, but the scent is weak or barely noticeable when burning.
- Cause: This issue, known as poor “scent throw,” can result from using too little fragrance oil, using the wrong type of wax, or improper blending of the scent into the wax.
- Solution:
- Increase Fragrance Load: Ensure you are using the correct amount of fragrance oil. A good rule of thumb is to use about 1 ounce of fragrance oil per pound of wax. Some waxes can hold more fragrance, so check the manufacturer’s recommendations.
- Choose the Right Wax: Different waxes have varying abilities to hold and release scents. Soy wax, for instance, may require more fragrance oil than paraffin wax to achieve a strong scent throw. Experiment with different waxes to find the one that works best for your project.
- Proper Mixing: Make sure to add the fragrance oil when the wax is at the right temperature—typically between 175°F and 185°F (79°C and 85°C) for most waxes. Stir thoroughly to ensure the oil is evenly distributed throughout the wax.
Fixing Scents That Are Too Strong
- Problem: The scent of your candle is overpowering or too strong when burning, which can be unpleasant.
- Cause: This may occur if too much fragrance oil was added or if the fragrance oil used is particularly potent.
- Solution:
- Dilute with Unscented Wax: If possible, remelt the candle and add some unscented wax to dilute the fragrance. Re-pour the candle and allow it to cool as usual.
- Test in Small Batches: When working with a new fragrance oil, always make a small test batch first to gauge the scent strength before committing to a full candle.
Dealing with Wick Problems
Ensuring the Wick Burns Correctly and Evenly
- Problem: The candle’s wick is not burning evenly, causing the candle to tunnel (burning down the center while leaving unmelted wax around the edges) or creating an excessively large flame.
- Cause: Wick problems are often caused by using the wrong wick size, incorrect wick placement, or poor quality wicks.
- Solution:
- Choose the Right Wick Size: The size of the wick should correspond to the diameter of the candle. Larger candles require thicker wicks, while smaller candles need thinner ones. Check the wick manufacturer’s recommendations for guidance.
- Re-center the Wick: If the wick is off-center, it can cause uneven burning. Ensure the wick is perfectly centered when you pour the wax, and use a wick holder to keep it in place until the wax has set.
- Trim the Wick: Always trim the wick to about ¼ inch before lighting the candle. This prevents the flame from becoming too large and helps the candle burn more evenly.
Fixing a Wick That Keeps Going Out
- Problem: The wick keeps going out shortly after being lit, or it struggles to stay lit at all.
- Cause: This can happen if the wick is too thin for the candle size, if there is too much fragrance oil or additives in the wax, or if the wick is buried too deeply in the wax.
- Solution:
- Use a Larger Wick: If the wick is too small, it won’t be able to draw enough wax to sustain the flame. Replace it with a thicker wick that is more appropriate for the candle’s diameter.
- Check Wick Quality: Ensure you’re using high-quality wicks that are designed for candle making. Poor-quality wicks may not burn properly.
- Avoid Overloading with Fragrance: Too much fragrance oil can saturate the wick, making it difficult for the flame to burn. Use the recommended amount of fragrance oil for your wax type.
Preventing Air Bubbles and Cracks
Eliminating Air Bubbles
- Problem: Small air bubbles have formed in the wax, either on the surface or throughout the candle.
- Cause: Air bubbles can occur if the wax was poured too quickly or if the container was not pre-warmed before pouring.
- Solution:
- Slow and Steady Pouring: Pour the wax slowly and steadily to minimize the formation of air bubbles. Avoid stirring the wax too vigorously, as this can introduce air into the mixture.
- Tap the Container: After pouring the wax, gently tap the container on the table to release any trapped air bubbles. You can also use a toothpick or skewer to pop any bubbles that appear on the surface before the wax sets.
Preventing Cracks in the Wax
- Problem: Cracks appear on the surface of the candle as it cools and hardens.
- Cause: Cracks are usually the result of the wax cooling too quickly or being poured at too high a temperature.
- Solution:
- Cool Slowly: Allow the candle to cool slowly at room temperature. If you’re working in a particularly cold environment, consider wrapping the container in a towel to slow down the cooling process.
- Lower Pouring Temperature: Pour the wax at a slightly lower temperature to reduce the likelihood of cracks forming as it cools.
By understanding and troubleshooting these common candle-making issues, you can improve the quality of your candles and make the process more enjoyable.
Whether you’re dealing with surface imperfections, scent throw problems, or wick issues, these tips will help you and your kids create beautiful, functional candles every time.
Fun Candle Making Games and Challenges
Candle making is already a creative and enjoyable activity, but adding a bit of playful competition or teamwork can make the experience even more engaging for kids.
In this section, you’ll find fun games and challenges that can turn your candle-making session into an unforgettable family event.
Candle Making Relay
Overview: A candle-making relay is a fantastic way to incorporate teamwork and a little bit of friendly competition into the process. This game is best suited for families with multiple kids or when hosting a group activity.
How It Works:
- Divide into Teams: Split participants into two or more teams. Each team should have an equal number of members, and if you have different age groups, try to balance the teams so everyone can contribute equally.
- Assign Tasks: Assign specific tasks to each team member. For example, one person can melt the wax, another can prepare the containers, a third person can add the dye and fragrance, and the final person can pour the wax. Each team member must complete their task before the next person can start.
- Set Up the Relay: Arrange the workspace so that each team has access to all the materials they need. Place a timer in the middle of the workspace to keep track of time.
- Start the Relay: When the timer starts, the first member of each team begins their task. Once they complete it, they pass the materials to the next team member, who then starts their part of the process.
- Finish the Candle: The team that finishes their candle first wins, but make sure to emphasize that quality is just as important as speed. After the candles have cooled and set, you can evaluate the candles based on appearance, creativity, and how well they burn.
Tips:
- Encourage Communication: Team members should communicate and help each other out, especially if someone is struggling with their task.
- Focus on Fun: While the competitive aspect can be exciting, remind everyone that the goal is to have fun and create something beautiful together.
Creative Candle Contest
Overview: A creative candle contest is a great way to inspire artistic expression and originality. This challenge encourages kids to think outside the box and come up with unique candle designs.
How It Works:
- Set a Theme: Choose a theme for the contest, such as “Nature-Inspired Candles,” “Holiday Magic,” or “Fantasy Worlds.” The theme will guide the design and decoration of the candles.
- Provide Materials: Give each participant the same set of basic materials—wax, wicks, containers, dyes, and scents. You can also offer a selection of additional decorations like glitter, dried flowers, and stickers.
- Design and Create: Allow each participant a set amount of time to design and create their candle according to the theme. Encourage them to be as creative as possible, whether it’s through the use of color, scent combinations, or decorations.
- Judging: Once the candles are finished and have cooled, hold a judging session. Consider having a panel of judges (which could be parents, older siblings, or neighbors) who will evaluate the candles based on creativity, adherence to the theme, and overall aesthetic.
- Award Prizes: Give out small prizes for categories like “Most Creative,” “Best Use of Color,” “Best Scent Combination,” and “Best Overall.” Everyone should receive some recognition for their effort and creativity.
Tips:
- Encourage Individuality: Emphasize that there’s no right or wrong way to create a candle and that the most important thing is to have fun and express oneself.
- Showcase the Candles: Display the finished candles in a special place, like the family living room or kitchen, so everyone can admire the creativity on display.
Guess the Scent Game
Overview: The “Guess the Scent” game is a fun and sensory way to engage kids with the scents they’re using in their candles. This game can be played during or after the candle-making process and is especially enjoyable for kids who love using their sense of smell.
How It Works:
- Prepare the Scents: Before starting the game, select a variety of fragrance oils or essential oils that will be used in the candles. Pour a small amount of each scent into separate, labeled containers, and cover them so the scents aren’t obvious.
- Blindfold the Participants: Blindfold the participants or ask them to close their eyes tightly. If they’re old enough, they can take turns being the guesser.
- Present the Scents: One at a time, hold a scent container under the participant’s nose. Ask them to guess what the scent is based on smell alone. They can write down their guesses or say them out loud.
- Reveal the Answers: Once all the scents have been guessed, reveal the correct answers. Discuss the different scents and how they might work together in a candle.
- Add the Scent to the Candle: After the game, let the participants choose which of the guessed scents they want to use in their candles. This adds a personal touch and makes the candle-making process even more special.
Tips:
- Use a Variety of Scents: Choose a mix of common scents (like vanilla or lavender) and more unusual ones (like lemongrass or pine) to make the game more challenging and fun.
- Educate About Scents: Take the opportunity to teach kids about how scents are made, where they come from, and their uses in aromatherapy or everyday life.
Candle Making Scavenger Hunt
Overview: A candle-making scavenger hunt is a fun, interactive way to get kids moving and excited about the process. This game works well in larger spaces, such as a backyard or throughout the house.
How It Works:
- Hide the Materials: Before starting, hide various candle-making materials (like wicks, dye blocks, containers, and molds) around the designated area. Make sure the items are hidden in safe, accessible places.
- Create a Clue List: Write out clues or a map that leads the participants to the hidden items. Each clue should guide them to the next item needed for the candle-making process.
- Start the Hunt: Give the participants their first clue, and let them start the scavenger hunt. As they find each item, they’ll gradually collect all the materials needed to make their candles.
- Make the Candles: Once all the items have been found, bring everyone back together to start making their candles with the materials they’ve gathered.
- Reward the Effort: Consider giving small rewards or treats to everyone who participated, especially if they found all the items. The real reward, of course, is making and taking home their custom candles.
Tips:
- Tailor the Difficulty: Adjust the difficulty of the clues based on the age of the participants. For younger kids, simple clues or a straightforward map will work best, while older kids can handle more complex riddles or puzzles.
- Work as Teams: If you have a larger group, divide the kids into teams and let them work together to find the materials. This encourages teamwork and collaboration.
These fun games and challenges add an extra layer of enjoyment to the candle-making process, making it a memorable experience for kids and adults alike.
Whether you’re hosting a family craft day, a birthday party, or simply looking for a way to keep the kids entertained, these activities will bring creativity, learning, and laughter to your candle-making sessions.
Conclusion
Candle making with kids is more than just a craft; it’s an opportunity to create lasting memories, spark creativity, and teach valuable skills in a fun and engaging way.
Whether you’re melting wax for the first time or experimenting with advanced techniques, the joy of crafting something beautiful together is unmatched.
By following this guide, you’ve learned how to set up a safe and inviting workspace, select the right materials and tools, and create a variety of candles that reflect your family’s unique style.
You’ve also discovered how to troubleshoot common issues, customize your candles with creative flair, and add an element of fun with games and challenges.