Welcome to the magical world of backyard astronomy!
Discover the joy of stargazing with your kids, learn about the night sky, and explore fun activities that make astronomy an exciting adventure for the whole family.
Setting Up for Stargazing
Choosing the Best Spot in Your Backyard
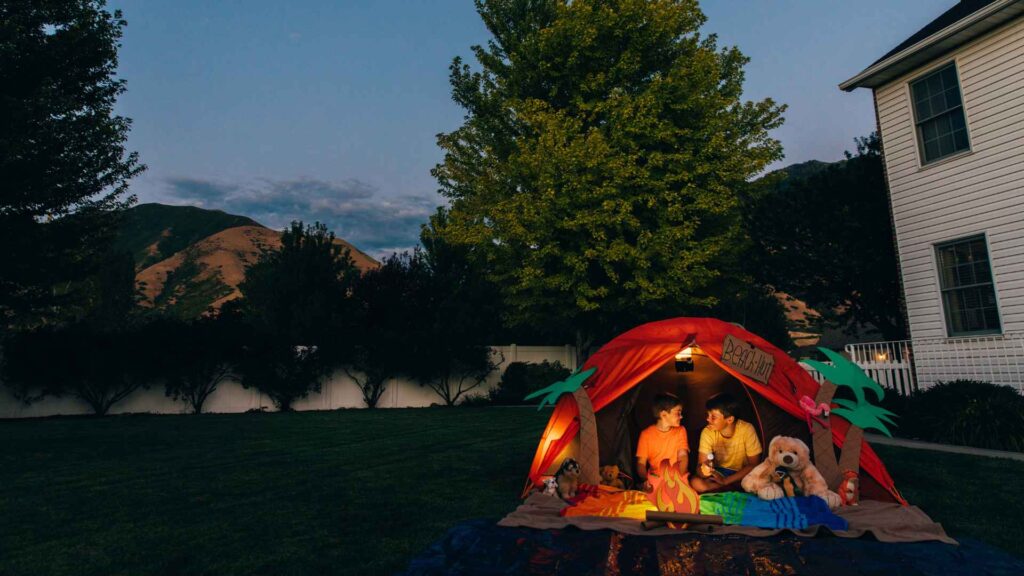
Finding the perfect spot in your backyard is the first step to a successful stargazing adventure.
- Away from Lights: Choose a spot away from any artificial lights. Streetlights, porch lights, and even indoor lights can create light pollution that makes it harder to see the stars.
- Open Sky View: Look for a location with a clear view of the sky, free from tall trees, buildings, or other obstructions.
- Comfortable Seating: Bring out some comfortable chairs or blankets. Lying on your back is often the best way to gaze up at the stars.
Essential Tools
While you don’t need fancy equipment to enjoy stargazing, a few essential tools can enhance the experience.
- Binoculars: A simple pair of binoculars can make a big difference. They are easy to use and can bring the moon, planets, and stars closer to view.
- Telescope: For a more detailed look at the night sky, a beginner-friendly telescope can be a great investment. Look for one that is easy to set up and use.
- Star Charts and Apps: Printed star charts are helpful for identifying constellations and stars. Additionally, smartphone apps like Star Walk or SkyView can provide real-time information about what you are seeing in the sky.
Safety Tips for Stargazing
Stargazing is a safe and fun activity, but a few safety tips can ensure that everyone has a good time.
- Dress Appropriately: Nights can be chilly, so wear warm clothes and bring extra blankets.
- Flashlights with Red Filters: Use flashlights with red filters to preserve your night vision. Bright white lights can make it difficult to see the stars.
- Be Aware of Wildlife: Depending on your location, be mindful of any nocturnal animals that might be nearby.
- Stay Hydrated and Bring Snacks: A thermos of hot cocoa and some snacks can make the experience more enjoyable, especially for kids.
By setting up your stargazing area thoughtfully, you’ll create a comfortable and conducive environment for exploring the wonders of the night sky.
Understanding the Night Sky
Basic Astronomy Terms
Before diving into stargazing, it’s helpful to know some basic astronomy terms.
- Constellation: A group of stars forming a recognizable pattern. There are 88 officially recognized constellations.
- Celestial Sphere: An imaginary sphere surrounding Earth onto which all celestial bodies can be projected.
- Magnitude: The brightness of a star or celestial object. The lower the magnitude, the brighter the object.
- Zenith: The point in the sky directly above an observer.
The Phases of the Moon
Understanding the moon’s phases can make stargazing even more interesting.
- New Moon: The moon is between Earth and the sun, and its dark side faces us, making it invisible.
- Waxing Crescent: A sliver of the moon becomes visible as it starts to move away from the sun.
- First Quarter: Half of the moon is illuminated and visible.
- Waxing Gibbous: More than half of the moon is visible and growing.
- Full Moon: The entire face of the moon is illuminated.
- Waning Gibbous: The moon starts to shrink but is still mostly visible.
- Last Quarter: Only half of the moon is illuminated again.
- Waning Crescent: Just a small sliver of the moon is visible before it becomes new again.
How to Identify Constellations
Learning to identify constellations is one of the most exciting parts of stargazing.
- Start with the Big Dipper: This is part of the Ursa Major constellation and is one of the easiest to find. It looks like a ladle or a plow.
- Find Polaris: The North Star, also known as Polaris, is part of the Ursa Minor constellation. It’s almost directly above the North Pole and can be found by following the line from the two outer stars of the Big Dipper.
- Look for Orion: This is one of the most recognizable constellations. Look for three stars in a row (Orion’s Belt) and then the four stars that form Orion’s shoulders and legs.
- Use a Star Chart or App: Star charts can help you identify constellations by season and location. Apps can also be incredibly useful, allowing you to point your phone at the sky for real-time identification.
By familiarizing yourself and your kids with these basics, you’ll be well on your way to understanding and appreciating the night sky.
This foundational knowledge will make your stargazing sessions more enjoyable and educational.
Star Gazing Activities
Fun Games to Play While Stargazing
Constellation Hunt
- Objective: Identify as many constellations as possible.
- How to Play: Use a star chart or app to locate constellations. Take turns spotting and naming them. Keep a tally of how many each person finds.
Star Counting Challenge
- Objective: Count as many stars as you can in a given time.
- How to Play: Set a timer for one minute. Each person counts the stars they see. Compare numbers at the end. It’s harder than it sounds, and lots of fun!
Create Your Own Constellation
- Objective: Use your imagination to make new constellations.
- How to Play: Look at the stars and think of patterns or shapes they might form. Draw your new constellation on paper and give it a name. Share your creations with each other.
Starry Storytelling: Myths and Legends of the Stars
Sharing stories can make the stars come alive for kids.
- Greek Myths: Talk about how constellations like Orion, Hercules, and Andromeda got their names from ancient Greek mythology.
- Native American Legends: Many Native American tribes have their own stories about the stars, such as the Big Dipper being a bear chased by hunters.
- Modern Tales: Make up your own stories about the stars. Let your kids create characters and adventures that take place in the night sky.
Observing the Moon
- The Different Phases of the Moon: Teach your kids how the moon changes shape over the course of a month. Use a calendar to track its phases.
- Moon Watching Tips: Use binoculars or a telescope to get a closer look at the moon’s surface. Look for craters, mountains, and seas.
- Drawing the Moon: Have your kids draw what they see. This helps them pay attention to details and improves their observation skills.
Exploring Planets
- Introduction to the Planets in Our Solar System: Give a brief overview of the planets. Use mnemonics like “My Very Educated Mother Just Served Us Noodles” to remember their order from the sun.
- How to Spot Planets with the Naked Eye: Teach your kids how to identify bright planets like Venus, Jupiter, and Saturn. Venus often appears as the brightest object after the sun and moon, while Jupiter and Saturn can be seen with the naked eye during certain times of the year.
- Using a Telescope to See Planets: Show your kids how to use a telescope to observe planets. Jupiter’s moons and Saturn’s rings are always exciting to see!
By incorporating these fun activities and storytelling into your stargazing sessions, you’ll create memorable experiences that engage your kids and spark their curiosity about the night sky.
Observing the Moon
The Different Phases of the Moon
Understanding the moon’s phases is a fundamental part of backyard astronomy. The moon goes through a cycle of eight phases each month.
- New Moon: The moon is positioned between Earth and the sun, making it invisible from Earth.
- Waxing Crescent: A small, crescent-shaped sliver of the moon becomes visible. This phase comes after the new moon.
- First Quarter: Half of the moon is illuminated and visible. It’s called the first quarter because it’s one-quarter of the way through its cycle.
- Waxing Gibbous: More than half of the moon is visible and increasing in size.
- Full Moon: The entire face of the moon is illuminated and visible from Earth.
- Waning Gibbous: The moon starts to decrease in size, but more than half is still visible.
- Last Quarter: Half of the moon’s surface is illuminated, but it’s on the opposite side from the first quarter.
- Waning Crescent: A small crescent of the moon is visible before it transitions back to a new moon.
Moon Watching: Tips and Tricks
Observing the moon can be a fascinating experience, especially with the right tips and tricks.
- Best Times to Watch: The best time to observe the moon is during the first quarter and waxing gibbous phases. The craters and mountains are more visible due to the shadows cast by the sun’s light.
- Use Binoculars or a Telescope: Binoculars are great for beginners. They provide a close-up view of the moon’s surface. Telescopes can reveal even more details, such as individual craters and lunar seas.
- Track the Moon’s Movement: Notice how the moon rises and sets at different times throughout the month. Keep a moon journal to record your observations.
Drawing the Moon: A Fun Activity
Drawing the moon can be a fun and educational activity for kids.
- Observation First: Spend some time observing the moon with the naked eye, binoculars, or a telescope.
- Drawing Supplies: Get paper, pencils, and possibly a white crayon or chalk for highlights.
- Capture the Details: Encourage kids to draw what they see, paying attention to the craters, the seas (maria), and the bright and dark areas.
- Compare Over Time: Draw the moon at different phases and compare the drawings. This helps kids understand how the moon changes over time.
By focusing on the moon and its phases, you can help kids develop a deeper appreciation for our nearest celestial neighbor.
Observing and drawing the moon fosters curiosity and enhances observational skills, making backyard astronomy even more enjoyable.
Exploring Planets
Introduction to the Planets in Our Solar System
Introduce your kids to the planets in our solar system with a fun and engaging overview.
- Mercury: The closest planet to the sun, known for its extreme temperatures.
- Venus: The hottest planet with a thick, toxic atmosphere. It’s often called Earth’s twin because of its similar size.
- Earth: Our home planet, unique for its abundant water and life.
- Mars: The red planet, known for its iron oxide surface and the largest volcano in the solar system, Olympus Mons.
- Jupiter: The largest planet, famous for its Great Red Spot, a giant storm.
- Saturn: Known for its stunning ring system.
- Uranus: The planet that rotates on its side, with faint rings.
- Neptune: The farthest planet from the sun, known for its deep blue color and strong winds.
How to Spot Planets with the Naked Eye
Some planets are visible to the naked eye and can be easily spotted with a bit of practice.
- Venus: Often seen just after sunset or before sunrise, Venus is the brightest planet and often called the “Evening Star” or “Morning Star.”
- Jupiter: Jupiter is very bright and can be seen throughout the night. It often appears as a bright, steady light in the sky.
- Saturn: Although not as bright as Jupiter, Saturn can still be seen with the naked eye. Look for its steady, yellowish light.
- Mars: Mars appears as a bright red dot in the sky. Its visibility varies, but it’s best seen during opposition when it’s closest to Earth.
Using a Telescope to See Planets
A telescope can reveal incredible details of the planets.
- Choosing a Telescope: A simple refractor or reflector telescope is perfect for beginners. Look for one with a stable mount and a decent aperture (70mm or more).
- Observing Jupiter: With a telescope, you can see Jupiter’s four largest moons: Io, Europa, Ganymede, and Callisto. You can also spot the bands of clouds and the Great Red Spot.
- Observing Saturn: Saturn’s rings are a stunning sight through a telescope. Depending on the power of your telescope, you might also see some of Saturn’s moons, like Titan.
- Observing Mars: During opposition, you can see surface features on Mars, such as the polar ice caps and dark volcanic regions.
- Tips for Best Viewing: The best time to observe planets is during a clear night with little light pollution. Let your telescope cool down to the outside temperature before using it to prevent blurry images.
Exploring the planets with your kids can be an awe-inspiring experience.
Understanding how to spot planets with the naked eye and using a telescope to see them up close brings the wonders of our solar system into your backyard, making astronomy a thrilling adventure for young explorers.
Meteor Showers and Other Celestial Events
What Are Meteor Showers?
Meteor showers are one of the most exciting celestial events to observe.
They occur when Earth passes through the debris left by a comet or asteroid, creating bright streaks of light as the debris burns up in our atmosphere.
- Meteor: A small piece of rock or metal from space that enters Earth’s atmosphere and burns up, creating a streak of light.
- Meteor Shower: A celestial event where numerous meteors can be seen in the night sky, often appearing to radiate from a single point (called the radiant).
Best Times and Tips for Watching Meteor Showers
Watching a meteor shower can be a magical experience, especially for kids.
- Major Meteor Showers:
- Perseids: Occurs in mid-August, known for its bright and numerous meteors.
- Geminids: Peaks in mid-December, often considered the best meteor shower of the year.
- Quadrantids: Peaks in early January, known for its bright fireballs.
- Optimal Viewing Conditions:
- Dark Skies: Find a spot away from city lights. The darker the sky, the more meteors you’ll see.
- Clear Weather: Check the weather forecast to ensure clear skies on the night of the shower.
- Best Time: The best time to watch is usually after midnight when the sky is darkest and the radiant is high in the sky.
- Tips for Viewing:
- Comfortable Seating: Bring reclining chairs or blankets to lie on.
- Dress Warmly: Even summer nights can get chilly, so dress in layers.
- Be Patient: It can take 15-20 minutes for your eyes to adjust to the dark, so give it some time.
Other Exciting Celestial Events to Watch For
Besides meteor showers, there are many other celestial events that can captivate young astronomers.
- Lunar Eclipses: When the Earth comes between the sun and the moon, casting a shadow on the moon. A total lunar eclipse can turn the moon a reddish color, known as a “Blood Moon.”
- Solar Eclipses: When the moon passes between the Earth and the sun, temporarily blocking the sun’s light. These should be viewed with proper solar viewing glasses to protect your eyes.
- Planetary Conjunctions: When two or more planets appear very close to each other in the sky. These events can be quite striking and are visible to the naked eye.
- International Space Station (ISS) Flyovers: The ISS is often visible as a bright, fast-moving dot crossing the sky. Check websites or apps for the exact times it will be visible in your area.
- Auroras: Also known as the Northern or Southern Lights, these colorful displays occur when solar particles interact with Earth’s magnetic field. They are best seen in high-latitude regions.
By planning your stargazing around these celestial events, you can create unforgettable experiences for your kids.
Each event offers a unique glimpse into the wonders of the universe, making backyard astronomy an exciting and ever-changing adventure.
Using Technology to Enhance Stargazing
Astronomy Apps and Websites for Kids
Technology can make stargazing even more exciting and educational for kids.
- Star Walk Kids: This app is designed specifically for children, offering an easy-to-use interface with fun, animated characters that guide kids through the night sky.
- SkyView Lite: Point your phone at the sky, and this app will identify stars, constellations, and planets in real-time. It’s intuitive and great for beginners.
- NASA’s Eyes: An interactive app that allows kids to explore the solar system and beyond, featuring real-time data from NASA missions.
- Stellarium: A powerful planetarium software that shows a realistic sky in 3D, just like what you see with the naked eye, binoculars, or a telescope.
How to Use a Star Chart App
Star chart apps can transform your stargazing experience by making it easier to identify celestial objects.
- Download a Reliable App: Apps like SkySafari, Star Chart, or SkyView Lite are popular and highly rated.
- Calibrate Your Device: Follow the app’s instructions to calibrate your phone’s sensors for accurate star mapping.
- Point and Discover: Simply point your device at the sky, and the app will overlay the names and positions of stars, planets, and constellations on your screen.
- Learn About Each Object: Most apps provide detailed information about the stars and planets you’re looking at, including their history, mythology, and scientific facts.
Taking Photos of the Night Sky
Capturing the beauty of the night sky can be a rewarding part of stargazing.
- Smartphone Photography: Modern smartphones have impressive cameras that can capture night sky images with the right settings.
- Use a Tripod: To avoid blurry images, use a tripod or a stable surface to hold your phone steady.
- Adjust Settings: Use manual settings if available. Increase the exposure time, lower the ISO to reduce noise, and focus manually to get clear shots of the stars.
- Apps for Night Photography: Apps like NightCap Camera or ProCam offer advanced controls for night sky photography.
- Astrophotography with a Camera: For more detailed and higher-quality images, use a DSLR or mirrorless camera.
- Use a Wide-Angle Lens: A lens with a wide aperture (f/2.8 or lower) will capture more light.
- Long Exposure: Set your camera to a long exposure time (10-30 seconds) to capture more light from stars and celestial objects.
- Remote Shutter Release: Use a remote shutter release or the camera’s timer to avoid shaking the camera when taking a photo.
- Post-Processing: Enhance your photos using software like Adobe Lightroom or Photoshop to adjust brightness, contrast, and colors.
Exploring Augmented Reality (AR) and Virtual Reality (VR)
AR and VR technologies can provide immersive stargazing experiences.
- AR Apps: Apps like SkyView AR and Night Sky use augmented reality to overlay star maps on your real-world surroundings, making it easier to identify stars and constellations.
- VR Headsets: Virtual reality headsets like Oculus Quest offer apps such as Titans of Space, which provide virtual tours of the solar system and beyond, offering a unique perspective on astronomy.
Using technology to enhance your stargazing sessions can make learning about the night sky more interactive and engaging for kids.
These tools not only make it easier to identify celestial objects but also provide deeper insights and a greater appreciation for the wonders of the universe.
Crafting and DIY Projects
Make Your Own Star Wheel
Creating a star wheel, or planisphere, is a fun and educational project that helps kids learn about the night sky.
Materials Needed:
- Printable star wheel template (available online)
- Scissors
- Cardstock or thick paper
- Brass fastener
- Markers or crayons for decoration
Instructions:
- Print the Template: Download and print a star wheel template.
- Cut Out the Pieces: Carefully cut out the star wheel and the outer circle from the cardstock.
- Assemble the Star Wheel: Place the star wheel on top of the outer circle, aligning the center points. Secure them together with a brass fastener.
- Decorate: Let your kids decorate the outer circle with markers or crayons.
- Using the Star Wheel: Adjust the star wheel to match the date and time to see a representation of the night sky. Use it to identify stars and constellations.
DIY Telescope from Household Items
A simple DIY telescope can introduce kids to the basics of optics and magnification.
Materials Needed:
- Two cardboard tubes (one slightly larger than the other)
- Two magnifying glasses (different sizes)
- Tape
- Scissors
- Construction paper (optional for decoration)
Instructions:
- Insert the Magnifying Glasses: Tape one magnifying glass to the end of each cardboard tube.
- Fit the Tubes Together: Slide the smaller tube inside the larger tube. Adjust until you get a clear image when looking through both magnifying glasses.
- Secure the Tubes: Once you have a clear view, tape the tubes in place.
- Decorate: Use construction paper and markers to decorate your telescope.
- Using the Telescope: Point the telescope at the moon or a bright star to see them up close.
Create a Starry Night Sky in a Jar
This simple craft project can bring the beauty of the night sky indoors.
Materials Needed:
- Mason jar
- Black construction paper
- Glow-in-the-dark stars or paint
- Cotton balls
- Glitter
- Battery-operated fairy lights
Instructions:
- Prepare the Jar: Line the inside of the jar with black construction paper.
- Add Stars: Stick glow-in-the-dark stars on the black paper or use glow-in-the-dark paint to create stars.
- Add Cotton Balls: Place cotton balls inside the jar, layering them with glitter to mimic the Milky Way.
- Insert Lights: Place the battery-operated fairy lights inside the jar, among the cotton balls.
- Seal and Decorate: Seal the jar and, if desired, decorate the outside with additional stickers or paint.
- Enjoy Your Starry Sky: Turn on the fairy lights to illuminate your starry night sky jar.
These crafting and DIY projects not only provide hands-on learning experiences but also allow kids to create tangible representations of their stargazing adventures.
These activities can make the concepts of astronomy more concrete and enjoyable, fostering a deeper interest in the night sky.
Astronomy and STEM Learning
How Stargazing Can Spark Interest in Science
Stargazing is more than just a fun activity; it can ignite a passion for science and exploration in kids.
- Curiosity: Observing the night sky naturally leads to questions about planets, stars, and the universe, fostering a curious mindset.
- Critical Thinking: Identifying constellations and understanding celestial events involve problem-solving and critical thinking skills.
- Inspiration: Learning about space can inspire kids to pursue careers in science, technology, engineering, and mathematics (STEM).
Simple Astronomy Experiments for Kids
Hands-on experiments can deepen kids’ understanding of astronomical concepts.
Phases of the Moon Experiment:
- Materials Needed: A flashlight, a small ball (representing the moon), and a larger ball or globe (representing Earth).
- Instructions:
- Dark Room: Conduct this experiment in a dark room.
- Position the “Earth”: Place the larger ball or globe on a table.
- Illuminate with the Flashlight: Use the flashlight to represent the sun, shining it on the globe.
- Move the “Moon”: Hold the small ball and move it around the globe to simulate the moon’s orbit. Observe how the illumination changes, representing the different phases of the moon.
Constellation Projector:
- Materials Needed: An empty toilet paper roll, black construction paper, a rubber band, a pin, and a flashlight.
- Instructions:
- Create the Constellation Template: Cut a circle from the black construction paper to fit over one end of the toilet paper roll.
- Draw and Poke Holes: Draw a simple constellation on the paper circle and use the pin to poke holes at the star positions.
- Attach the Template: Secure the paper circle to the end of the toilet paper roll with a rubber band.
- Project the Constellation: Shine the flashlight through the opposite end of the roll to project the constellation onto a wall or ceiling.
Learning More About Space: Books and Resources
Books and other resources can provide valuable information and inspire further exploration.
Books:
- “There’s No Place Like Space: All About Our Solar System” by Tish Rabe: A fun introduction to the solar system, perfect for young readers.
- “The Darkest Dark” by Chris Hadfield: A beautifully illustrated book about overcoming fears and dreaming big, written by astronaut Chris Hadfield.
- “Star Stuff: Carl Sagan and the Mysteries of the Cosmos” by Stephanie Roth Sisson: A biography of the famous astronomer Carl Sagan, inspiring curiosity about the universe.
Online Resources:
- NASA’s Kids’ Club: Offers games, videos, and activities related to space exploration.
- The Night Sky Network: Provides resources and information about local astronomy clubs and events.
- StarDate Online: Features astronomy news, sky guides, and educational resources.
Local Resources:
- Astronomy Clubs: Many communities have astronomy clubs that offer star parties, workshops, and talks.
- Planetariums and Science Centers: Visiting a planetarium or science center can provide interactive and immersive learning experiences.
- Public Libraries: Libraries often have a selection of astronomy books and may host educational events or telescope lending programs.
Encouraging kids to learn more about space through experiments, books, and resources can deepen their interest in astronomy and STEM fields.
These activities and materials provide a foundation for lifelong learning and curiosity about the universe.
Hosting a Backyard Astronomy Party
Planning the Perfect Stargazing Party
Hosting a stargazing party is a fun way to share the wonders of the night sky with friends and family.
- Choose a Date: Pick a night with clear skies and minimal moonlight for the best stargazing experience. Meteor showers or other celestial events can make the party even more special.
- Send Invitations: Create fun, themed invitations. You can even use star-themed designs and glitter to make them sparkle.
- Prepare the Space: Set up your backyard with comfortable seating, such as lawn chairs or blankets. Arrange telescopes, binoculars, and star charts for easy access.
Fun Themes and Activities for an Astronomy Party
Themes and activities can make your stargazing party more engaging and enjoyable.
- Space Adventure Theme: Decorate with stars, planets, and rocket ships. Use glow-in-the-dark decorations to create a celestial atmosphere.
- Astronomy Crafts: Set up a craft table where kids can make star wheels, constellation projectors, or decorate their own telescope tubes.
- Star Hunt: Organize a star hunt game where kids use star charts or apps to find and identify constellations. Offer small prizes for finding specific stars or planets.
- Storytelling Circle: Gather everyone for a storytelling session where you share myths and legends about the stars and constellations. Encourage kids to create their own star stories.
Stargazing Snacks: Fun and Easy Recipes
No party is complete without snacks! Here are some fun, themed treats for your astronomy party.
- Star Sandwiches: Use star-shaped cookie cutters to make sandwiches. Fill them with your choice of spreads like peanut butter and jelly, or ham and cheese.
- Planet Pops: Create cake pops decorated like planets in our solar system. Use different colors of icing to represent each planet.
- Galaxy Cupcakes: Bake cupcakes and frost them with swirled colors of blue, purple, and black to resemble a galaxy. Add edible glitter and star-shaped sprinkles for extra sparkle.
- Constellation Cookies: Bake sugar cookies and use icing to draw constellations on them. Use edible silver balls to represent the stars.
- Meteorite Popcorn: Make caramel popcorn and mix in chocolate-covered candies to represent meteorites.
Setting Up Viewing Stations
Create dedicated viewing stations for different celestial objects and activities.
- Moon Station: Set up a telescope aimed at the moon. Provide a guide to the moon’s features for guests to read while they observe.
- Planet Station: Arrange a station with information about visible planets. Use another telescope or binoculars for planet viewing.
- Constellation Station: Lay out star charts and blankets for guests to lie down and identify constellations. Provide laser pointers for easy constellation tracing.
- Meteor Shower Station: If a meteor shower is happening, set up a comfortable area with reclining chairs or lounge chairs so guests can look up and watch for meteors.
Making It Educational and Fun
Blend fun and education to make your astronomy party memorable and enriching.
- Interactive Talks: Prepare a short, kid-friendly presentation about the night sky. Use visuals and props to make it engaging.
- Q&A Session: Encourage kids to ask questions about space and astronomy. Have knowledgeable guests or use resources to provide accurate answers.
- Take-Home Materials: Provide guests with star charts, moon phase calendars, or printouts of fun astronomy facts to take home.
By hosting a backyard astronomy party, you can create an enjoyable and educational experience that fosters a love for stargazing and science.
These activities, themes, and treats will make your party a hit and inspire guests to explore the night sky further.
Conclusion
Recap of the Fun and Learning
Backyard astronomy is a wonderful way to combine fun and education, creating memorable experiences for the whole family.
- Setting Up for Success: Finding the perfect spot and gathering essential tools makes stargazing comfortable and enjoyable.
- Understanding the Night Sky: Learning basic astronomy terms, moon phases, and how to identify constellations enhances the stargazing experience.
- Star Gazing Activities: Engaging in fun games, storytelling, and moon watching fosters curiosity and creativity.
- Exploring Planets: Spotting planets with the naked eye and using a telescope to see them up close brings the solar system to life.
- Meteor Showers and Celestial Events: Observing meteor showers and other celestial events adds excitement and wonder to your stargazing sessions.
- Using Technology: Utilizing astronomy apps, star chart apps, and taking photos enhances the learning experience.
- Crafting and DIY Projects: Hands-on projects like making a star wheel, DIY telescope, and starry night sky jar make astronomy tangible and fun.
- Astronomy and STEM Learning: Stargazing sparks interest in science, fosters critical thinking, and provides valuable educational experiences.
- Hosting a Backyard Astronomy Party: Sharing the joy of stargazing with friends and family through themed parties and activities makes the experience communal and even more enjoyable.
Encouragement to Keep Exploring the Night Sky
The night sky is vast and full of wonders waiting to be discovered. Encourage your kids to keep looking up and exploring the cosmos.
- Stay Curious: Keep asking questions about the stars, planets, and other celestial objects. Curiosity is the heart of learning.
- Keep Learning: Use books, apps, and other resources to expand your knowledge about astronomy. Join local astronomy clubs or attend stargazing events.
- Observe Regularly: Make stargazing a regular family activity. The more you observe, the more you’ll learn and appreciate the night sky.
Final Tips and Resources for Aspiring Young Astronomers
To continue the journey of backyard astronomy, here are some final tips and resources.
- Be Patient: Stargazing requires patience and practice. The more time you spend, the more you’ll see and understand.
- Use a Journal: Keep a stargazing journal to record your observations, sketches, and discoveries. This helps track progress and remember what you’ve seen.
- Join Online Communities: Participate in online forums and communities where you can share experiences, ask questions, and learn from other astronomy enthusiasts.
