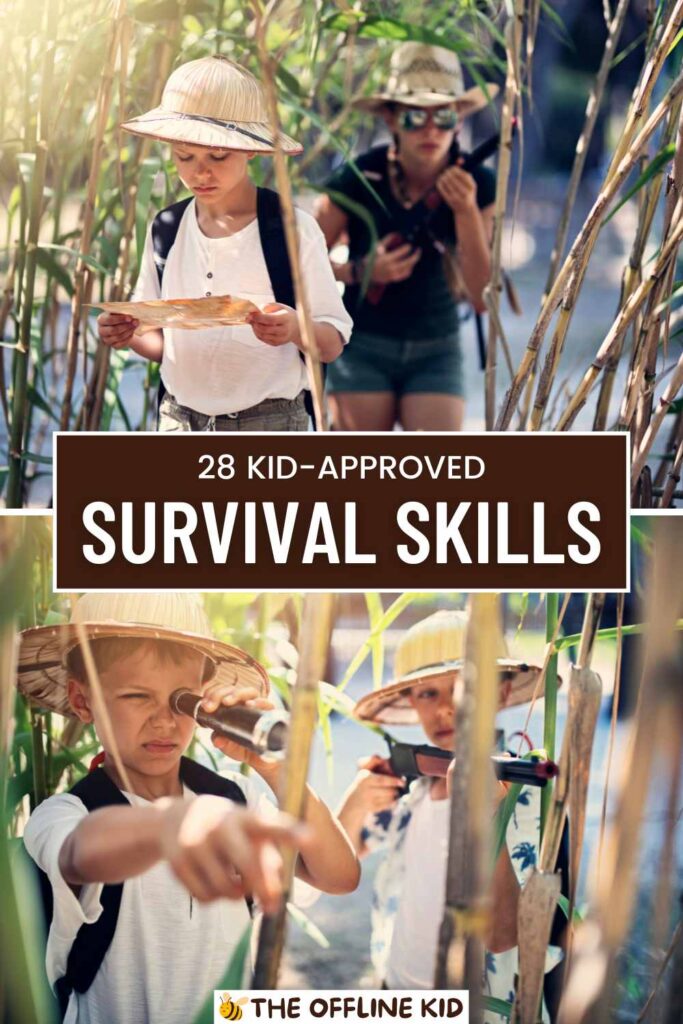
Teaching your kids outdoor survival skills equips them with confidence, independence, and safety knowledge.
From finding water to building shelters, this guide covers essential skills that prepare them for any wilderness adventure.
Finding and Purifying Water
One of the most critical survival skills is finding and purifying water.
Clean water is essential for staying hydrated and healthy in the wilderness.
Identifying Natural Water Sources
- Streams and Rivers: Flowing water is usually safer to drink than stagnant water. Look for clear, moving water.
- Lakes and Ponds: These can be good sources but are more likely to contain contaminants.
- Rainwater: Collect rainwater using tarps, leaves, or containers.
- Morning Dew: Use a cloth to soak up dew from grass and plants in the early morning.
Methods to Purify Water
- Boiling: Boil water for at least one minute to kill most pathogens. This is one of the most reliable methods.
- Purification Tablets: Easy to carry and use, these tablets can kill bacteria and viruses. Follow the instructions on the package.
- DIY Filters: Create a simple water filter using layers of sand, charcoal, and gravel in a container. Pour water through the filter to remove large particles.
- Solar Still: Dig a hole, place a container in the center, cover the hole with plastic, and weigh down the plastic with a small rock over the container. Water will evaporate and condense on the plastic, dripping into the container.
Safety Tips
- Always purify water if you’re unsure about its safety.
- Avoid drinking water from sources near human activity or animals, as these are more likely to be contaminated.
- Be cautious of water that has an unusual color, odor, or taste.
Teaching your kids these water survival skills will help ensure they can stay hydrated and healthy in the wilderness.
Understanding how to find and purify water is a fundamental skill that can make a significant difference in an emergency situation.
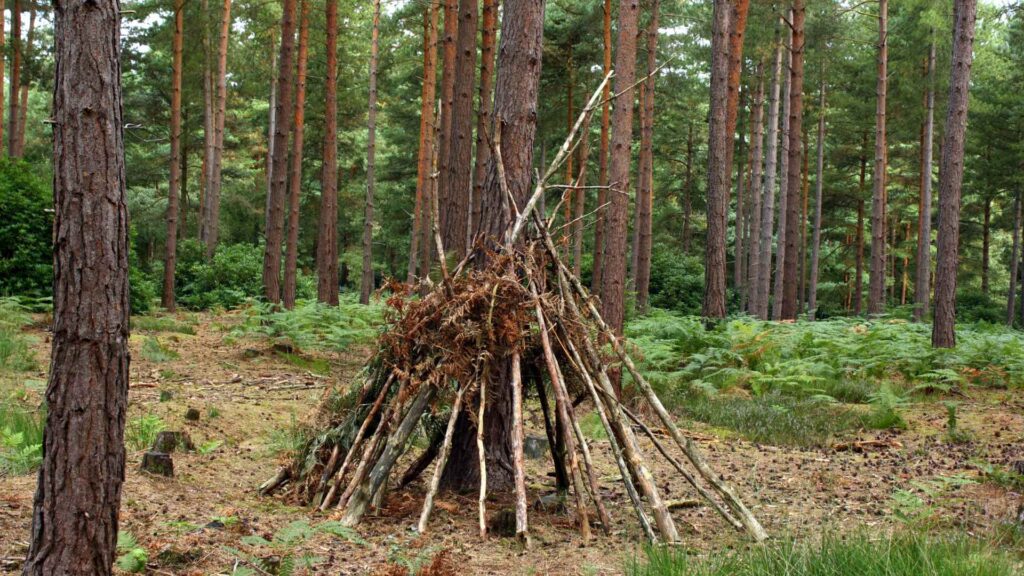
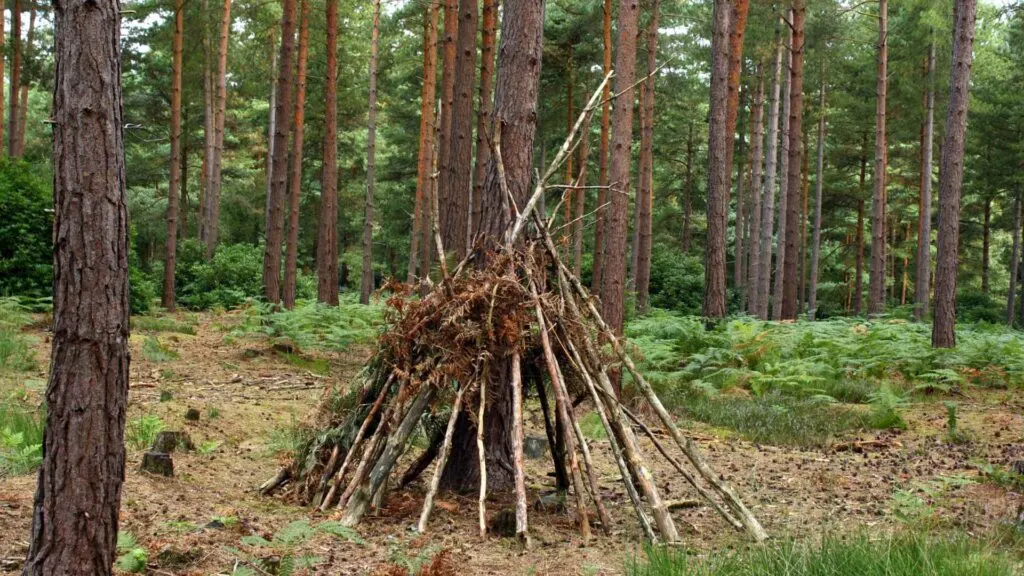
Building a Shelter
Knowing how to build a shelter is crucial for staying protected from the elements and ensuring a safe and comfortable place to rest.
Basic Types of Shelters
- Lean-To Shelter
- Materials Needed: Long branches or poles, smaller sticks, leaves, and other debris.
- How to Build:
- Find a sturdy tree or a large rock.
- Lean long branches against the tree or rock to form a frame.
- Cover the frame with smaller sticks, leaves, and debris for insulation.
- Debris Hut
- Materials Needed: Sticks, leaves, pine needles, and other natural debris.
- How to Build:
- Create a framework by leaning a sturdy stick against a tree or rock.
- Pile sticks on both sides of the framework to form a tent-like structure.
- Cover the structure with a thick layer of leaves, pine needles, and other debris for insulation.
- Tarp Shelter
- Materials Needed: Tarp, rope, and stakes.
- How to Build:
- Find two trees about 8-10 feet apart.
- Tie a rope between the trees and drape the tarp over it.
- Secure the tarp to the ground using stakes or by weighing down the edges with rocks.
Materials Needed and Step-by-Step Instructions
- Choosing a Location:
- Look for a dry, flat area away from potential hazards like falling branches or flooding.
- Consider the wind direction and build the entrance facing away from the prevailing wind.
- Gathering Materials:
- Collect branches, sticks, and debris from the surrounding area.
- Make sure the materials are dry and sturdy.
- Building the Framework:
- Use long branches or poles to create the main structure of the shelter.
- Ensure the framework is stable and secure.
- Adding Insulation:
- Cover the framework with leaves, grass, and other natural materials to provide insulation.
- Make the layer of insulation as thick as possible to retain heat and protect from rain.
- Final Adjustments:
- Check for gaps or weak spots and reinforce as needed.
- Make sure the entrance is easily accessible but can be covered to keep out the cold and rain.
Safety Tips
- Avoid building shelters in low-lying areas that might flood.
- Stay clear of animal trails and nests to avoid unwanted encounters.
- Ensure your shelter is stable and won’t collapse during the night.
Teaching your kids how to build a shelter not only provides them with a vital survival skill but also fosters creativity and problem-solving.
By practicing these techniques, they can learn to stay safe and comfortable in the wilderness.
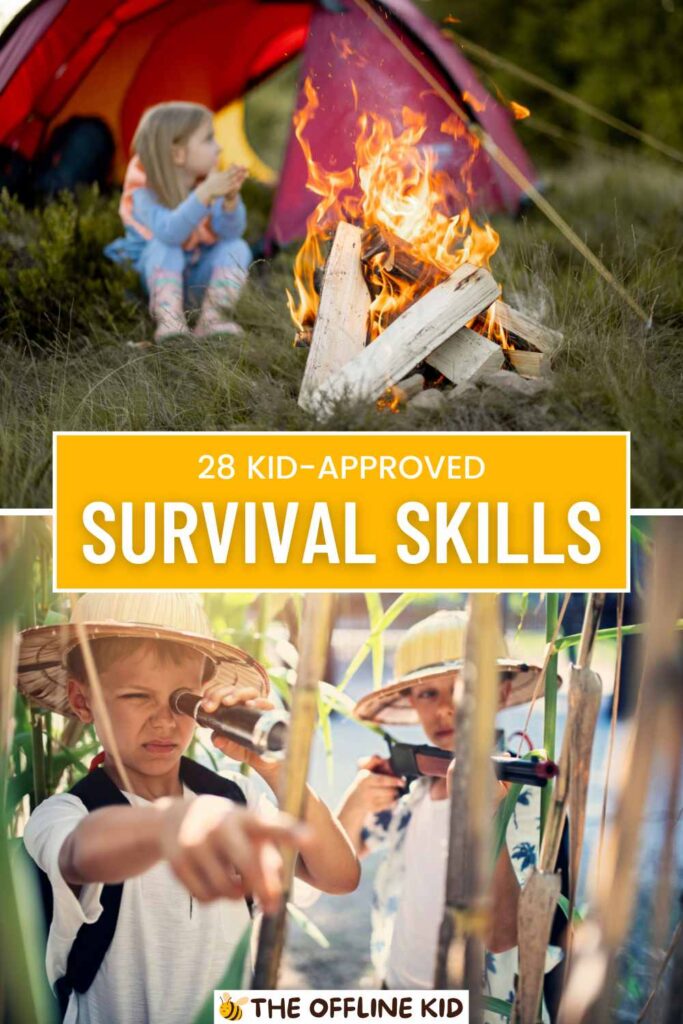
Starting a Fire
Fire is a critical survival skill for warmth, cooking, and signaling for help. Knowing how to start a fire can make a significant difference in a survival situation.
Importance of Fire
- Warmth: Fire provides heat, which is essential for staying warm in cold environments.
- Cooking: Cooking food makes it safer to eat and more nutritious.
- Signaling: Fire can be used to signal for help, especially at night or in foggy conditions.
- Protection: Fire can help keep wild animals at bay.
Different Methods to Start a Fire
- Using Matches or Lighters
- Matches: Waterproof matches are ideal for survival situations. Strike the match against a rough surface to ignite.
- Lighters: Easy to use and reliable. Keep a lighter in your survival kit for emergencies.
- Fire Starters
- Ferro Rod: Strike the metal rod with a striker to create sparks. Direct the sparks onto tinder to start a fire.
- Magnesium Block: Shave off magnesium flakes onto your tinder and use a spark to ignite.
- Bow Drill Technique
- Materials Needed: A bow (curved branch with a cord), a spindle (straight stick), a fireboard (flat piece of wood), and a socket (handhold).
- How to Use:
- Create a notch in the fireboard and place the spindle in the notch.
- Wrap the cord around the spindle and place the socket on top.
- Move the bow back and forth to spin the spindle, creating friction and eventually an ember.
- Transfer the ember to your tinder bundle and blow gently to ignite the fire.
Gathering Materials
- Tinder: Dry, flammable material that catches fire easily (e.g., dry grass, leaves, bark, cotton balls).
- Kindling: Small sticks and twigs that catch fire from the tinder and help build the fire.
- Fuel: Larger branches and logs that keep the fire burning.
Step-by-Step Instructions
- Prepare the Site:
- Choose a safe location away from overhanging branches and dry vegetation.
- Clear a circular area and dig a small pit or create a fire ring with rocks.
- Build the Fire Structure:
- Teepee: Arrange tinder in the center, then place kindling around it in a teepee shape. Add larger sticks and logs as the fire grows.
- Log Cabin: Place tinder in the center, build a square structure with kindling around it, and stack larger logs in layers around the kindling.
- Ignite the Fire:
- Use your chosen method (matches, lighter, fire starter, or bow drill) to ignite the tinder.
- Gently blow on the tinder to help the fire catch and spread to the kindling.
- Maintain the Fire:
- Add more fuel as needed to keep the fire burning.
- Avoid smothering the fire by adding too much fuel at once.
Safety Tips
- Always have water or sand nearby to extinguish the fire quickly if needed.
- Never leave a fire unattended.
- Ensure the fire is completely out before leaving the site by dousing it with water and stirring the ashes.
Teaching your kids how to start and maintain a fire safely is an invaluable skill.
Practice these techniques in a controlled environment to build their confidence and proficiency.
Basic First Aid
Having basic first aid knowledge is essential for dealing with common injuries and medical emergencies in the wilderness. Teaching your kids these skills ensures they can respond effectively and safely.
Common Outdoor Injuries and How to Treat Them
- Cuts and Scrapes
- Cleaning the Wound: Use clean water to rinse out dirt and debris. If available, use an antiseptic wipe.
- Applying a Bandage: Cover the wound with a sterile bandage or gauze. Secure it with medical tape.
- Monitoring for Infection: Watch for signs of infection, such as redness, swelling, or pus. Seek medical help if these symptoms occur.
- Sprains and Strains
- Rest: Encourage the injured person to rest the affected area.
- Ice: Apply an ice pack wrapped in a cloth to reduce swelling. Use it for 15-20 minutes at a time.
- Compression: Wrap the injured area with an elastic bandage to provide support.
- Elevation: Elevate the injured limb above heart level to reduce swelling.
- Insect Bites and Stings
- Removing Stingers: Use tweezers to gently remove any stingers left in the skin.
- Cleaning the Area: Wash the bite or sting with soap and water.
- Applying a Cold Pack: Use a cold pack to reduce swelling and pain.
- Using Anti-Itch Cream: Apply an anti-itch cream or calamine lotion to relieve itching.
- Sunburn
- Cooling the Skin: Apply cool, damp cloths to the sunburned area.
- Hydrating: Encourage the person to drink plenty of water.
- Moisturizing: Use aloe vera gel or a moisturizing lotion to soothe the skin.
- Protecting from Further Sun Exposure: Keep the person out of the sun until the burn heals.
Assembling a Basic First Aid Kit
- Bandages and Gauze: Include a variety of sizes for different types of wounds.
- Antiseptic Wipes and Creams: To clean and disinfect wounds.
- Tweezers: For removing splinters, stingers, and debris.
- Scissors: For cutting bandages and tape.
- Elastic Bandages: For sprains and strains.
- Cold Packs: For reducing swelling and pain.
- Pain Relievers: Such as acetaminophen or ibuprofen.
- Anti-Itch Cream: For insect bites and skin irritations.
- Medical Tape: For securing bandages and gauze.
- Gloves: For protecting yourself while providing first aid.
Safety Tips
- Always wash your hands or use hand sanitizer before and after providing first aid.
- Know the location of the nearest medical facility and how to contact emergency services.
- Teach kids to stay calm and communicate clearly in an emergency.
- Ensure that children understand the importance of personal safety and hygiene while administering first aid.
Teaching your kids basic first aid equips them with the skills needed to handle common injuries confidently. Regularly review and practice these skills to ensure they are prepared for any situation in the wilderness.
Navigation Skills
Being able to navigate through unfamiliar terrain is a vital survival skill. Teaching your kids how to use maps, compasses, and other navigation tools will help them stay oriented and find their way.
Using a Map and Compass
- Understanding Map Basics
- Types of Maps: Familiarize your kids with different types of maps, such as topographic maps, which show elevation changes, and road maps.
- Reading Map Symbols: Teach them to interpret common symbols and legends on maps, including contour lines, water sources, trails, and landmarks.
- Map Orientation: Show them how to align the map with the terrain using identifiable landmarks and the cardinal directions.
- Using a Compass
- Parts of a Compass: Explain the parts of a compass, including the baseplate, rotating bezel, and magnetic needle.
- Taking a Bearing: Demonstrate how to take a bearing by aligning the compass with a landmark and reading the degree mark.
- Following a Bearing: Teach them to hold the compass level and follow the bearing by keeping the needle aligned with the north marker on the bezel.
Basic Orienteering and Understanding Landmarks
- Identifying Landmarks: Teach kids to recognize natural landmarks like mountains, rivers, and distinct trees, as well as man-made landmarks such as buildings and roads.
- Using Landmarks for Navigation: Show them how to use landmarks to orient themselves and navigate towards a destination.
- Estimating Distances: Teach them how to estimate distances by counting steps or using visual cues.
Introduction to GPS Devices and Apps
- Understanding GPS Basics
- How GPS Works: Explain the basics of how GPS devices use satellites to determine location.
- Types of GPS Devices: Familiarize them with handheld GPS units, smartphone apps, and built-in car navigation systems.
- Using GPS for Navigation
- Entering Coordinates: Show them how to enter coordinates into a GPS device to find a specific location.
- Following GPS Directions: Teach them to interpret and follow directions provided by the GPS.
- Waypoint Marking: Explain how to mark waypoints (specific locations) to help track their route and return to important spots.
Practical Exercises
- Map and Compass Practice
- Set up a small orienteering course in a safe area and have your kids practice using a map and compass to navigate between points.
- Encourage them to identify landmarks and use them to stay oriented.
- GPS Navigation Practice
- Plan a hike or walk using a GPS device or app. Let your kids take turns leading the way using the GPS.
- Practice marking waypoints and following the route back.
Safety Tips
- Always carry a physical map and compass as a backup to electronic devices.
- Teach kids to stay on marked trails whenever possible to avoid getting lost.
- Ensure they know the importance of not relying solely on GPS, as electronic devices can fail or lose signal.
By teaching your kids navigation skills, you empower them to explore the wilderness confidently and safely. Regular practice and familiarization with both traditional and modern navigation tools will prepare them for any outdoor adventure.
Foraging for Food
Foraging for wild food is a valuable survival skill that can provide nourishment in an emergency. Teaching your kids to identify edible plants and berries ensures they can find safe, nutritious food in the wilderness.
Identifying Edible Plants and Berries
- Common Edible Plants
- Dandelions: Easily recognizable with their bright yellow flowers and serrated leaves. All parts of the plant are edible.
- Clover: Found in fields and lawns, clover leaves and flowers can be eaten raw or cooked.
- Plantain: This plant has broad, oval leaves and small, green flowers. Both the leaves and seeds are edible.
- Chickweed: Small, star-shaped white flowers and oval leaves. It can be eaten raw in salads.
- Common Edible Berries
- Blueberries: Found in forests and meadows. Look for clusters of small, blue, round berries.
- Blackberries: These grow on thorny bushes and are dark purple to black when ripe.
- Raspberries: Similar to blackberries but usually red or golden. They grow on thorny canes.
- Elderberries: Small, dark purple berries that grow in clusters. Must be cooked before eating to remove toxins.
Foraging Safety
- Avoiding Poisonous Plants and Berries
- Know Your Plants: Learn to identify common poisonous plants such as poison ivy, poison oak, and deadly nightshade.
- The Universal Edibility Test: If unsure about a plant, use this test: separate the plant into its parts (leaves, stems, roots, buds, flowers), test each part separately by touching it to your lips and waiting for a reaction. If no reaction occurs, chew a small piece and wait again. If there’s no adverse reaction, it’s likely safe to eat.
- Color and Smell: Be cautious of brightly colored berries and plants with an unpleasant odor.
- Proper Preparation Methods
- Washing: Always wash foraged plants and berries thoroughly with clean water to remove dirt and potential contaminants.
- Cooking: Some plants and berries need to be cooked to remove toxins (e.g., elderberries must be boiled).
Ethical Foraging Practices
- Sustainable Harvesting
- Leave Some Behind: Only take what you need and leave enough for the plant to regenerate and for wildlife to consume.
- Rotate Harvesting Areas: Avoid depleting one area by rotating your foraging spots.
- Respecting Nature
- No Over-Harvesting: Do not pick rare or endangered plants.
- Minimize Impact: Be gentle with plants to avoid damaging them and their surroundings.
Practical Foraging Exercises
- Guided Foraging Walks
- Take your kids on foraging walks with a knowledgeable guide or use a foraging book to identify edible plants and berries.
- Practice identifying and harvesting plants in different seasons.
- Cooking with Foraged Foods
- Incorporate foraged foods into meals to show how they can be prepared and enjoyed.
- Teach simple recipes using foraged ingredients like salads, teas, and cooked dishes.
Safety Tips
- Never consume plants or berries unless you are 100% sure they are safe to eat.
- Teach kids to ask an adult before eating anything they find in the wild.
- Be aware of potential allergens and ensure no one in your group has allergies to the plants you forage.
Foraging for food can be a fun and educational activity that connects kids with nature. By learning to identify and safely gather wild edibles, your kids will gain confidence and essential survival skills that can be used in the wilderness.
Knot Tying
Knowing how to tie knots is a versatile and essential survival skill.
Whether it’s securing a shelter, making a fishing line, or creating a safety harness, knots have countless applications in the wilderness.
Essential Knots for Survival
- Square Knot
- Uses: Joining two ropes of the same diameter, securing bandages.
- How to Tie:
- Cross the right end over the left and tuck it under.
- Cross the left end over the right and tuck it under.
- Pull tight to secure.
- Bowline Knot
- Uses: Creating a fixed loop at the end of a rope, rescue situations.
- How to Tie:
- Make a small loop near the end of the rope.
- Pass the end of the rope through the loop from the underside.
- Wrap the end around the standing part of the rope and back through the loop.
- Tighten to form a secure loop.
- Clove Hitch
- Uses: Securing a rope to a post or tree, temporary fastening.
- How to Tie:
- Wrap the rope around the post or tree.
- Cross the rope over itself and wrap it around the post again.
- Tuck the end under the last wrap and pull tight.
Practical Applications of Each Knot
- Square Knot
- Securing Bandages: Use to tie bandages in place during first aid.
- Joining Ropes: Connect two ropes for extended length.
- Bowline Knot
- Rescue and Safety: Create a secure loop for rescue operations or safety harnesses.
- Hanging Items: Use to hang food or gear away from animals.
- Clove Hitch
- Setting Up Shelter: Secure a rope to a tree for a tarp shelter.
- Temporary Fastening: Quickly secure items that may need frequent adjustment.
Learning and Practicing Knot Tying
- Hands-On Practice
- Step-by-Step Demonstrations: Show kids how to tie each knot slowly, explaining each step clearly.
- Practice with Rope: Give kids ropes to practice tying knots until they can do it confidently.
- Applications in Real Situations
- Shelter Building: Use knots to set up shelters during camping trips.
- Fishing and Trapping: Teach kids to tie knots for making fishing lines and traps.
- Emergency Scenarios: Practice knots that could be useful in rescue situations or for securing gear.
Additional Useful Knots
- Taut-Line Hitch
- Uses: Adjusting tension on a rope, useful for securing tents and tarps.
- How to Tie:
- Make a loop around a fixed object.
- Wrap the working end around the standing part twice on the inside of the loop.
- Make one more wrap on the outside of the loop.
- Slide the knot to adjust tension.
- Sheet Bend
- Uses: Joining two ropes of different diameters.
- How to Tie:
- Make a bight (a U-shaped bend) in the thicker rope.
- Pass the thinner rope through the bight from the back.
- Wrap the thinner rope around the bight and tuck it under itself.
- Pull tight to secure.
Safety Tips
- Always practice knots in a safe environment before using them in critical situations.
- Ensure knots are secure and double-check them, especially in rescue or load-bearing scenarios.
- Use appropriate rope or cordage for the task to ensure strength and reliability.
Teaching your kids knot-tying skills provides them with practical tools they can use in various outdoor scenarios. Regular practice and real-world application will make these knots second nature, enhancing their confidence and preparedness in the wilderness.
Signaling for Help
In an emergency, knowing how to signal for help can be life-saving. Teaching your kids various signaling methods ensures they can attract attention and get assistance when needed.
Using Mirrors
- Signal Mirror
- How to Use:
- Hold the mirror at eye level and aim it towards the sun.
- Use the sighting hole to aim the reflected light at a target (e.g., an aircraft or distant rescuer).
- Move the mirror slightly to create flashes of light.
- Effective Range: Signal mirrors can be seen for miles, making them ideal for long-distance signaling.
- How to Use:
Whistles
- Emergency Whistle
- How to Use:
- Blow three short blasts, pause, and repeat. This is the international distress signal.
- Continue signaling at regular intervals until help arrives.
- Advantages: Whistles are loud, easy to carry, and can be heard over long distances and through dense vegetation.
- How to Use:
Creating Smoke Signals
- Smoke Signal Fire
- How to Make:
- Build a fire in a clear area, away from trees and flammable materials.
- Add green leaves, grass, or other damp vegetation to create thick smoke.
- Use a blanket or large cloth to cover the fire intermittently, creating puffs of smoke.
- Signal Patterns: Three puffs of smoke in a row indicate distress.
- How to Make:
International Distress Signals
- SOS
- How to Signal: Use any available means (e.g., rocks, sticks, or lights) to create the SOS signal, which is three short signals, three long signals, and three short signals (e.g., … — …).
- Using Flashlights: If at night, use a flashlight to signal SOS by flashing the light in the same pattern.
Building Ground Signals
- Large Letters or Symbols
- How to Create: Use rocks, logs, or any large materials to spell out “SOS” or create an “X” on open ground.
- Visibility: Ensure the signals are large enough to be seen from the air. Clear any surrounding debris to make the signal stand out.
Using Sound
- Shouting and Making Noise
- How to Use: Shout, bang pots and pans, or use any noise-making devices to attract attention.
- Patterned Signals: Make noise in a pattern, such as three short bursts, to indicate distress.
Practical Exercises
- Mirror Signaling Practice
- Have kids practice using a signal mirror to reflect sunlight towards a specific target.
- Whistle Drills
- Conduct whistle drills where kids practice blowing the distress signal pattern.
- Smoke Signal Creation
- Under adult supervision, practice building a small smoke signal fire and creating puffs of smoke.
- Ground Signal Construction
- Go on a hike and have kids build ground signals using natural materials.
Safety Tips
- Ensure that all signaling methods are practiced in a safe and controlled environment.
- Teach kids the importance of staying calm and persistent when signaling for help.
- Emphasize that signaling should continue until rescue arrives or the situation is resolved.
Teaching your kids various signaling techniques prepares them to effectively call for help in an emergency. Regular practice and understanding the importance of these signals will enhance their ability to get assistance when it’s most needed.
Animal Safety
Understanding how to safely interact with wildlife is a crucial survival skill. Teaching your kids how to identify dangerous animals and what to do if they encounter them helps prevent injuries and ensures their safety in the wilderness.
Identifying Dangerous Animals
- Bears
- Identification: Large size, fur color ranging from black to brown, prominent shoulder hump (grizzly bears).
- Signs: Tracks with claw marks, overturned rocks, scat, scratched trees.
- Snakes
- Venomous Snakes: Identify by head shape (triangular for venomous), slit-like pupils, and the presence of rattles (rattlesnakes).
- Common Venomous Species: Rattlesnakes, copperheads, cottonmouths.
- Mountain Lions
- Identification: Large, tan or grayish color, long tail, and cat-like features.
- Signs: Tracks (four toes with no claw marks), scat, scratches on trees.
What to Do in an Encounter with Wild Animals
- Bears
- If You See a Bear: Stay calm, do not run. Slowly back away while facing the bear.
- If the Bear Approaches: Make yourself look larger by raising your arms and making noise. Use bear spray if available.
- If Attacked: For black bears, try to escape or fight back. For grizzly bears, play dead by lying flat on your stomach with hands protecting your neck.
- Snakes
- If You See a Snake: Stay still or back away slowly. Do not attempt to handle or provoke the snake.
- If Bitten: Stay calm, keep the bite area immobilized and at or below heart level, and seek medical help immediately. Do not try to suck out the venom or apply a tourniquet.
- Mountain Lions
- If You See a Mountain Lion: Stand your ground, make eye contact, and do not turn your back. Make yourself look larger by raising your arms and opening your jacket.
- If the Mountain Lion Approaches: Make loud noises, throw rocks or sticks, and try to appear intimidating.
- If Attacked: Fight back with anything available, aiming for the eyes and face.
Avoiding Animal Encounters
- Make Noise: When hiking, make noise to alert animals of your presence and avoid surprising them.
- Store Food Properly: Use bear-proof containers and hang food away from your campsite to avoid attracting animals.
- Travel in Groups: There is safety in numbers. Animals are less likely to approach a group.
- Keep a Safe Distance: Observe wildlife from a distance and never attempt to feed or approach wild animals.
Understanding Animal Behavior
- Recognize Warning Signs: Teach kids to recognize warning behaviors like hissing, growling, or raised fur.
- Know Animal Habits: Understand when animals are most active (e.g., dawn and dusk for many predators) and plan activities accordingly.
- Learn Local Wildlife: Familiarize yourselves with the specific animals in your area and their behaviors.
Practical Exercises
- Animal Track Identification
- Go on nature walks to identify and observe different animal tracks and signs.
- Role-Playing Scenarios
- Practice role-playing different animal encounter scenarios to reinforce the appropriate responses.
- Bear Spray Practice
- Teach kids how to properly use bear spray, including when and how to deploy it (use practice canisters if available).
Safety Tips
- Always supervise children in areas where dangerous animals may be present.
- Ensure kids know the importance of respecting wildlife and maintaining a safe distance.
- Teach kids never to run from predators, as it can trigger a chase response.
By educating your kids about animal safety and how to handle encounters with wildlife, you equip them with the knowledge to stay safe and respond appropriately in various situations. Regular practice and awareness of animal behaviors will enhance their confidence and safety in the wilderness.
Weather Awareness
Understanding and predicting weather conditions is an essential survival skill that helps in planning and staying safe in the wilderness.
Teaching your kids how to interpret weather signs and prepare for various conditions ensures they are ready for any situation.
Understanding Weather Patterns
- Cloud Types and Their Meanings
- Cumulus Clouds: Fluffy, white clouds indicating fair weather.
- Stratus Clouds: Gray, uniform clouds that often bring light rain or drizzle.
- Cirrus Clouds: High, wispy clouds signaling a change in weather, often preceding a warm front.
- Cumulonimbus Clouds: Tall, towering clouds associated with thunderstorms and severe weather.
- Wind Direction and Changes
- Prevailing Winds: Teach kids about the common wind directions in your area and how they can affect weather.
- Sudden Changes: Rapid shifts in wind direction can indicate an approaching storm or front.
Predicting Weather Changes
- Reading the Sky
- Red Sky at Night: “Red sky at night, sailor’s delight” suggests good weather ahead.
- Red Sky in Morning: “Red sky in morning, sailor’s warning” indicates bad weather is likely coming.
- Feeling the Air
- Humidity: High humidity often precedes rain. Teach kids to recognize the feeling of increased moisture in the air.
- Temperature Drops: A sudden drop in temperature can signal an approaching storm or cold front.
- Animal Behavior
- Birds and Insects: Low-flying birds and increased insect activity often indicate low pressure and impending rain.
- Animal Activity: Animals becoming restless or seeking shelter can be a sign of bad weather approaching.
Preparing for Different Weather Conditions
- Rain and Thunderstorms
- Rain Gear: Always carry waterproof jackets, pants, and ponchos.
- Shelter: Know how to find or create shelter to stay dry and avoid hypothermia.
- Lightning Safety: Teach kids to avoid open fields, tall trees, and bodies of water during thunderstorms. Seek shelter in a low area or dense forest.
- Cold Weather and Snow
- Layering Clothing: Use multiple layers to trap heat. Teach kids the importance of wearing a base layer, insulating layer, and waterproof outer layer.
- Staying Dry: Emphasize the importance of staying dry to prevent hypothermia.
- Snow Shelters: Teach kids how to build snow shelters like quinzee huts or snow caves to stay warm.
- Hot Weather and Heatwaves
- Hydration: Stress the importance of drinking plenty of water.
- Shade and Rest: Encourage taking breaks in the shade and avoiding strenuous activities during peak heat.
- Sun Protection: Use sunscreen, hats, and light, breathable clothing to protect from sunburn and heat exhaustion.
Practical Exercises
- Weather Observation
- Keep a daily weather journal where kids can record their observations of clouds, wind, and temperature changes.
- Compare their predictions with actual weather conditions to improve their forecasting skills.
- Building Shelters for Different Conditions
- Practice building different types of shelters suitable for rain, snow, and sun.
- Simulate various weather scenarios and have kids respond appropriately.
- Emergency Drills
- Conduct drills for different weather emergencies, such as thunderstorms, heavy rain, or extreme heat, to reinforce safety procedures.
Safety Tips
- Always check weather forecasts before heading out on outdoor adventures.
- Teach kids the importance of not underestimating weather changes and always being prepared.
- Ensure they understand the signs of hypothermia and heat exhaustion and know how to respond.
By teaching your kids weather awareness and preparation, you equip them with the knowledge to stay safe and make informed decisions in the wilderness. Understanding and responding to weather conditions is a critical survival skill that enhances their overall outdoor experience.
Hygiene and Sanitation
Maintaining proper hygiene and sanitation in the wilderness is crucial for preventing illness and staying healthy.
Teaching your kids these skills ensures they can take care of themselves even when modern conveniences are not available.
Maintaining Personal Hygiene
- Hand Washing
- Importance: Washing hands before eating, after using the bathroom, and after handling food helps prevent the spread of germs.
- How to Wash: Use biodegradable soap and water. Scrub hands thoroughly for at least 20 seconds, then rinse.
- Dental Hygiene
- Brushing Teeth: Encourage brushing teeth at least twice a day with a small amount of toothpaste. Use water sparingly.
- Alternative Methods: In a pinch, chewing sticks or rinsing with water can help maintain oral hygiene.
- Body Cleaning
- Sponge Baths: Use a wet cloth or sponge with a small amount of biodegradable soap to clean the body.
- Dry Bathing: Use wet wipes or alcohol-based hand sanitizer to clean hands, face, and other exposed areas.
Proper Disposal of Waste
- Human Waste
- Digging a Cathole:
- How to Dig: Use a small trowel to dig a hole at least 6-8 inches deep and 200 feet away from water sources, trails, and campsites.
- After Use: Cover the hole with soil and natural debris.
- Toilet Paper: Use biodegradable toilet paper or pack it out in a sealed bag.
- Digging a Cathole:
- Food Waste
- Minimize Food Scraps: Plan meals to minimize leftovers. Pack out any food scraps.
- Waste Disposal: Store food waste in a sealed container or bag and pack it out.
- Trash
- Pack It In, Pack It Out: Carry all trash, including food wrappers, cans, and bottles, back to civilization for proper disposal.
- Leave No Trace: Ensure no litter is left behind, maintaining the cleanliness of the wilderness.
Keeping the Campsite Clean
- Cooking and Eating Areas
- Setup: Keep cooking and eating areas clean and organized.
- Cleanup: Wash dishes and utensils with biodegradable soap and water away from water sources. Dispose of wastewater in a cathole or scatter it over a wide area.
- Food Storage
- Bear-Proof Containers: Use bear-proof containers or hang food in a tree to keep it safe from wildlife.
- Smellables: Store all scented items, including toothpaste and soap, with your food to avoid attracting animals.
Avoiding Contamination
- Water Sources
- Distance: Ensure all washing, cooking, and waste disposal activities are conducted at least 200 feet away from water sources to prevent contamination.
- Filtering and Purifying: Always filter and purify water from natural sources before drinking.
- Injury Prevention
- Clean Wounds: Clean any cuts or scrapes immediately with clean water and an antiseptic to prevent infection.
- Bandages: Keep wounds covered and change bandages regularly to maintain cleanliness.
Practical Exercises
- Simulated Campsite Setup
- Set up a mock campsite and practice proper hygiene and sanitation routines, including hand washing, waste disposal, and keeping the area clean.
- Cathole Practice
- Teach kids how to dig and use catholes properly. Practice in a controlled environment to build confidence.
- Water Purification
- Demonstrate various methods of water purification, such as boiling, using purification tablets, and filtering, and let kids practice these techniques.
Safety Tips
- Always prioritize clean water for drinking and personal hygiene.
- Teach kids the importance of hand hygiene and regular cleaning to prevent the spread of germs.
- Encourage kids to speak up if they feel unwell or notice any signs of infection or illness.
Teaching your kids hygiene and sanitation practices in the wilderness helps them stay healthy and reduces the risk of illness. These skills are essential for maintaining cleanliness and ensuring a safe and enjoyable outdoor experience.