
Building an indoor fort with your kids is a magical experience, fostering creativity, problem-solving, and bonding.
This guide will help you create unforgettable memories with step-by-step instructions, tips, and fun activities to enhance your fort-building adventure.
Preparation and Planning
Gathering Supplies
Building a fantastic indoor fort starts with gathering the right supplies. Here’s a list of essentials and optional items to get you started:
Essential Materials:
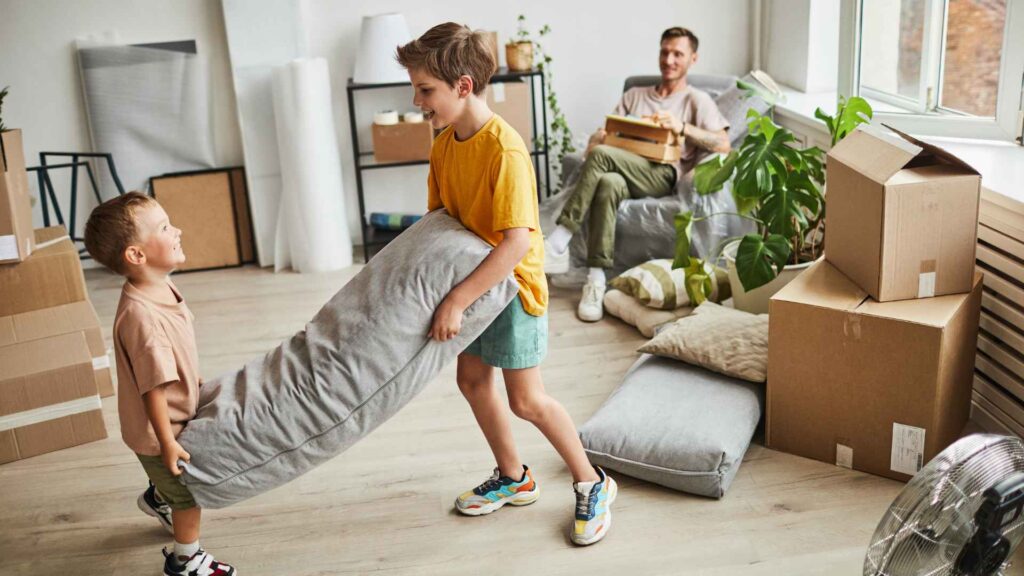
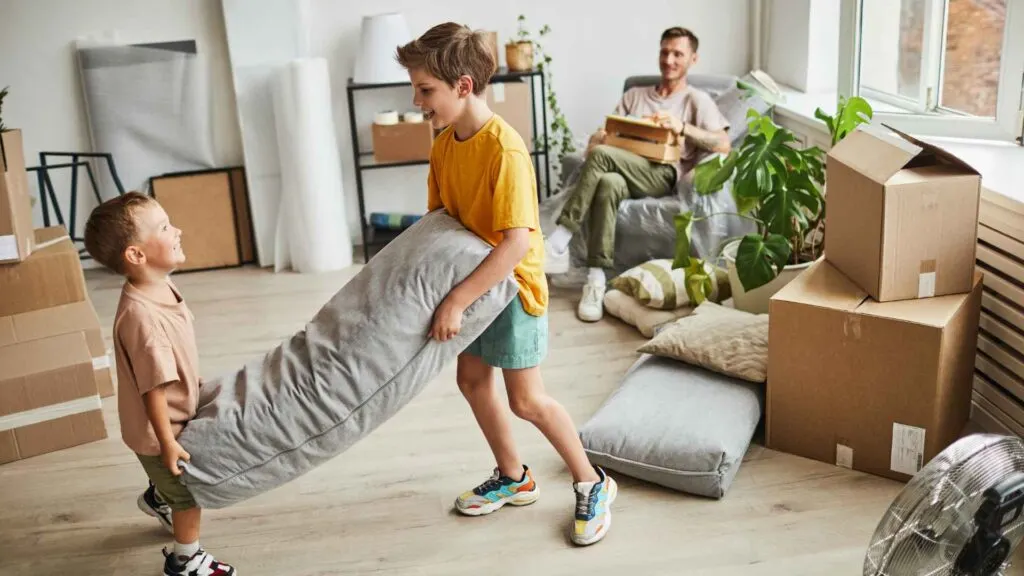
- Blankets and Sheets: The backbone of any fort. Use different sizes for various parts of the structure.
- Pillows and Cushions: These provide comfort and can be used for seating, walls, and roofs.
- Clothespins and Clips: Useful for securing blankets and sheets.
- Heavy Books: These can act as weights to keep blankets in place.
Optional Materials:
- Fairy Lights: Add a magical touch with safe, battery-operated fairy lights.
- Cardboard: Great for making walls, roofs, or even small doors and windows.
- Tape: Painter’s tape works best as it’s less likely to damage walls and furniture.
- Decorations: Paper crafts, banners, and stuffed animals can personalize the space.
Choosing the Location
Selecting the perfect spot for your fort is crucial. Here are some tips to help you choose the best location in your home:
Best Places in the House:
- Living Room: Often has the most space and furniture to work with.
- Bedroom: Cozy and convenient, especially for sleepover forts.
- Basement: Provides ample space and can be quieter for longer play sessions.
Safety Considerations:
- Avoid High Traffic Areas: Build in a spot where the fort won’t be in the way of daily activities.
- Check for Stability: Ensure furniture and other structures used in the fort are stable and won’t tip over.
- Consider Temperature: Make sure the area is not too hot or cold to keep your kids comfortable.
Involving Your Kids in the Planning
Make the planning process a collaborative and fun activity. Involving your kids will not only make the experience more enjoyable but also encourage their creativity and problem-solving skills.
Brainstorming Ideas Together:
- Themes: Discuss possible themes like castles, spaceships, jungles, or cozy reading nooks.
- Design Elements: Talk about what kind of materials and decorations they would like to use.
Assigning Roles and Tasks:
- Builders: Kids can help with placing blankets and securing them.
- Decorators: Let them choose and place the decorations inside the fort.
- Organizers: Assign someone to gather and hand out materials as needed.
Setting a Theme:
- Castle Fort: Use cardboard to create towers and battlements. Add a “drawbridge” with a sheet.
- Spaceship Fort: Decorate with aluminum foil, stars, and space-themed toys.
- Jungle Fort: Use green blankets, stuffed animals, and plant decorations to create a wild adventure.
By preparing thoroughly and planning with your kids, you’ll set the stage for an amazing indoor fort-building experience. Let their imaginations run wild as you gather supplies, choose the perfect spot, and brainstorm creative ideas together.


Building the Foundation
Basic Structures
Creating a solid foundation is the key to a successful fort. Here are some tips and techniques for building sturdy structures:
Using Furniture:
- Couches: Position couches back-to-back or use the backrests as walls.
- Chairs: Place chairs in a row or circle to support the roof. Ensure they are stable and won’t tip over.
- Tables: Use tables as the main support for the roof. Drape blankets over the top and secure them on the sides.
Creating a Sturdy Frame:
- Broomsticks and PVC Pipes: Use broomsticks or PVC pipes to create a frame. Anchor them securely between heavy furniture or against walls.
- Cardboard: Large pieces of cardboard can be cut and shaped to form walls and roofs. Tape pieces together for added stability.
- Clothing Racks: Portable clothing racks can serve as the main support for larger forts. Drape blankets or sheets over them and secure with clips.
Importance of a Strong Base:
- Heavy Books and Weights: Use heavy books or other weights to anchor the corners of blankets and sheets.
- Clips and Clothespins: Secure blankets and sheets to furniture with clips or clothespins to prevent slipping.
Securing the Fort
Once the basic structure is in place, it’s important to ensure everything is secure. Here’s how to make sure your fort stays sturdy:
Techniques for Attaching Blankets and Sheets:
- Clothespins and Clips: Use clothespins and clips to attach blankets to furniture and other supports. This helps keep the blankets in place and prevents sagging.
- Tape: Painter’s tape is ideal for temporarily attaching blankets to walls and other surfaces. It’s strong but won’t damage paint or wallpaper.
- Heavy Books: Place heavy books on the edges of blankets to weigh them down and keep them secure.
Using Furniture for Support:
- Backrests and Armrests: Drape blankets over the backrests and armrests of couches and chairs. Secure them with clips or clothespins.
- Table Legs: Wrap blankets around table legs and secure with clips or tape. This creates a stable and secure wall for your fort.
By building a solid foundation and securing your fort properly, you ensure that it will stand up to hours of play. With these tips, you’ll create a sturdy and reliable fort that your kids will love.
Enhancing the Fort
Comfort and Coziness
Transform your fort into a cozy retreat with these tips:
Layering Pillows and Cushions:
- Seating: Arrange pillows and cushions along the walls for comfortable seating.
- Lounging: Create a lounging area with large cushions or bean bags.
- Flooring: Add extra padding with rugs or folded blankets for a soft floor.
Sleeping Arrangements:
- Sleeping Bags: Lay out sleeping bags for a sleepover fort. They’re easy to set up and comfortable.
- Mattresses: If space allows, use a small mattress or a foldable foam mat for added comfort.
- Blankets: Layer blankets for warmth and comfort, ensuring they are securely tucked to avoid slipping.
Using Rugs and Carpets:
- Padding: Use rugs or carpets to add extra padding and warmth to the floor.
- Play Area: Define a play area within the fort with a colorful rug or mat.
Lighting Up the Fort
Proper lighting can enhance the magic of your fort. Here are some safe and fun lighting ideas:
Safe Lighting Options:
- Fairy Lights: Use battery-operated fairy lights to add a soft, magical glow.
- Lanterns: Battery-operated lanterns are safe and provide a cozy light source.
- LED Candles: Flameless LED candles can add a warm, flickering effect without the risk of fire.
Creating a Magical Ambiance:
- Glow-in-the-Dark Stars: Stick glow-in-the-dark stars and planets on the ceiling of your fort for a nighttime sky effect.
- String Lights: Drape string lights along the walls and roof for a twinkling star effect.
Personalizing the Space
Make the fort truly your own by adding personal touches and decorations:
DIY Decorations:
- Paper Garlands: Create colorful paper garlands to hang inside the fort. Let your kids help with cutting and stringing them together.
- Drawings and Posters: Decorate the walls with your kids’ drawings or favorite posters.
- Banners: Make a banner with your fort’s name and hang it at the entrance.
Incorporating Favorite Toys and Books:
- Stuffed Animals: Place your kids’ favorite stuffed animals inside the fort for company.
- Books: Create a mini-library corner with a selection of favorite books for story time.
- Toys: Bring in a few toys that match the theme of your fort, like toy swords for a castle or space figures for a spaceship.
By enhancing your fort with comfort, lighting, and personal touches, you create a special and inviting space where your kids will love to spend time. These additions will make the fort-building experience even more enjoyable and memorable.

Activities Inside the Fort
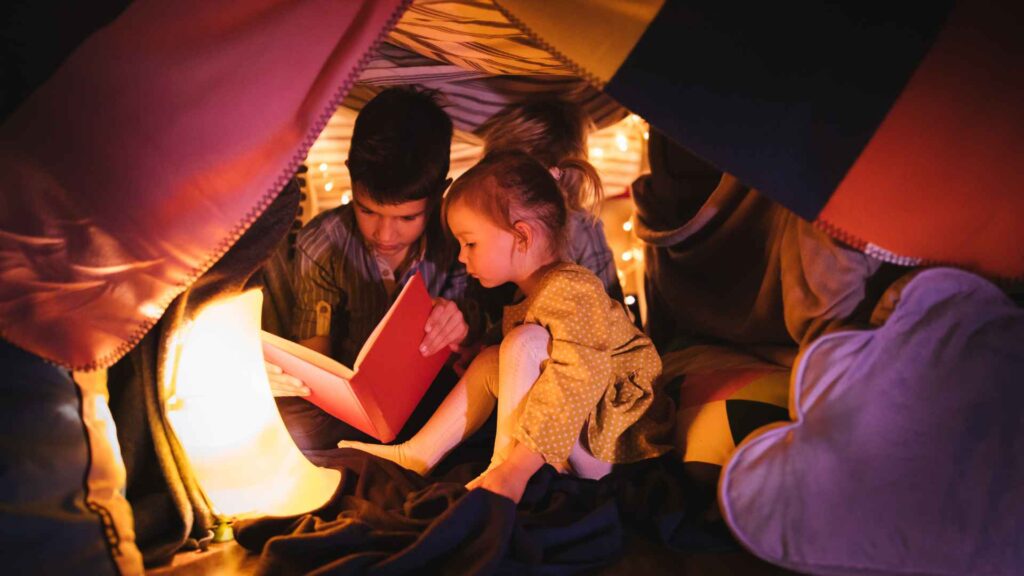
Story Time
Transform your fort into a cozy reading nook or a stage for storytelling:
Reading Favorite Books Together:
- Classic Stories: Choose beloved classics that your kids enjoy.
- New Adventures: Introduce new books to keep the excitement alive.
- Interactive Reading: Encourage your kids to participate by asking questions about the story.
Creating a Storytelling Session:
- Made-Up Tales: Make up your own stories together, taking turns to add to the tale.
- Props and Costumes: Use props and simple costumes to act out stories. Blankets can become capes, and pillows can be transformed into magical creatures.
- Puppet Shows: Create puppets from socks or paper bags and put on a puppet show.
Games and Playtime
Keep the fun going with games and imaginative play:
Board Games and Card Games:
- Fort-Friendly Games: Choose games that can be played in a confined space, like card games, small board games, or travel-sized games.
- Cooperative Play: Opt for games that encourage teamwork and cooperation.
Imaginative Play:
- Pretend Camping: Turn the fort into a campsite. Use a flashlight for campfire stories and make pretend s’mores with craft materials.
- Treasure Hunts: Hide small toys or treats around the fort and create a treasure map for your kids to follow.
- Role-Playing: Encourage your kids to role-play as knights, astronauts, or jungle explorers based on the theme of your fort.
Arts and Crafts
Turn the fort into a creative workshop with these craft ideas:
Simple Crafts to Make and Display:
- Paper Garlands: Cut out shapes like stars, hearts, or animals from colored paper and string them together to hang in the fort.
- Handmade Signs: Create signs for different areas of the fort, like “Reading Corner” or “Snack Zone.”
- Picture Frames: Make simple picture frames from cardboard and decorate them. Add photos or drawings to display in the fort.
Drawing and Coloring:
- Drawing Sessions: Provide paper and crayons or markers for free drawing time.
- Coloring Books: Bring in coloring books and let your kids color inside the fort.
- Themed Drawings: Encourage your kids to draw pictures that match the theme of your fort, like castles, spaceships, or jungles.
Making Paper Puppets:
- Sock Puppets: Use old socks to create puppets. Decorate them with buttons, yarn, and fabric scraps.
- Paper Bag Puppets: Turn paper bags into puppets by drawing faces and adding construction paper arms and legs.
- Finger Puppets: Create small puppets that fit on your fingers using felt or paper.
By incorporating a variety of activities inside the fort, you ensure that your kids stay engaged and entertained. These activities will make the fort a dynamic and fun space where your kids can read, play, and create to their heart’s content.
Fort Maintenance and Clean-Up
Keeping the Fort Tidy
Maintaining a tidy fort can extend its lifespan and make it more enjoyable for everyone:
Encouraging Kids to Help:
- Make it Fun: Turn tidying up into a game. Set a timer and see how quickly you can pick up toys or organize pillows.
- Assign Roles: Give each child a specific task, like gathering toys, folding blankets, or fluffing pillows.
- Praise and Rewards: Offer praise for their help and maybe a small reward, like extra story time, to encourage participation.
Storage Solutions:
- Bins and Baskets: Keep a few bins or baskets near the fort to quickly stash toys and craft supplies.
- Under-Fort Storage: Utilize the space under the fort for storage. Slide boxes or bins underneath to keep the area organized.
- Hooks and Hangers: Use removable hooks to hang bags or baskets for small items like clothespins, clips, or fairy lights.
Safety Checks
Regular safety checks ensure the fort remains a safe place to play:
Regularly Checking Stability:
- Structural Integrity: Periodically check the stability of the furniture and blankets. Make sure nothing is sagging or likely to collapse.
- Secure Fastenings: Ensure that clips, clothespins, and tape are still securely holding the blankets and sheets in place.
- Floor Space: Keep the floor clear of trip hazards, such as loose toys or tangled lights.
Ensuring Safe Use of Materials:
- No Sharp Objects: Avoid using materials with sharp edges. If using cardboard, make sure edges are taped over or smoothed out.
- Supervised Play: Keep an eye on younger children, especially if the fort includes small or loose parts that could be a choking hazard.
- Fire Safety: Only use battery-operated lights. Never use candles or any open flame inside the fort.
Dismantling the Fort
When it’s time to take the fort down, make the process smooth and fun:
Making Clean-Up Fun:
- Challenge: Turn dismantling the fort into a race or a challenge. See who can fold blankets the fastest or who can gather the most clips.
- Music: Play some upbeat music to keep the energy high and make clean-up feel less like a chore.
- Story Recap: As you clean, talk about the fun times you had in the fort. This can make the process feel like a natural end to the adventure.
Properly Storing Materials:
- Folding Blankets and Sheets: Teach kids how to fold blankets and sheets neatly. Store them in a designated spot for easy access next time.
- Organizing Clips and Clothespins: Gather all clips, clothespins, and other small items in a container or bag to prevent them from getting lost.
- Storing Decorations: Keep any decorations or props in a labeled box. This makes it easy to find and reuse them for future fort-building sessions.
By keeping the fort tidy, conducting regular safety checks, and making clean-up fun, you ensure that your fort remains a safe and enjoyable space. Plus, a smooth dismantling process sets you up for the next fort-building adventure with ease.

Special Fort-Building Events
Holiday and Themed Forts
Elevate your fort-building experience by incorporating holidays and special themes:
Christmas Fort:
- Decorations: Use holiday-themed blankets, twinkling fairy lights, and mini Christmas trees. Hang stockings and garlands inside the fort.
- Activities: Read Christmas stories, watch holiday movies, and enjoy festive snacks like cookies and hot chocolate.
Halloween Fort:
- Decorations: Drape the fort in dark sheets and use orange and black decor. Add fake cobwebs, plastic spiders, and Halloween-themed lights.
- Activities: Tell spooky (but kid-friendly) ghost stories, play Halloween games, and make themed crafts like paper pumpkins and ghost decorations.
Birthday Fort:
- Decorations: Use your child’s favorite colors for blankets and decorations. Add balloons, streamers, and a “Happy Birthday” banner.
- Activities: Have a mini birthday party inside the fort with games, cake, and presents. Create a photo booth with props for fun pictures.
Other Themed Forts:
- Pirate Fort: Decorate with pirate flags, maps, and treasure chests. Dress up as pirates and go on a treasure hunt.
- Space Fort: Use silver and black blankets, star decorations, and glow-in-the-dark stickers. Pretend to be astronauts exploring new planets.
- Fairy Tale Fort: Decorate with princess or knight-themed items. Read fairy tales and act out scenes from favorite stories.
Sleepover Forts
Make sleepovers extra special with a dedicated fort setup:
Preparing for a Fort Sleepover:
- Comfortable Bedding: Use sleeping bags, pillows, and blankets to create cozy sleeping spots.
- Lighting: Use soft, ambient lighting like fairy lights or battery-operated lanterns.
- Entertainment: Plan activities like movie marathons, board games, or storytelling sessions. Have a selection of favorite books and games ready.
Making the Fort Extra Cozy:
- Warm Blankets: Provide plenty of warm blankets for chilly nights.
- Snacks: Set up a snack station inside or near the fort with popcorn, fruit, and treats.
- Music and Sounds: Play soft music or nature sounds to create a relaxing atmosphere. You can also use white noise machines if preferred.
Reflecting on the Experience
After each special event, take some time to reflect on the experience with your kids:
Recap of Fun and Learning Moments:
- Talk About Highlights: Discuss what everyone enjoyed the most. This helps reinforce the positive memories.
- Share Stories: Encourage kids to share their favorite moments or stories from the event.
Encouraging Kids to Share Their Favorite Parts:
- Drawing and Writing: Have your kids draw pictures or write short stories about their favorite parts of the event. This can be a fun way to capture memories.
- Photo Albums: Create a photo album of the event. Let your kids help with selecting and arranging the photos.
Inspiring Future Forts
Use the excitement from special events to inspire future fort-building adventures:
Ideas for Next Fort-Building Adventures:
- Seasonal Themes: Plan forts around upcoming seasons or holidays.
- New Themes: Brainstorm new themes with your kids. Maybe they want to build a zoo, a superhero hideout, or a beach fort.
- Expanding Creativity: Encourage kids to come up with their own unique ideas and designs for future forts.
Keeping the Tradition Alive:
- Regular Fort Nights: Set aside regular times for fort-building, like monthly or during school breaks.
- Family Participation: Involve the whole family in fort-building activities to create shared memories.
- Documenting Adventures: Keep a fort-building journal or scrapbook to document each adventure, making it a cherished family tradition.
By incorporating holiday themes, planning special sleepover forts, and reflecting on the experiences, you can make fort-building a beloved tradition in your household. These events create lasting memories and provide endless opportunities for creativity and fun.
Conclusion
Reflecting on the Experience
Building indoor forts with your kids is more than just a fun activity; it’s a chance to create lasting memories and foster important skills. Here’s how to reflect on and make the most of these experiences:
Recap of the Fun and Learning Moments:
- Discussion: After each fort-building session, take a moment to sit with your kids and talk about what they enjoyed the most. Ask them about their favorite parts and what they found challenging.
- Highlight Skills Learned: Emphasize the skills they practiced, such as teamwork, problem-solving, and creativity. Celebrate their accomplishments and efforts.
Encouraging Kids to Share Their Favorite Parts:
- Storytelling: Let your kids narrate their own stories about the fort-building adventure. This can be a fun way to reinforce their memories and give them a sense of achievement.
- Art Projects: Encourage them to draw pictures or make crafts that reflect their experiences. Create a gallery wall to display their artwork and keep the memories alive.
Inspiring Future Forts
Use the excitement from your current fort-building adventures to inspire more creativity in the future:
Ideas for Next Fort-Building Adventures:
- Seasonal Themes: Plan forts around upcoming seasons or holidays, like a summer beach fort or a winter igloo fort.
- New Themes: Brainstorm new and exciting themes with your kids. Consider ideas like a jungle safari, a wizard’s tower, or a time machine.
- Expanding Creativity: Encourage your kids to think outside the box and come up with their own unique fort designs. Maybe they want to build a multi-room fort or incorporate new materials.
Keeping the Tradition Alive:
- Regular Fort Nights: Establish a regular fort-building night, whether it’s weekly, monthly, or during school breaks. This can become a cherished family tradition.
- Family Participation: Involve the entire family in the process. Each member can contribute ideas, help with construction, or participate in fort activities.
- Documenting Adventures: Keep a fort-building journal or scrapbook where you document each adventure. Include photos, drawings, and notes about each fort you build. This creates a wonderful keepsake and a way to look back on all the fun you’ve had together.
By reflecting on your fort-building experiences and using them as inspiration for future adventures, you create a tradition that fosters creativity, strengthens family bonds, and provides endless fun. Each fort becomes a stepping stone to the next, ensuring that the magic of fort-building stays alive in your home.